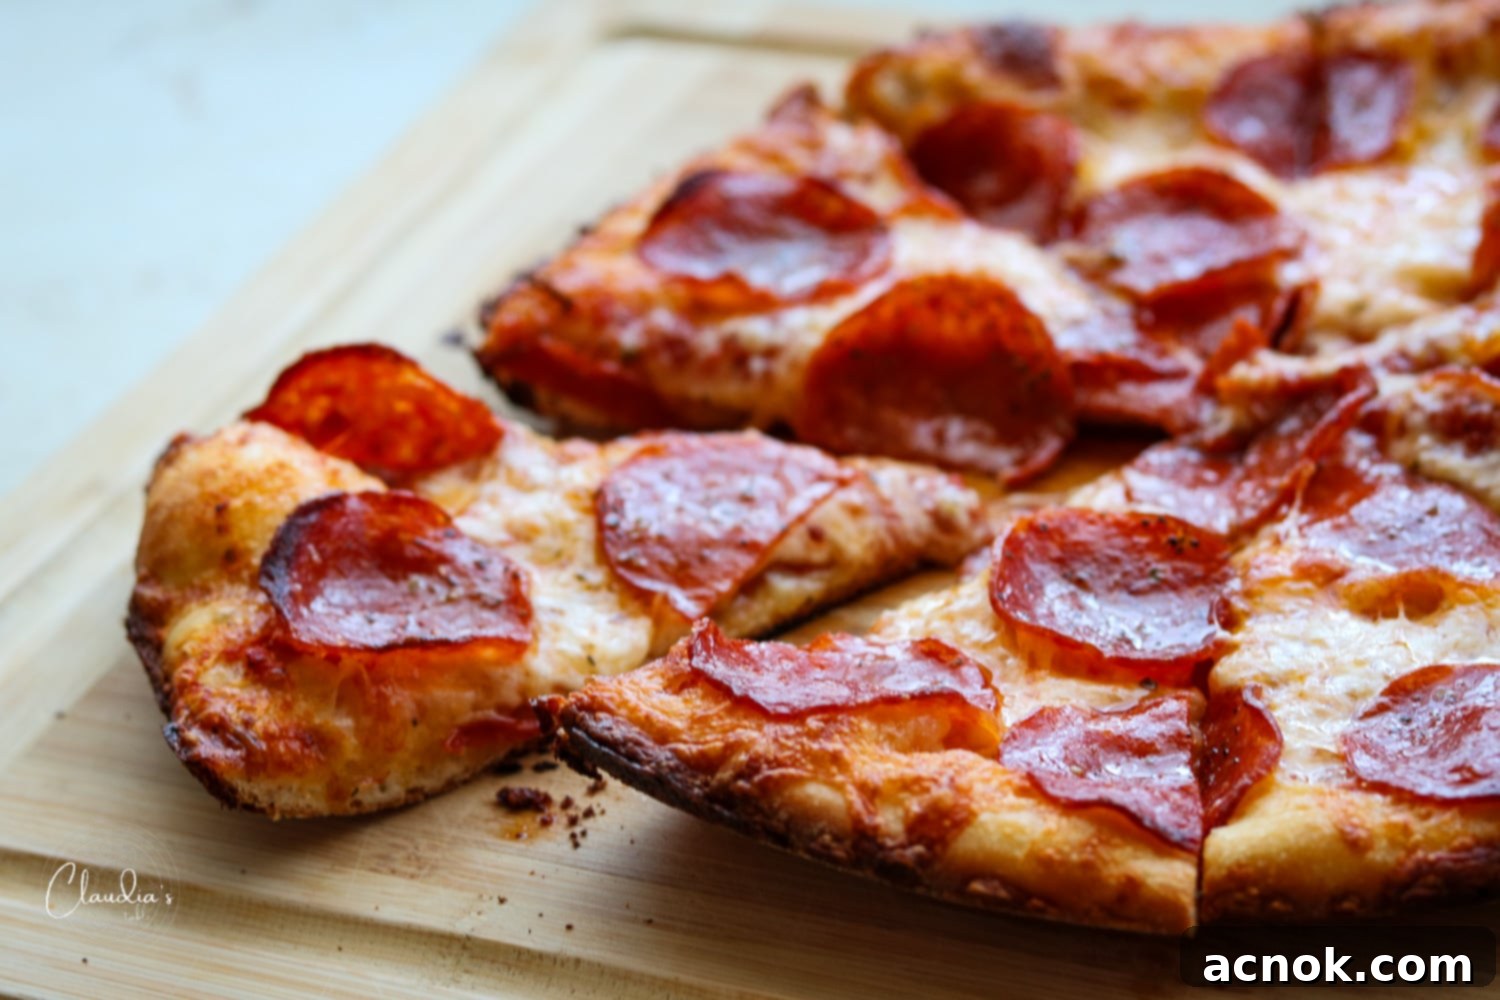
Master the Perfect Cast Iron Pan Pizza: Crispy, Cheesy & Irresistibly Delicious
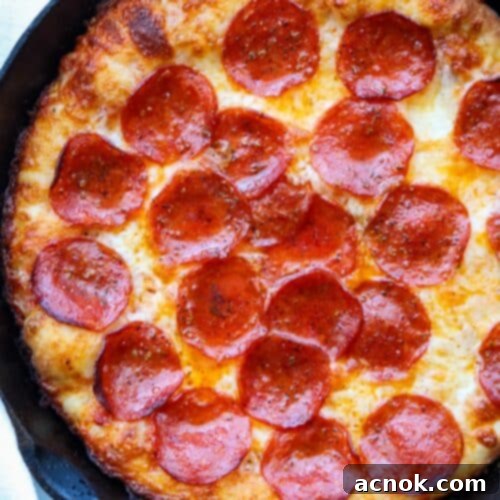
Imagine a pizza with a perfectly crispy crust, golden-brown cheesy edges that sizzle, and a delightfully puffy, airy interior. This isn’t just a dream; it’s the reality of a homemade cast iron pan pizza. Whether you’re planning a camping trip, hosting a backyard gathering, or simply craving an exceptional pizza night at home, this recipe transforms a simple meal into an unforgettable culinary experience. The unique properties of cast iron create a superior texture that conventional oven pizzas often miss, making it the ultimate choice for pizza lovers. Get ready to ditch delivery and embrace the joy of creating a truly remarkable pizza right in your skillet.
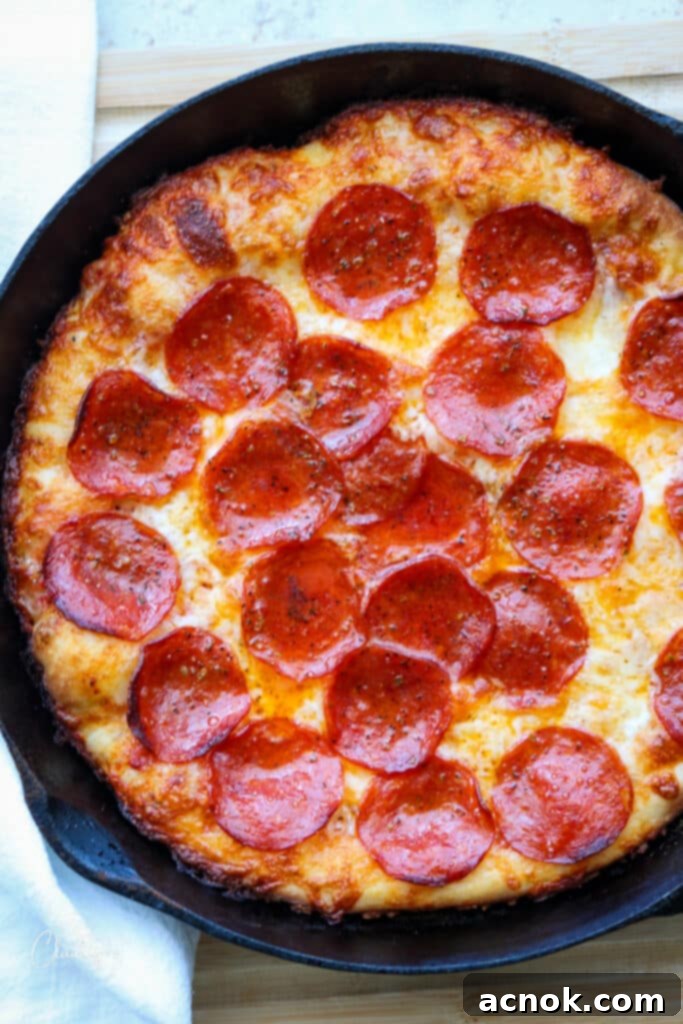
This recipe, much like my Spicy Chorizo Shrimp Pizza, relies on my acclaimed Perfect All-Purpose Pizza Dough. This versatile pizza dough recipe is specifically designed to excel in various home baking scenarios, including this incredible cast iron pan pizza, traditional oven-baked pizzas, and even outdoor grilled pizzas. Its robust structure and flavor development make it ideal for achieving the signature puffy rise and crispy texture unique to this pan-pizza method.
Table of contents
- Why This Cast Iron Pan Pizza Will Be Your New Favorite Recipe
- Essential Ingredients for Your Perfect Cast Iron Pan Pizza
- Expert Pizza Dough Tips for Success
- Preparing and Stretching Your Dough for Cast Iron Pizza
- Mastering the Cast Iron Skillet: Prepping for Pizza Perfection
- Baking Your Cast Iron Pan Pizza to Golden Perfection
- Elevate Your Cast Iron Pan Pizza with Creative Toppings
- Frequently Asked Questions About Cast Iron Pan Pizza
Why This Cast Iron Pan Pizza Will Be Your New Favorite Recipe
There are countless reasons why you’ll fall head over heels for this cast iron pan pizza. First and foremost, it’s incredibly versatile. Whether you’re enjoying a rustic camping trip, a cozy evening at a mountain cabin, or simply firing up the grill in your backyard, this skillet pizza adapts perfectly. It bakes beautifully in both a conventional oven and on an outdoor grill, delivering consistent, mouth-watering results every time. The cast iron skillet is the secret weapon here, providing a unique high-heat environment that crisps the crust like no other pan can, creating that coveted golden-brown, crunchy bottom that’s essential for a truly great pizza.
Beyond its culinary performance, this recipe embraces flexibility. While I highly recommend making your own homemade Perfect All-Purpose Pizza Dough for the ultimate flavor and texture, store-bought refrigerated dough is also an option for those busy days. Just ensure it’s at room temperature and handled according to package directions. Our homemade dough recipe is specifically designed to yield enough for three 10-inch cast iron pizzas, making it perfect for feeding a crowd or planning multiple pizza nights. With a short 2-hour rise time for the homemade dough, you’ll be enjoying delicious pizza faster than you think. It’s truly a fun, interactive meal that brings people together and guarantees smiles.
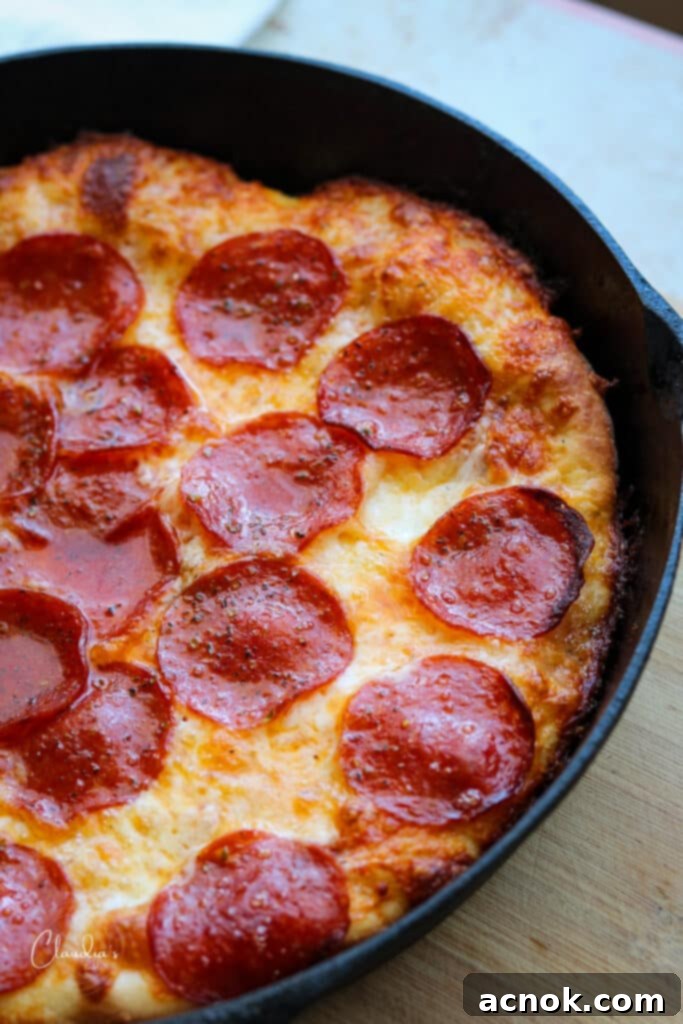
Essential Ingredients for Your Perfect Cast Iron Pan Pizza
Crafting an exceptional cast iron pan pizza begins with high-quality ingredients. Here’s what you’ll need to gather:
- Pizza Dough: 1 ball (approximately 1/3 of my Perfect All-Purpose Pizza Dough Recipe for a 10-inch skillet) or one store-bought, refrigerated pizza dough ball.
- Pizza Sauce: 1/2 cup of your favorite pizza sauce. For an authentic homemade taste, try my Rich and Zesty Pizza Sauce.
- Mozzarella Cheese: 1 1/2 cups of shredded low-moisture mozzarella cheese. Freshly shredded is always best for melt and flavor.
- Pepperoni: 3-6 ounces of thinly sliced pepperoni, or your preferred amount.
- Olive Oil: Approximately 2 tablespoons of good quality olive oil for brushing the pan and the dough. This is crucial for achieving that signature crispy crust.
- Italian Seasoning: 1/2 teaspoon of dried Italian seasoning (optional, but highly recommended for an extra layer of flavor).
- Additional Toppings (Optional): Your choice of cooked Italian sausage (thinly sliced), sautéed bell peppers, onions, sliced black olives, fresh mushrooms, or any other favorites.
- Parmesan Cheese: Freshly grated Parmesan cheese for serving.
- Crushed Red Pepper Flakes: For those who like a little kick, crushed red pepper flakes for serving.
Expert Pizza Dough Tips for Success
The foundation of any great pizza is its dough, and with a cast iron pan, the dough truly shines. Here are some essential tips to ensure your pizza dough is perfect:
- Homemade vs. Store-Bought: While my Perfect All-Purpose Pizza Dough recipe is highly recommended for its superior flavor and texture, don’t hesitate to use quality store-bought dough if you’re short on time. Look for refrigerated dough in the deli or fresh produce section of your grocery store. Avoid pre-baked crusts for this recipe, as they won’t achieve the desired puffy, crispy results in the cast iron skillet.
- Advance Preparation & Freezing: Pizza night doesn’t have to be last-minute. You can easily make large batches of homemade pizza dough in advance, portion it into individual balls, and freeze them. Simply wrap each dough ball tightly in plastic wrap, then place them in a freezer-safe bag. When you’re ready to bake, transfer the frozen dough to the refrigerator the night before, or let it thaw at room temperature for a few hours. Frozen dough defrosts beautifully, making spontaneous pizza nights a breeze.
- Room Temperature is Key: Whether homemade or store-bought, always allow your pizza dough to come to room temperature before stretching. Cold dough is stiff and difficult to work with, prone to snapping back or tearing. Letting it warm up for 30-60 minutes will relax the gluten, making it pliable and much easier to stretch into your desired shape.
- Cooking Time & Pairing: One of the best aspects of cast iron pan pizza is its speed. These pizzas cook rapidly, typically in just 10-12 minutes, making it an ideal choice for a quick lunch or a satisfying weeknight dinner. To complete your meal, pair it with a refreshing Butter Lettuce Green Salad and your favorite beverage – a nice bottle of wine, a craft beer, or sparkling water.
Consider preparing “pizza kits” for camping trips or visits to house rentals. Portion out the dough, sauce, and cheese into separate containers. Then, pack a variety of toppings so everyone can customize their own delicious pan pizza. It’s a fantastic way to enjoy gourmet pizza no matter where you are!
Preparing and Stretching Your Dough for Cast Iron Pizza
Once your dough is ready – whether it’s your homemade Perfect All-Purpose Pizza Dough that has completed its rise, or a quality store-bought refrigerated dough – it’s time to prepare it for the cast iron skillet. Proper dough preparation is key to achieving that fantastic crispy crust and puffy edge.
- Bring to Room Temperature: If your dough has been refrigerated, it’s crucial to let it sit at room temperature for at least 30-60 minutes before you begin stretching. This allows the gluten to relax, making the dough much more elastic and cooperative, preventing it from snapping back as you stretch.
- Prepare Your Work Surface: Lightly dust a clean, dry work surface with a small amount of all-purpose flour. This prevents the dough from sticking and makes handling much easier. You won’t need cornmeal, which is often used for transferring pizzas to a stone, as this dough will go directly into a hot, oiled pan.
- Stretch the Dough: For a 10-inch cast iron skillet, you’ll want to stretch your dough ball into a circle that is approximately 11 inches in diameter. This slight overhang ensures the dough can be easily pressed up the sides of the skillet, creating those glorious cheesy, crispy edges. Start by gently pressing the dough from the center outwards, using your fingertips to slowly widen the circle. You can also carefully lift and rotate the dough, letting gravity assist in the stretching process. Don’t worry if your circle isn’t perfectly round; once it’s in the pan and baking, it will still look and taste amazing.
- Portioning Homemade Dough: If you’re using my Perfect All-Purpose Pizza Dough recipe, remember that one batch yields enough for three 10-inch pan pizzas. So, you’ll need to divide your risen dough into three equal portions before stretching one for your current pizza.
By following these simple steps, your dough will be perfectly primed for the hot cast iron skillet, setting the stage for an incredible pizza experience.
Mastering the Cast Iron Skillet: Prepping for Pizza Perfection
The secret to an incredibly crispy crust on your pan pizza lies in a properly preheated and oiled cast iron skillet. This step is critical, so pay close attention:
- Preheat Your Oven or Grill: Begin by preheating your oven or outdoor grill to a blistering 500 degrees Fahrenheit (260°C). High heat is essential for quickly crisping the dough and cooking the toppings evenly. Allow plenty of time for your chosen cooking appliance to reach and maintain this temperature.
- Preheat the Cast Iron Skillet: Once your oven or grill is fully preheated, carefully place your empty cast iron pan directly onto the middle rack of the oven or onto the grill grates. Allow the skillet to preheat for a full 10 minutes. This ensures the cast iron is thoroughly hot, creating an instant sear on the pizza dough when it’s added.
- Oil the Hot Pan: Using a thick, oven-safe mitt or heat-resistant gloves, carefully remove the intensely hot cast iron pan from the oven or grill. Immediately and carefully brush about 2 tablespoons of olive oil onto the entire bottom and up the sides of the skillet. The oil will shimmer and may lightly smoke, which is normal. Be thorough, as this oil creates a non-stick surface and contributes significantly to the golden-brown, crispy bottom crust. Avoid using butter or cooking sprays, as they tend to burn at such high temperatures and won’t achieve the same crispy effect as olive oil.
Working quickly during this stage is important to retain the skillet’s heat. A well-prepped cast iron pan is the foundation for an exceptional pan pizza experience.
Baking Your Cast Iron Pan Pizza to Golden Perfection
With your dough prepped and your cast iron skillet perfectly hot and oiled, you’re ready for the exciting part – building and baking your magnificent pizza! Speed is beneficial here to maintain the skillet’s heat.
- Place the Dough: Carefully transfer your stretched dough circle into the hot, oiled cast iron pan. Gently press the dough out towards the edges of the skillet, ensuring it covers the entire bottom and slightly creeps up the sides. This creates a small “wall” for the cheese, leading to those sought-after crispy, golden-brown edges.
- Base Seasoning (Optional but Recommended): For an extra layer of flavor and a slightly richer crust, lightly spray or brush a little olive oil onto the dough. Then, sprinkle about 1/2 teaspoon of dried Italian seasoning evenly over the dough.
- Apply Sauce: Spoon your pizza sauce evenly over the dough, spreading it almost to the very edges. The sauce layer acts as a barrier, preventing the dough from becoming soggy.
- Load the Cheese: Generously add the mozzarella cheese over the sauce. Be sure to scatter some cheese right up to the very edges of the dough, allowing it to melt and crisp against the hot cast iron for that irresistible frico effect.
- Add Toppings: Arrange your chosen toppings, such as pepperoni and any additional vegetables or cooked meats (see “Suggested Toppings” section for ideas), over the cheese. Don’t overload the pizza, as too many toppings can make the crust soggy and prevent even cooking.
- Bake Until Golden: Carefully place the loaded cast iron pan back into your preheated 500°F (260°C) oven or onto the grill. Bake for approximately 10 to 12 minutes. The pizza is ready when the crust is visibly puffy and golden brown, the cheese is bubbling and slightly caramelized, and the edges are a deep, crispy golden-brown. If using a gas grill, maintain a consistent 500°F temperature, utilizing the built-in thermometer for accuracy.
- Cool and Serve: Once baked, use an oven-safe mitt to carefully remove the hot pan. Immediately, use a sturdy metal spatula to gently loosen the sides of the pizza from the pan, then carefully slide the entire pizza onto a cutting board. Letting it rest for a minute or two before slicing helps the cheese set. Cut your cast iron pan pizza into 6-8 generous slices using a pizza cutter or a large, sharp butcher’s knife.
Serve immediately, garnished with grated Parmesan cheese and a sprinkle of crushed red pepper flakes if desired. Enjoy the incredible aroma and taste of your homemade, perfectly crispy cast iron pan pizza!
Elevate Your Cast Iron Pan Pizza with Creative Toppings
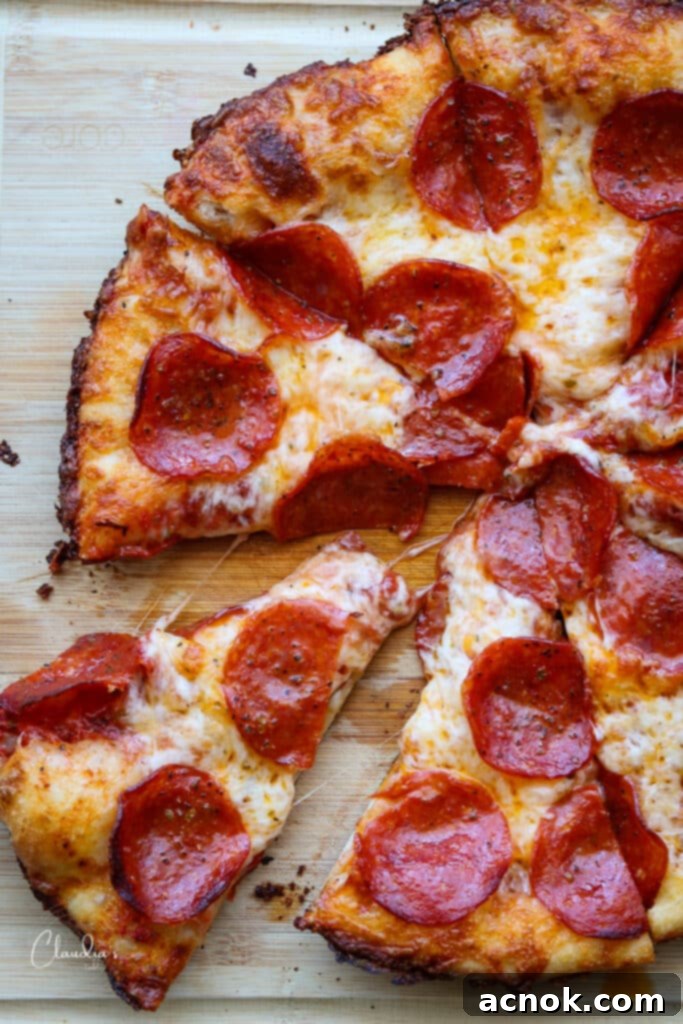
While the classic combination of mozzarella and pepperoni is undeniably delicious and a perfect match for the crispy crust of a cast iron pan pizza, don’t hesitate to get creative with your toppings! The beauty of homemade pizza is the ability to customize every slice to your liking.
Here are some popular and delicious topping ideas, along with tips for preparation:
- Classic Pepperoni: Always a crowd-pleaser. The pepperoni cups slightly and crisps beautifully in the hot cast iron.
- “Combo” Style: A robust mix featuring cooked Italian sausage (crumbled or thinly sliced), bell peppers, onions, sliced black olives, and mushrooms. For vegetables like peppers and onions, slice them very thinly to ensure they cook through evenly with the short baking time. Alternatively, lightly sautéing them beforehand can prevent undercooked veggies and add a deeper flavor.
- Vegetarian Delight: A medley of fresh spinach, sun-dried tomatoes, artichoke hearts, Kalamata olives, and feta cheese. Ensure spinach is lightly wilted first to avoid too much moisture release.
- Meat Lover’s Dream: Cooked bacon bits, pepperoni, ground beef, and ham. All meats should be pre-cooked and drained of excess fat.
- Spicy Kick: Jalapeños (fresh or pickled), hot Italian sausage, and a generous sprinkle of crushed red pepper flakes.
- Mediterranean Inspired: Cherry tomatoes (halved), fresh basil leaves (added after baking), Kalamata olives, and crumbled goat cheese.
Topping Tip: Regardless of your choice, remember not to overload your pizza. Too many toppings can weigh down the crust, making it difficult to achieve that desirable crispness. Distribute toppings evenly for balanced flavor and optimal cooking.
Frequently Asked Questions About Cast Iron Pan Pizza
For the best results with this cast iron pan pizza recipe, we highly recommend using fresh pizza dough, whether homemade or store-bought. Pre-baked pizza crusts typically do not achieve the desirable puffy rise, crispy bottom, or golden-brown cheesy edges that a raw dough creates in the hot cast iron skillet. The raw dough is essential for forming those delicious high edges and that signature crispy texture.
One full batch of our Perfect All-Purpose Pizza Dough recipe is designed to yield enough dough for three individual 10-inch cast iron pan pizzas. This makes it perfect for feeding a family, entertaining friends, or freezing extra portions for future pizza nights.
Absolutely, oiling the pan is a crucial step! It serves two primary purposes for your cast iron pan pizza: it helps create that wonderfully crispy, golden-brown crust on the bottom of the pizza, and it acts as a release agent, making it much easier to lift the pizza out of the pan after baking without sticking. We strongly recommend using olive oil for this, as butter tends to burn at high temperatures, and cooking sprays often contain ingredients that can build up on and damage the seasoning of your cast iron skillet over time.
If you are baking pizzas one immediately after another, the skillet will likely retain enough heat, and you might only need to quickly brush in some fresh olive oil for the next pizza. However, if there’s a significant time gap between baking batches (e.g., more than 5-10 minutes), it’s advisable to place the empty cast iron pan back into the hot oven or grill for a few minutes (around 5 minutes) to bring it back up to temperature before re-oiling and adding the next pizza. This ensures consistent results with a perfectly crispy crust for every pizza you make.
Yes, you can adapt this recipe to fit different cast iron skillet sizes, but you’ll need to adjust the dough quantity and potentially the baking time. For a larger skillet (e.g., 12-inch), you’ll need more dough, sauce, and toppings, and the baking time might increase slightly. For a smaller skillet (e.g., 8-inch), you’d use less dough and ingredients, and the baking time might be a bit shorter. Always ensure the dough is stretched to cover the bottom and slightly up the sides of your chosen pan for the best results.
If you tried this delicious cast iron pan pizza recipe, please help other readers by commenting below and sharing some stars! We 🫶🏼 appreciate you!
All content and photographs ©Claudia’s Table and claudiastable.com
Cast Iron Pan Pizza
Ana | Claudia’s Table
February 7, 2024
Pin Recipe
Equipment
-
1 cast iron skillet 10 inch
Ingredients
Cast Iron Pan Pizza
- 1 dough ball homemade Perfect All Purpose Pizza Dough Recipe or store-bought refrigerated pizza dough.
- 1/2 cup of pizza sauce store-bought or my Rich and Zesty pizza sauce.
- 1 1/2 cups of mozzarella cheese
- 3-6 ounces of pepperoni sliced
- olive oil to brush onto dough + olive oil to brush onto pan
- 1/2 teaspoon of Italian seasoning, dried optional
Additional toppings (optional)
- Additional toppings of your choice – cooked Italian sausage thinly sliced, sautéed peppers, onions, sliced olives, mushrooms etc.
- Parmesan cheese grated for serving
- Crushed red pepper flakes for serving
Instructions
Prepare the dough
-
Once you have either made your homemade dough (see note below) or purchased prepared dough, (like Trader Joe’s refrigerated dough) it’s time for a stretch.
-
If the dough is refrigerated, allow the dough to come to room temperature before stretching the dough. Dust the work surface with a little flour to prevent the dough from sticking. In terms of size, If you are using a 10-inch skillet, you will want to stretch the dough to a circle slightly larger than the bottom of the pan. The dough should be an 11-inch circle.
-
Don’t worry if the circle isn’t perfect, once it’s placed in the pan and baked it will be fine. For this cast iron pan pizza you will not need cornmeal to dust a pizza peel as the dough will go directly into a heated, oiled pan.
-
NOTE: If you are using my pizza dough recipe, you will need 1/3 of the dough per pan pizza.
How to prep the cast iron pan to bake pizza
-
For the best results, preheat grill or oven to 500 degrees Fahrenheit.
-
Once the oven is preheated, place the empty cast iron pan in the middle rack or grill and preheat for 10 minutes.
-
Using an oven-safe mitt, carefully remove the preheated cast iron pan and carefully brush olive oil on the bottom and sides of the skillet.
How to bake Cast Iron Pan Pizza
-
Now carefully place the dough circle in the pan and carefully push the edges if needed to even it out the dough on the bottom of the skillet.
-
OPTIONAL: Spray or brush olive oil onto the dough, sprinkle Italian seasoning onto the dough.
-
Spoon pizza sauce onto the dough to the edges.
-
Add plenty of cheese to the top and edges of the pizza dough and top with pepperoni.
-
Now place back into the hot oven for 10 or 12 minutes.
-
The pizza will be baked when it’s puffy, crispy and the cheesy edges are golden brown. Yum!
-
Once the pizza is baked, carefully slide out the pizza onto a cutting board. Use a metal spatula to loosen the sides of the pizza before sliding it onto a cutting board. Cut the pizza into 6-8 slices using a pizza cutter or a long butcher’s knife.
Notes
Nutrition
Nutritional information is calculated online and should be used as a guide.
All content and photographs ©Claudia’s Table and claudiastable.com
Check out our New & Delicious posts below
- Pasta with Grilled Vegetables, Feta, and Lemon
- Grilled Asian Marinated Flank Steak
- Classic Homemade Chunky Blue Cheese Dressing
- 3-Ingredient Crispy Oven-Roasted Potatoes
- Grilled Peach Avocado Chicken Salad
