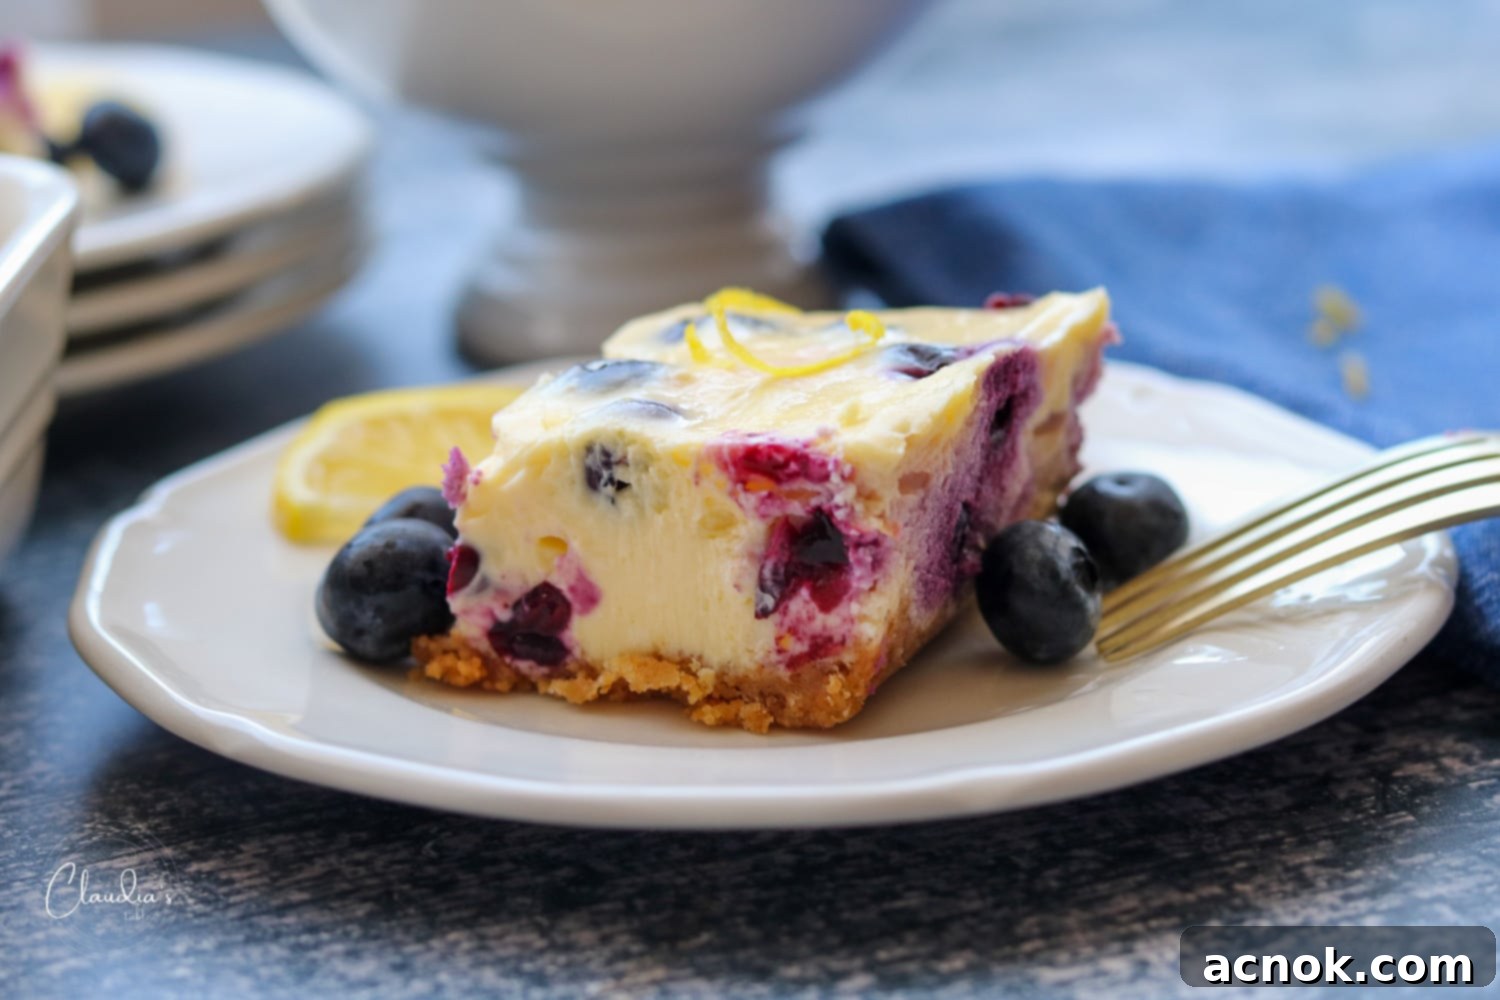
Decadent Blueberry Lemon Cheesecake Bars: Your New Favorite Easy Dessert Recipe
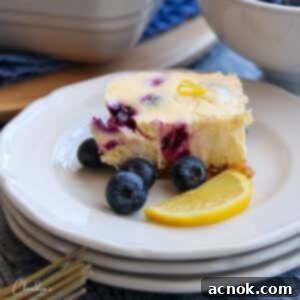
What’s better than a classic cheesecake? Our luscious Blueberry Lemon Cheesecake Bars! These delightful dessert bars offer all the rich, creamy texture and intense flavor of a traditional cheesecake, but in a perfectly portioned, easy-to-handle square. Each bite is a symphony of sweet, fresh blueberries, zesty lemon, and a smooth, tangy cream cheese filling, all resting on a wonderfully buttery graham cracker crust. This dream team of flavors comes together to create an irresistible treat that’s ideal for parties, gatherings, or simply enjoying a moment of pure bliss.
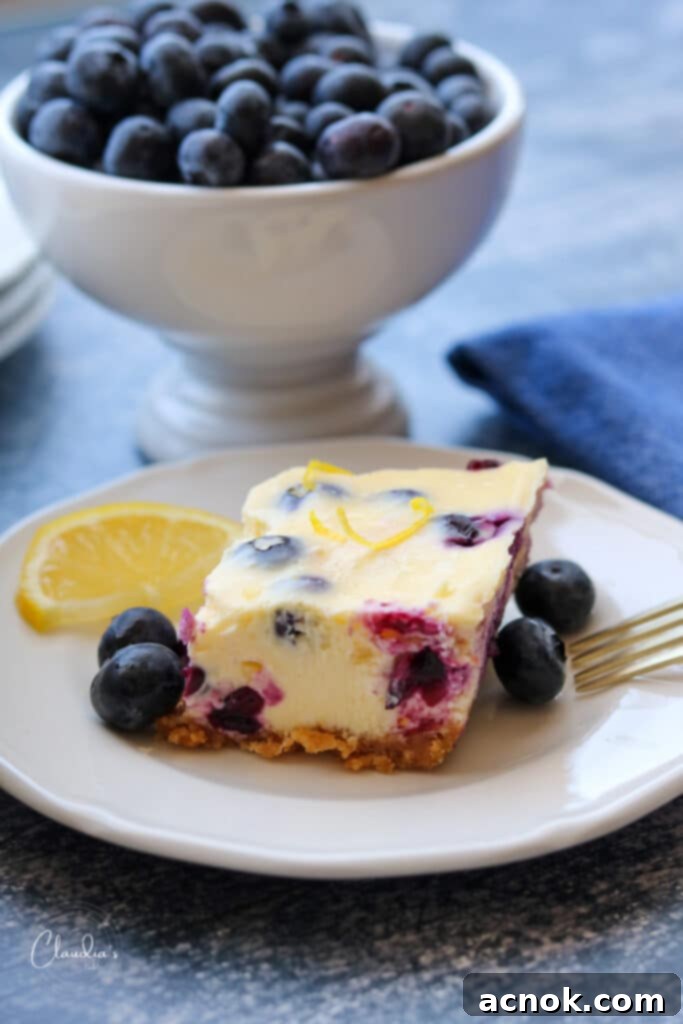
Table of Contents
- Recipe Inspiration: The Story Behind These Bars
- Cheesecake vs. Cheesecake Bars: Why Bars Are a Game Changer
- Blueberry Lemon Cheesecake Bar Recipe: Your Step-by-Step Guide
- Essential Ingredients for the Perfect Cheesecake Bars
- Preparation: Crafting Your Delicious Bars
- Mastering the Buttery Graham Cracker Crust
- Creating the Silky Smooth Cream Cheese Filling
- Baking Your Blueberry Lemon Cheesecake to Perfection
- PRO TIP: How to Cut Cheesecake Bars Cleanly for a Professional Finish
- Cool, Refrigerate, and Serve: The Final Steps
- How to Store, Freeze, and Thaw Your Blueberry Lemon Cheesecake Bars
- Delightful Variations for Your Cheesecake Bar Recipe
- Love Lemons? Discover More Zesty Recipes You’ll Adore!
Recipe Inspiration: The Story Behind These Bars
Every great recipe has a story, and these easy-to-make Blueberry Lemon Cheesecake Bars are no exception. This particular recipe started a few years ago when I stumbled upon a clipping from a magazine – I believe it was a classic Philadelphia Cream Cheese recipe. As a self-proclaimed “non-baker,” I’m always on the lookout for dessert recipes that promise delicious results without requiring advanced pastry chef skills. And when it comes to Philadelphia Cream Cheese, you just know it’s going to be inherently simple and incredibly tasty. My inspiration was twofold: my undeniable love for the vibrant, juicy sweetness of blueberries and the bright, tangy kick of fresh lemons. And, of course, a deep appreciation for the creamy decadence of cheesecake. This recipe perfectly brings together this trifecta of my favorite flavors, delivering them in small, almost guilt-free squares. While they aren’t truly calorie-free (a baker’s wish!), their convenient size makes them feel like an indulgence you can truly savor without overdoing it. It’s a foolproof method to enjoy exquisite homemade cheesecake without any of the fuss.
Cheesecake vs. Cheesecake Bars: Why Bars Are a Game Changer
You might be wondering, what’s the real difference between a traditional slice of cheesecake and a convenient cheesecake bar? A typical cheesecake is usually baked in a round springform pan, often in a water bath, resulting in a thick, impressive cake that requires careful handling and cutting into large wedges. While undeniably elegant, this can be intimidating for some home bakers. Cheesecake bars, however, offer the same rich flavors and dense, creamy texture in a much more accessible and user-friendly format. They are generally about one inch thick and bake beautifully in a standard square or rectangular baking dish, eliminating the need for a water bath and making the entire process far less intimidating. This straightforward approach makes cheesecake bars an ideal choice for those who are new to baking or simply don’t have the luxury of time. Beyond the ease of baking, bars excel in portability and portion control. They’re perfect for packing into lunchboxes, bringing to potlucks, or serving at parties where individual servings are preferred. Plus, their smaller size often translates to a quicker baking time and faster cooling, meaning you can enjoy your delicious dessert sooner!
Blueberry Lemon Cheesecake Bar Recipe: Your Step-by-Step Guide
Let’s dive into making these incredible Blueberry Lemon Cheesecake Bars! This recipe yields 12 perfectly sized, 2-inch dessert bars, which we find to be an ideal portion for a family treat or a small gathering. If you’re planning for a larger crowd, or just want more of these delightful bites to last throughout the week, you can easily double the recipe. Simply use a larger 9×13-inch baking pan, adjust the baking time slightly, and prepare for double the deliciousness! This flexible recipe is designed to fit your needs, ensuring you always have enough of this crowd-pleasing dessert on hand.
Essential Ingredients for the Perfect Cheesecake Bars
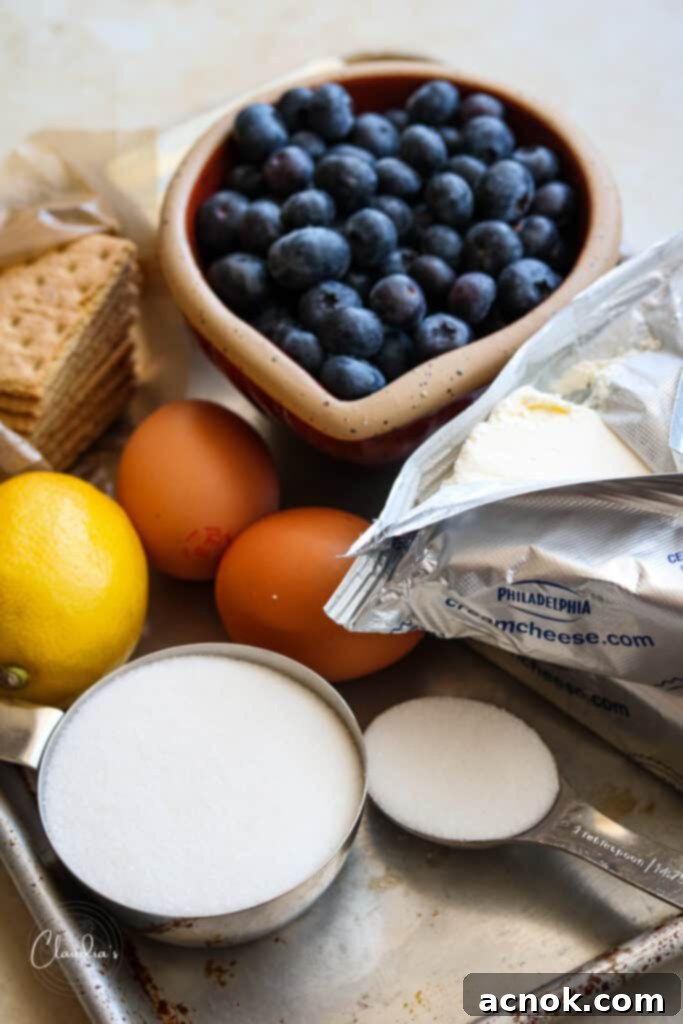
One of the best aspects of this blueberry lemon cheesecake bar recipe is its simplicity, relying on readily available ingredients and a streamlined baking method that makes it perfect for bakers of all skill levels, especially novices. There are no fancy or obscure items required, just good quality basics that come together to create something truly spectacular. Here’s what you’ll need to gather:
- 1 cup of graham cracker crumbs: These form the classic, irresistible base for our bars. You can buy them pre-crushed or crush your own from whole crackers.
- 1/2 cup + 1 tbsp of granulated sugar: Used in both the crust and the creamy filling to provide just the right amount of sweetness.
- 4 tbsp melted butter: Essential for binding the graham cracker crumbs and creating that rich, buttery crust.
- 1 1/2 cups of fresh blueberries: The star of the show! Choose plump, firm berries for the best flavor and texture. Frozen blueberries can also work in a pinch, but fresh are highly recommended.
- Juice of half a lemon and 1/2 tbsp of lemon zest: These bring the bright, tangy counterpoint to the sweetness of the blueberries and cream cheese. Always use fresh lemon for the most vibrant flavor.
- 2 packages (8oz each) of block-style cream cheese, regular, softened: It’s crucial to use full-fat, block-style cream cheese, not the spreadable kind, for the proper texture. Ensure it’s fully softened to room temperature for a smooth, lump-free filling.
- 2 large eggs: These act as a binder, giving the cheesecake its structure and characteristic creaminess.
Preparation: Crafting Your Delicious Bars
Before we dive into the creamy filling, we’ll begin by preparing the foundation of our cheesecake bars: the delightfully buttery graham cracker crust. This traditional crust is simple to make and provides the perfect textural contrast to the smooth, rich cheesecake layer.
Mastering the Buttery Graham Cracker Crust
- Preheat your oven: Set your oven to 325ºF (160ºC). This ensures it’s ready for baking as soon as your crust is assembled.
- Prepare the graham cracker crumbs: If you’re using whole graham crackers, you’ll need about 4-5 crackers to yield 1 cup of crumbs. My preferred method is to place them in a sturdy zip-top bag and use a rolling pin to crush them into fine crumbs. Alternatively, a food processor works quickly and efficiently.
- Combine dry crust ingredients: In a small bowl, mix the graham cracker crumbs with 1 tablespoon of sugar. Set this mixture aside for a moment.
- Prepare your baking dish: Line a small, 8×8 inch casserole dish or a 6×9 inch dish (I personally find a 6×9 inch works perfectly for this recipe) with aluminum foil. The key here is to ensure there is plenty of excess foil hanging over the rim of the dish. This overhang will serve as convenient “handles” later, making it incredibly easy to lift the baked cheesecake out of the pan for cutting.
- Add melted butter to crumbs: Melt 4 tablespoons of butter until fully liquid. Pour the melted butter into the bowl with your graham cracker crumbs and sugar. Mix thoroughly with a spoon until all the crumbs are evenly coated and moistened by the butter. The mixture should resemble wet sand.
- Press the crust: Transfer the buttered graham cracker mixture into your foil-lined casserole dish. Using the back of a spoon or your fingertips, firmly and evenly press the mixture onto the bottom of the dish. Ensure the crust is compact and covers the entire bottom surface from edge to edge. A well-pressed crust prevents crumbling.
- Pre-bake the crust: Place the prepared crust in the preheated oven and bake for 10 minutes. This step helps to set the crust, making it crispier and preventing it from becoming soggy when the filling is added. Once baked, remove the crust from the oven and allow it to cool slightly while you prepare the filling.
Creating the Silky Smooth Cream Cheese Filling
- Prepare blueberries and zest for garnish: Reserve 1/4 cup of the fresh blueberries and 1/2 teaspoon of lemon zest. These will be used later as a beautiful and flavorful garnish for your finished bars.
- Cream the main filling ingredients: In a large mixing bowl, combine the softened cream cheese, fresh lemon juice, the remaining granulated sugar, and the rest of the lemon zest. Using a hand mixer or a stand mixer fitted with the paddle attachment, beat these ingredients together on medium speed until the mixture is completely smooth, creamy, and well blended. Scrape down the sides of the bowl as needed to ensure everything is incorporated. The cream cheese must be at room temperature for this step to avoid lumps!
- Incorporate the eggs: Now it’s time to add the eggs. Add one egg at a time, mixing on low speed just until each egg is blended into the cream cheese mixture. It’s important not to overmix the eggs, as this can introduce too much air, leading to cracks in your cheesecake.
- Fold in blueberries and pour: Gently fold in the remaining 1 1/4 cups of blueberries into the cream cheese mixture using a spatula. Be careful not to mash the berries. Once incorporated, carefully pour the filling evenly over your pre-baked graham cracker crust in the foil-lined dish. Use a small spatula or the back of a spoon to spread the filling smoothly across the entire crust.
Baking Your Blueberry Lemon Cheesecake to Perfection
- Bake the cheesecake: Place the dish back into the preheated 325ºF (160ºC) oven and bake for approximately 35-40 minutes. You’ll know it’s ready when the edges appear set and slightly golden, but the very center may still have a slight “jiggle” when gently shaken. This jiggly center is perfectly normal; the cheesecake will continue to set as it cools.
- Cooling and chilling: Once baked, carefully remove the cheesecake from the oven. Allow it to cool completely at room temperature on a wire rack. This step is crucial for preventing cracks. After it has reached room temperature, transfer the cheesecake to the refrigerator and chill for a minimum of 4 hours, or ideally, overnight. Chilling is essential for the cheesecake to fully set, making it firm enough to cut cleanly and enhancing its rich, creamy texture.
PRO TIP: How to Cut Cheesecake Bars Cleanly for a Professional Finish
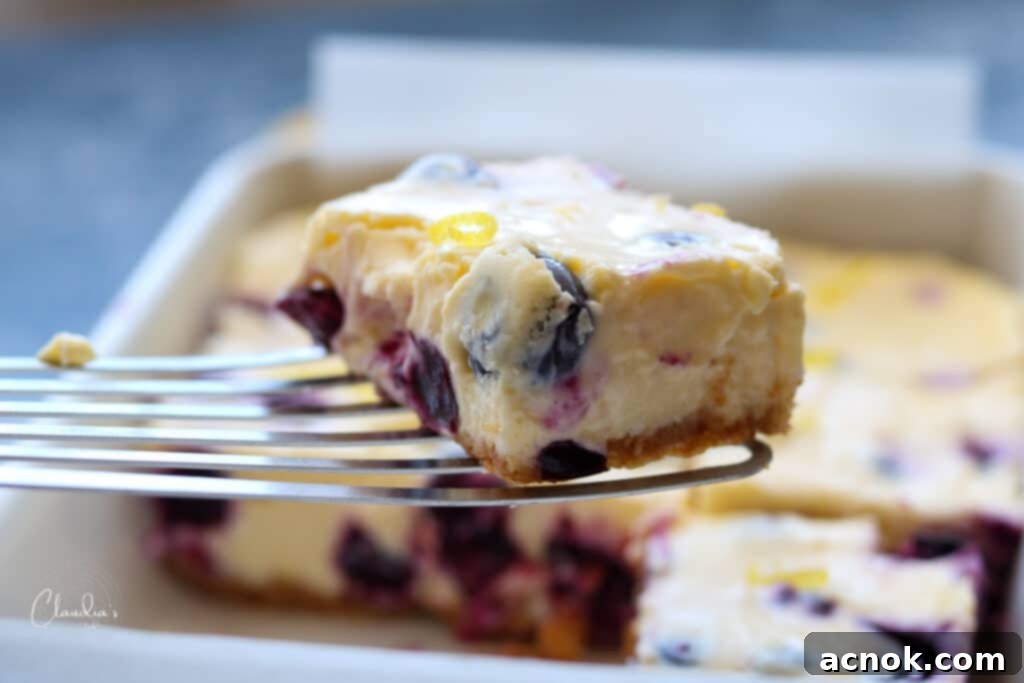
Achieving perfectly clean cuts on your cheesecake bars can be a challenge, as the creamy filling often sticks to the knife, leaving messy edges and crumbs. But with this simple trick, you can get bakery-worthy slices every time! The key is to use a hot knife. Before making your first cut, run your sharp cutting knife under hot tap water for a few seconds. The heat will help the blade glide effortlessly through the cold cheesecake. Immediately wipe the knife completely dry with a paper towel. Make your first cut, pressing down firmly and evenly. After each cut, wipe off any excess cream cheese and crumbs from the knife with a clean paper towel, and then repeat the hot water/dry wipe process before making the next cut. This meticulous step-by-step approach ensures that each and every cheesecake bar has a beautifully clean, sharp edge, making your presentation as perfect as the taste!
Cool, Refrigerate, and Serve: The Final Steps
After your Blueberry Lemon Cheesecake has been thoroughly refrigerated and is perfectly set (a minimum of 4 hours, but ideally overnight), it’s finally time for the satisfying moment of cutting it into individual bars. Carefully use the excess foil overhang as “handles” to gently lift the entire cheesecake out of the baking dish. Place it onto a clean cutting surface, such as a large cutting board. Then, carefully peel the foil down from the sides of the cheesecake. Now, using the hot knife tip described above, cut the cheesecake into your desired size. You can get 8 larger, more substantial bars or 12 smaller, more delicate ones, depending on your preference. Arrange the bars artfully on a serving platter. For an extra touch of freshness and visual appeal, serve each bar with the reserved fresh blueberries and a delicate sprinkle of additional lemon zest. Now, sit back, relax, and savor every delicious bite of your homemade creation!
How to Store, Freeze, and Thaw Your Blueberry Lemon Cheesecake Bars
Congratulations! You’ve successfully baked these scrumptious blueberry lemon cheesecake bars, and now you might want to enjoy them throughout the week or save some for a special occasion. Proper storage is key to maintaining their fresh taste and texture. These bars can be refrigerated in an airtight container for up to 4 days – if they last that long in your household! For longer storage, freezing is an excellent option. I love to freeze them in individual portions, so I can easily grab one whenever a craving strikes. There are two effective methods for freezing:
- Individual Wrap Method: Wrap each precut bar individually in waxed paper or parchment paper, then place the wrapped bars in a single layer in an airtight freezer-safe container or a large zip-top freezer bag. This prevents them from sticking together.
- Flash Freeze Method: Place the precut bars on a small rimmed baking sheet, ensuring they don’t touch. Flash freeze them for about 1-2 hours until solid. Once frozen, transfer the solid bars to an airtight freezer-safe container or a zip-top freezer bag.
Both methods work wonderfully, and these cheesecake bars can be stored in the freezer for up to 4 months without significant loss of quality. When you’re ready to enjoy a frozen treat, simply thaw them! Thaw time is approximately 30 minutes if left on the kitchen counter at room temperature, or about 2 hours if thawed slowly in the refrigerator. Enjoy a taste of summer anytime!
Delightful Variations for Your Cheesecake Bar Recipe
While blueberries are my absolute first choice for this delightful cheesecake dessert, the versatility of this recipe means you can easily experiment with other fruits to create equally delicious variations. The creamy lemon-kissed base pairs beautifully with a variety of berries and other fruit. For instance, fresh diced strawberries or raspberries work exceptionally well, adding their own unique burst of sweet-tart flavor and vibrant color. Imagine the possibilities with a swirl of tart cherry or even a medley of mixed berries! I’m particularly excited to try this recipe with fresh blackberries in the near future – I have a feeling they will be “berry” soon (pardon the pun!). I’ll be sure to update this post with my findings and any new recommendations. If you have any other creative ideas or successful fruit combinations you’ve tried with this recipe, please don’t hesitate to share them in the comments section below. I’d love to hear your delicious suggestions!
Love Lemons? Discover More Zesty Recipes You’ll Adore!
If you’re anything like me, you have an enduring love affair with lemons! It’s one of my absolute favorite ingredients, adding a bright, fresh, and zesty note to countless sweet and savory dishes. I incorporate lemons into so many of my daily meals, transforming ordinary recipes into extraordinary culinary experiences. The natural acidity and vibrant aroma are simply unparalleled. If you adore lemons as much as I do, you’re in for a treat! Here are some fan-favorite lemon-infused recipes from my site that I’m confident you will love:
- Lemon Arugula Pasta Salad: A light and refreshing pasta salad, perfect for summer, with the peppery bite of arugula balanced by a bright lemon dressing.
- Lemon Potato Caper Salad: A zesty twist on classic potato salad, elevated with tangy capers and a vibrant lemon vinaigrette.
- Rosemary Lemon Water: A simple yet sophisticated way to hydrate, offering subtle herbal and citrus notes.
- One Pan Lemon Rosemary Chicken and Rice: An incredibly easy and flavorful weeknight dinner, cooked all in one pan for minimal cleanup.
- Grilled Lemon Oregano Chicken + Salmoriglio Sauce: Juicy grilled chicken infused with Mediterranean flavors, complemented by a bright and herbaceous Salmoriglio sauce.
Every single one of these recipes embodies the sunny, delicious, and utterly delightful essence of lemons! They showcase how this versatile citrus can elevate both savory and sweet dishes, making them truly unforgettable.
If you tried this fantastic Blueberry Lemon Cheesecake Bar recipe, please take a moment to help other readers by commenting below and sharing some stars! Your feedback is invaluable, and we 🫶🏼 truly appreciate you!
All content and photographs ©Claudia’s Table and claudiastable.com
Blueberry Lemon Cheesecake Bars Recipe Card
Author: Ana | Claudia’s Table
Date: March 1, 2023
Decadent, luscious, perfectly sized and bursting with sweet, fresh blueberries and zesty lemon atop a buttery graham cracker crust. An easy homemade dessert for any occasion.
Rating: 5 out of 5 stars (based on 2 votes)
Print Recipe |
Pin Recipe
Key Details
- Prep Time: 15 mins
- Cook Time: 50 mins
- Cooling & Refrigeration: 5 hrs
- Course: Dessert
- Cuisine: American
- Servings: 12 bars
- Calories: 261 kcal per serving
Equipment
- 1 small casserole or baking dish (8×8 inch or 6×9 inch recommended)
- Foil paper
- Microplane (for lemon zest)
- Hand or stand mixer
Ingredients
For the Graham Cracker Crust:
- 1 cup graham cracker crumbs
- 1 tbsp sugar
- 4 tbsp butter, melted
For the Cheesecake Filling:
- 1/2 cup sugar (remaining from total)
- 1 1/2 cups fresh blueberries (reserve 1/4 cup for garnish)
- Juice of 1/2 fresh lemon
- 1/2 tbsp lemon zest (reserve 1/2 tsp for garnish)
- 2 packages (8oz each) block-style cream cheese, regular, softened
- 2 large eggs
Instructions
- Preheat oven to 325ºF (160ºC).
- Start by crushing enough graham crackers to make 1 cup of crumbs (approx. 4-5 crackers). Place them in a zip-top bag and crush with a rolling pin or use a food processor.
- In a small bowl, combine the graham cracker crumbs and 1 tbsp of sugar. Set aside.
- Line a small, 8×8 inch casserole dish or 6×9 inch baking dish with foil paper, ensuring there is excess foil over the rim to act as handles.
- Melt 4 tbsp of butter and add to the bowl with graham cracker crumbs and sugar. Mix well with a spoon until all crumbs are covered in butter.
- Add the cracker/butter mixture to the foil-covered casserole and press it firmly and evenly onto the bottom of the dish to form the crust.
- Bake the crust for 10 minutes. Remove from oven and let cool slightly.
- Reserve 1/4 cup of blueberries and 1/2 tsp of lemon zest and set aside for serving/garnish.
- In a large bowl, beat the softened cream cheese, lemon juice, the remaining 1/2 cup sugar, and the remaining lemon zest with a hand mixer or stand mixer until smooth and blended.
- Add 1 egg at a time, mixing on low speed just until each egg is blended into the cream cheese mixture. Do not overmix.
- Gently fold in the remaining 1 1/4 cups of blueberries (do not mash them). Pour the mixture evenly into the pre-baked graham cracker crust and spread with a small spatula.
- Bake for about 35-40 minutes. The edges should be set, but the center may still be slightly jiggly. This is normal.
- Remove from oven and allow to cool completely at room temperature. Once cooled, refrigerate for a minimum of 4 hours, or preferably overnight, until fully set.
- TIP FOR CUTTING THE BARS CLEANLY: To get clean edges, run a sharp cutting knife under hot water for a few seconds. Wipe it dry and make your first cut. Wipe excess cream cheese and crumbs off the knife with a paper towel, then repeat the hot water/dry wipe process before each subsequent cut.
- After the cheesecake has been refrigerated and set, use the foil overhang to gently lift it out of the baking dish. Peel the foil down from the sides. Cut into 8 large bars or 12 smaller ones.
- Serve with the reserved fresh blueberries and a sprinkle of lemon zest. Enjoy!
Notes
How to Store, Freeze and thaw my Blueberry Lemon Cheesecake Bars
These scrumptious cheesecake bars can be refrigerated for up to 4 days in an airtight container. To freeze, either wrap individual precut bars in waxed paper and store in an airtight container/zip-top bag, or flash freeze precut bars on a baking sheet before transferring to a container/bag. They can be frozen for up to 4 months.
To thaw, leave on the counter for about 30 minutes, or in the fridge for about 2 hours.
Recipe adapted from a Philadelphia cream cheese ad.
Nutrition
Nutritional information is calculated online and should be used as a guide.
Keywords
blueberry lemon cheesecake bars, cheesecake, cream cheese bars, dessert bars, lemon blueberry dessert, Philadelphia cream cheese recipes, easy dessert, homemade cheesecake, fruit dessert
All content and photographs ©Claudia’s Table and claudiastable.com
Share the Love on Pinterest
Follow @claudiastable or pin for later!
Check out our New & Delicious posts below
- Pasta with Grilled Vegetables, Feta, and Lemon
- Grilled Asian Marinated Flank Steak
- Classic Homemade Chunky Blue Cheese Dressing
- 3-Ingredient Crispy Oven-Roasted Potatoes
- Grilled Peach Avocado Chicken Salad
