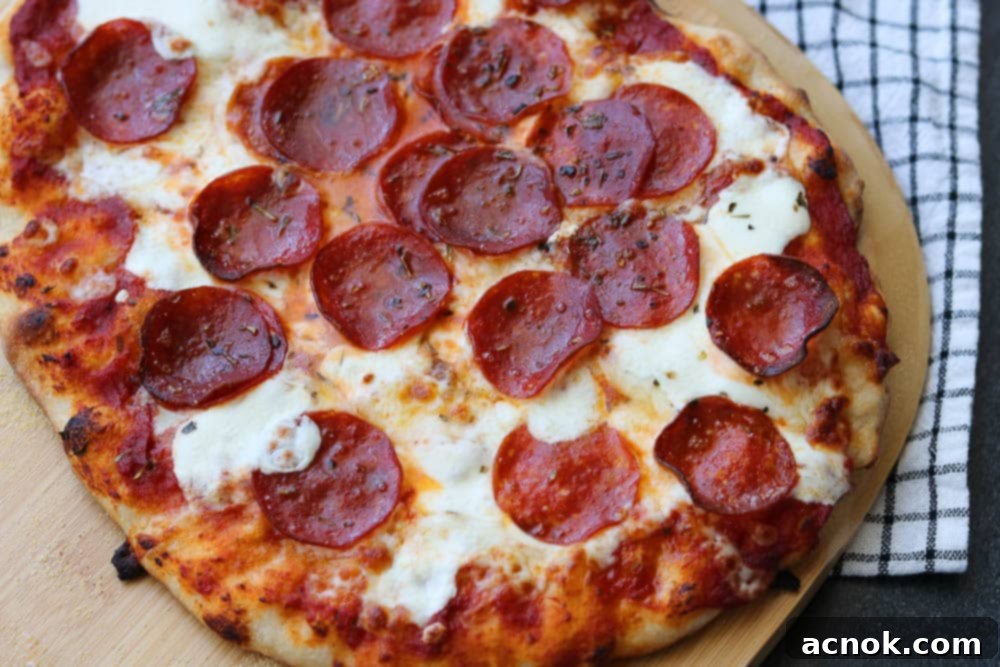
The Ultimate Perfect All-Purpose Pizza Dough Recipe for Crispy, Chewy Homemade Pizza
For years, we’ve dedicated ourselves to mastering the art of homemade pizza. Our kitchen has been a laboratory, experimenting with countless methods to find a recipe that’s not only incredibly delicious but also convenient for every home cook. The result of this extensive journey is our **Perfect All-Purpose Pizza Dough recipe**, a truly versatile foundation for a show-stopping pizza. This recipe has been rigorously tried, tested, and perfected across various cooking surfaces, including the grill, conventional oven, a dedicated pizza stone, innovative grill mats, and even specialized pizza ovens.
This isn’t just any dough; it’s designed to create a phenomenal **thin-crust pizza** that bakes remarkably quickly, delivering those coveted crispy edges and a delightful balance of crispness and satisfying chewiness. What’s more, this dough is incredibly freezer-friendly, allowing you to prepare it in advance and enjoy a flawless pizza after a quick defrost. It truly ticks all the boxes for the ultimate homemade pizza experience. While it does require a two-hour window for the dough to rise, the process itself is remarkably straightforward and virtually foolproof, ensuring success even for beginners.
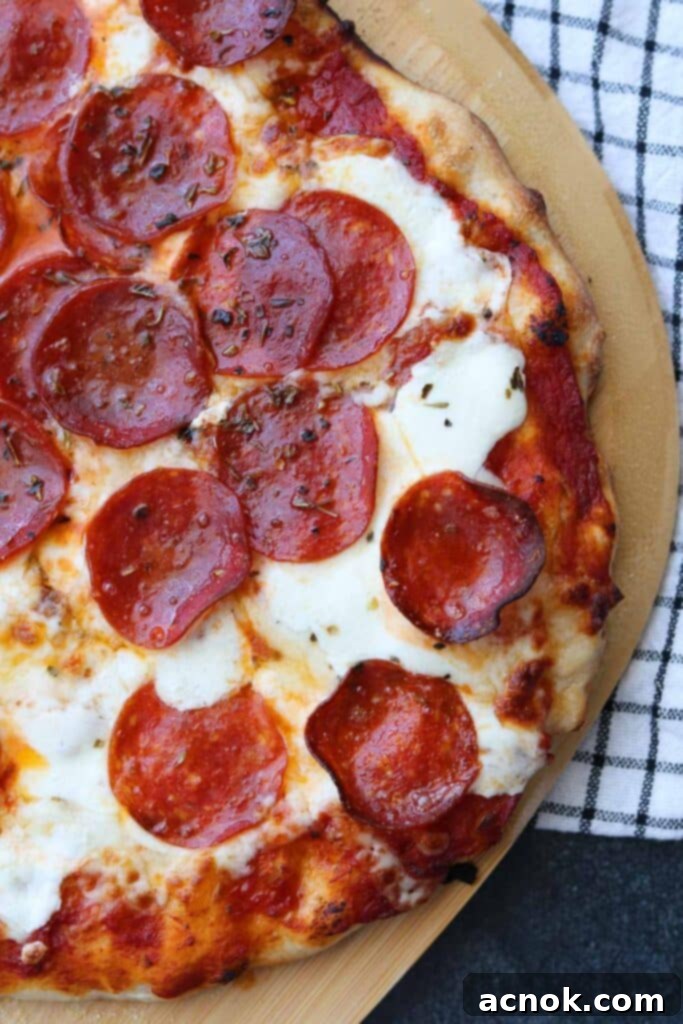
How to Make Homemade Pizza: Your Step-by-Step Guide
Before you dive into preparing this incredible Perfect All-Purpose Pizza Dough, we highly recommend reading this entire guide. We’ve packed it with essential information and practical tips on how to bake homemade pizza, covering everything from oven to grill options. This comprehensive post will walk you through the entire process, from mixing your ingredients to pulling a perfectly baked pie from your cooking surface. For easy navigation, the table of contents below provides links to specific topics. If you have any questions along the way, please don’t hesitate to send us a message; we’re always happy to help you achieve pizza perfection!
Table of Contents
- How to Make Homemade Pizza Step-by-Step
- Why You’ll Love This Perfect All-Purpose Pizza Dough Recipe
- Homemade Pizza 101: Essential Tips for Success
- Choosing the Best Flour for Your Homemade Pizza Dough
- Exploring Different Types of Pizza Crusts
- Thin-Crust Pizza Variations
- Thick-Crust Pizza Variations
- Recommendations for Achieving the Best Homemade Pizza Crust
- Practical Methods for Baking Pizza at Home
- How to Prepare Your Homemade Pizza Dough
- Kneading Pizza Dough by Hand
- How to Knead Pizza Dough with a Stand Mixer
- How to Stretch Pizza Dough Like a Pro
- How to Assemble Your Pizza for Baking
- Suggested Toppings for Your Homemade Pizza
- Optimal Cooking Times for Homemade Pizza
- How to Transfer Pizza from Peel to Cooking Surface
- Serving Suggestions for an Epic Pizza Night
- Frequently Asked Questions & Expert Tips
- Explore More Delicious Recipes
Why You’ll Love This Perfect All-Purpose Pizza Dough Recipe
This extraordinary pizza dough recipe draws its inspiration from a trusted source, my favorite cookbook: Better Homes and Gardens. We’ve thoughtfully adapted the original to excel on a pizza stone, particularly when using an outdoor gas grill to beautifully mimic the high-heat environment of a traditional pizza oven. While grilling is my personal favorite method for its consistent, crispy results, this guide also provides clear instructions for baking a perfect homemade pie in your conventional oven, dedicated pizza oven, or even directly on the grill with a copper mat. The core philosophy behind this **same-day pizza dough recipe** is simple: to utilize readily available ingredients and provide adaptable instructions to suit any home cooking setup. This makes it an incredibly easy and reliable pizza dough recipe that both seasoned chefs and absolute novices can confidently embrace, guaranteeing a delicious outcome every time.
Homemade Pizza 101: Essential Tips for Success
Over the past three years, our quest for the perfect homemade pizza has involved making dozens of pies, meticulously refining different methods suitable for home use. Our friends eagerly joined in, sharing notes and sampling each other’s creations, turning every pizza night into a fun, collaborative experiment. In our experience, the most crucial—and sometimes most challenging—element to master is achieving a good rise in your dough. Factors like ambient temperature can play a significant role. We’ve successfully made pizzas in all temperatures, year-round, from the mild winters of Los Angeles to its warmer spells.
For those cooler months, when your kitchen might not be warm enough for optimal proofing, here’s a foolproof tip: I gently warm my oven to its lowest setting, usually around 175 degrees Fahrenheit, and then turn it off. I then place the covered dough bowl on the stovetop, allowing the residual warmth from the oven to create the ideal cozy environment. This gentle warmth consistently helps the pizza dough achieve that beautiful, sufficient rise, setting the stage for a light and airy crust. Embracing these small adjustments ensures your dough will be perfectly primed, regardless of the weather outside.
Choosing the Best Flour for Your Homemade Pizza Dough
When it comes to homemade pizza dough, the choice of flour significantly impacts the final texture and flavor of your crust. The two most commonly accessible types of flour for home bakers are all-purpose flour and bread flour. If you’ve delved deeper into pizza recipes, you might have encountered “00 flour.” This ultra-fine Italian flour is renowned for producing a soft, pliable, and tender Neapolitan-style pizza with a delicate crumb. The main considerations for 00 flour are its sometimes higher cost, occasional difficulty to source, and its unique handling characteristics, which can be a bit trickier for beginners, especially during stretching. It also typically requires a longer, 12-24 hour rise. Is it worth it? Absolutely, for a truly authentic Neapolitan experience.
Regardless of the type, I always encourage buying the best quality flour you can afford. For me, that’s King Arthur Flour across all three types. This isn’t an advertisement; I genuinely believe their quality is superior and it’s widely available in most major supermarkets and superstores like Target. A crucial note: always ensure your flour is fresh and not expired for the best results; fresh flour makes a noticeable difference!
So, what exactly is the difference between these flours? It all comes down to their gluten content. Bread flour boasts the highest gluten content at 13-14%, followed by 00 flour at approximately 12%, and all-purpose flour ranging from 8-11%. Why does gluten content matter? Simply put, the more gluten, the chewier the crust. This allows you to customize your flour choice based on your desired pizza style. For our Perfect All-Purpose Pizza Dough recipe, which aims for a delicious thin crust with the right balance of chewiness and quick cooking, I’ve found a combination of bread flour and all-purpose flour yields outstanding results. This blend creates an ideal texture, cooks beautifully, and is wonderfully easy to handle and stretch.

Exploring Different Types of Pizza Crusts
When it comes to pizza, personal preference reigns supreme! Most of us have a deeply ingrained love for a particular style, rarely straying from our favorite crust. For me, it’s typically a thinner crust – but not *too* thin. I appreciate a crust that can robustly support a generous amount of sauce, cheese, and toppings, which is precisely why this is our **perfect all-purpose pizza dough recipe**. I also prefer a crust that doesn’t taste like plain bread. If you’re still exploring your pizza profile, here are brief descriptions of some beloved styles we enjoy across the United States, offering a taste of the diverse world of pizza crusts.
Thin-Crust Pizza Variations
- Neapolitan: This is the thinnest of the thin, characterized by a delicate, slightly charred crust cooked rapidly at extremely high temperatures, often in a wood-fired oven. The classic Margherita Pizza is the quintessential example.
- New York Style: Famous for its large, foldable slices, a wide, puffed edge, and a generous application of sauce and cheese with lighter toppings. It bakes at a slightly lower temperature, resulting in a more pliable crust. This is my personal favorite!
- St. Louis Style: Distinctively cracker-thin and made without yeast, this pizza offers a crisp texture. When served, it’s traditionally cut into square wedges, famously known as a “tavern cut.”
Thick-Crust Pizza Variations
- Sicilian: A beautifully thick, approximately 1-inch crust, often rectangular, providing a hearty base for numerous toppings. Its texture is more bread-like, offering a substantial bite.
- Detroit: If you know, you know. This is truly a unique masterpiece! Rectangular with a thick, airy, and chewy crust, it’s famous for its “reverse engineering” of toppings, where cheese often goes edge-to-edge directly on the dough before the sauce, creating a caramelized, crispy cheese crust.
- Chicago Deep Dish: The thickest of the thick, sometimes up to 2 inches deep. Baked in an oiled cast iron or dark steel pan, this pizza is loaded with toppings, which are often added in reverse order (cheese first, then toppings, then sauce) to prevent the cheese from burning during its longer cooking time.
- Pan Pizza: Popularized by chains like Pizza Hut, this style is baked in a dark, deep pan, resulting in a delightfully crisp, golden bottom and a fluffy interior. It’s a perfect cast iron pizza option for the home baker seeking a satisfyingly thick crust.
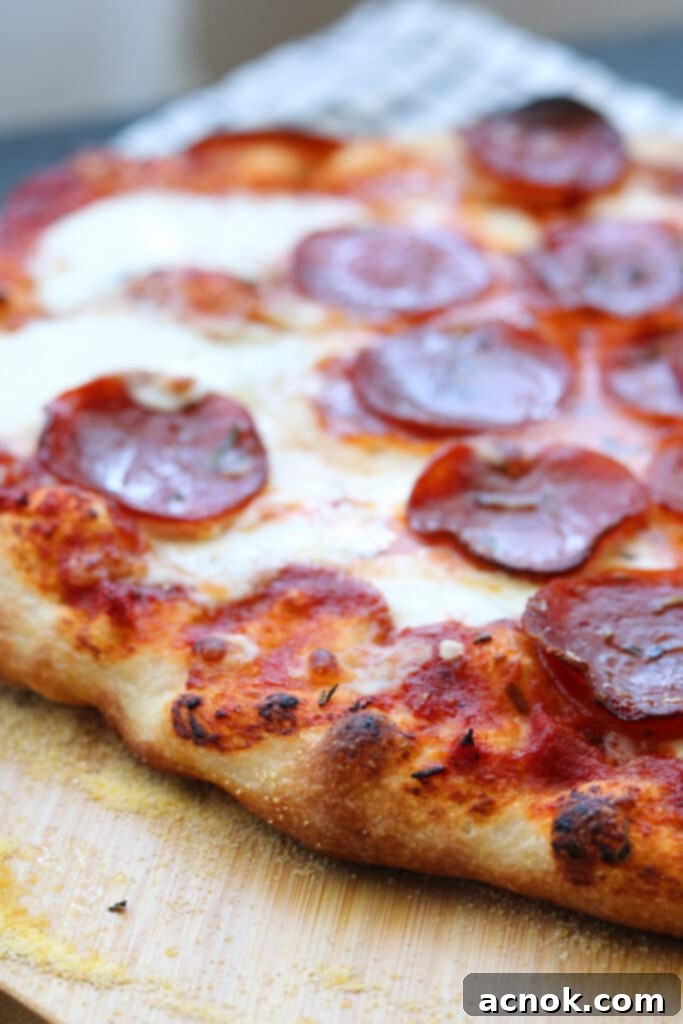
Recommendations for Achieving the Best Homemade Pizza Crust
Once you experience the joy and incredible flavor of baking your own homemade pizza using this **Perfect All-Purpose Pizza Dough recipe**, we guarantee you’ll be hooked. While it certainly doesn’t mean you’ll abandon your favorite local pizzerias, it provides a fantastic, fun, and delicious option for weekend gatherings with friends, family camping trips, or simply a spontaneous weeknight treat. The following list includes tools that can significantly enhance your pizza-making process and results, making it easier and more enjoyable. However, please note that these are recommendations, not necessities; you can still bake an excellent pizza with standard kitchen tools.
- **Pizza Stone**: Invest in a high-quality stone capable of withstanding temperatures up to 900 degrees Fahrenheit. It’s essential for achieving that beautifully crisp crust by drawing moisture from the dough and providing consistent, intense heat.
- **Pizza Peel**: This large, flat spatula is indispensable for safely transferring your pizza to and from a scorching hot oven, grill, or pizza stone. A well-floured peel ensures your pizza slides off smoothly without sticking.
- **Copper Mats**: An excellent alternative for both grills and conventional ovens (safe up to 500 degrees Fahrenheit). These mats are a fantastic choice for home ovens due to their non-stick properties and incredibly easy clean-up, preventing sticking without the need for excessive flour or cornmeal.
- **Gas Grill with Temperature Gauge**: A reliable gas grill offers excellent temperature control, crucial for consistent pizza baking, especially when aiming for a crispy crust.
- **Outdoor Grill Temperature Gauge (for Charcoal Grills)**: If you’re using a charcoal grill without a built-in thermometer, an external gauge is highly recommended. It allows you to accurately monitor and maintain optimal baking temperatures for your pizza.
- **Pizza Cutter**: A sharp, sturdy pizza cutter is a simple but essential tool for cleanly slicing your hot pizza without dragging toppings or tearing the crust.
- **Good Quality Flour**: As discussed, starting with fresh, high-quality flour is fundamental for superior dough and an ultimately delicious pizza.
Practical Methods for Baking Pizza at Home
For most home cooks, the most accessible and practical methods for baking pizza are either an outdoor gas grill or a conventional indoor oven. These two options offer excellent temperature control and ease of use, making them highly reliable for consistent, delicious results. A charcoal grill also works very well, providing a smoky flavor that many pizza enthusiasts adore, though it requires a bit more management for steady temperatures. My personal favorite methods for baking pizza at home are using a gas grill or my oven, always in combination with a preheated pizza stone. This combination consistently delivers beautifully cooked pies with the perfect crust texture.
How to Prepare Your Homemade Pizza Dough
This Perfect All-Purpose Pizza Dough recipe is specifically formulated to yield pizzas with a thinner, slightly crunchy crust. It’s important to note that this is not a thick, doughy pizza. If your preference leans towards a thicker, more bread-like crust, you might explore other excellent thick-crust pizza recipes available. A distinguishing feature of our recipe is the judicious use of yeast, which is notably less than what you’ll find in many other pizza dough recipes, contributing to its unique texture and faster rise. We believe this balance results in a superior crust. The original recipe often suggests bread flour exclusively, but through our testing, we’ve found that a thoughtful combination of both bread flour and all-purpose flour works exceptionally well, creating the ideal texture and manageability.
- **Equipment:**
- 2 large bowls: one for mixing the dough and one for resting (proofing).
- Stand mixer with dough hook (optional, for easier kneading).
- Quick-read thermometer (for water temperature).
- **Ingredients:**
- 3 cups unbleached bread flour (spooned into a dry measuring cup and leveled with a knife)
- 2 cups unbleached all-purpose flour (spooned into a dry measuring cup and leveled with a knife) + approximately 1/2 cup extra for flouring your kneading surface.
- 1 teaspoon active dry yeast (Fleischmann’s is our preferred brand for reliability).
- 1 tablespoon white sugar (or honey, for an alternative sweetener).
- 1 tablespoon Kosher salt (or 2 teaspoons of table salt/sea salt for a finer grain).
- 1 3/4 cup warm water (ideally between 110-115°F, checked with a thermometer to activate yeast without killing it).
- 2 tablespoons extra virgin olive oil + 1 tablespoon to lightly coat the bottom and sides of a large bowl.
- Optional for crust flavor: 1 tablespoon olive oil and 1 teaspoon dried Italian herbs for brushing onto the dough before adding sauce.
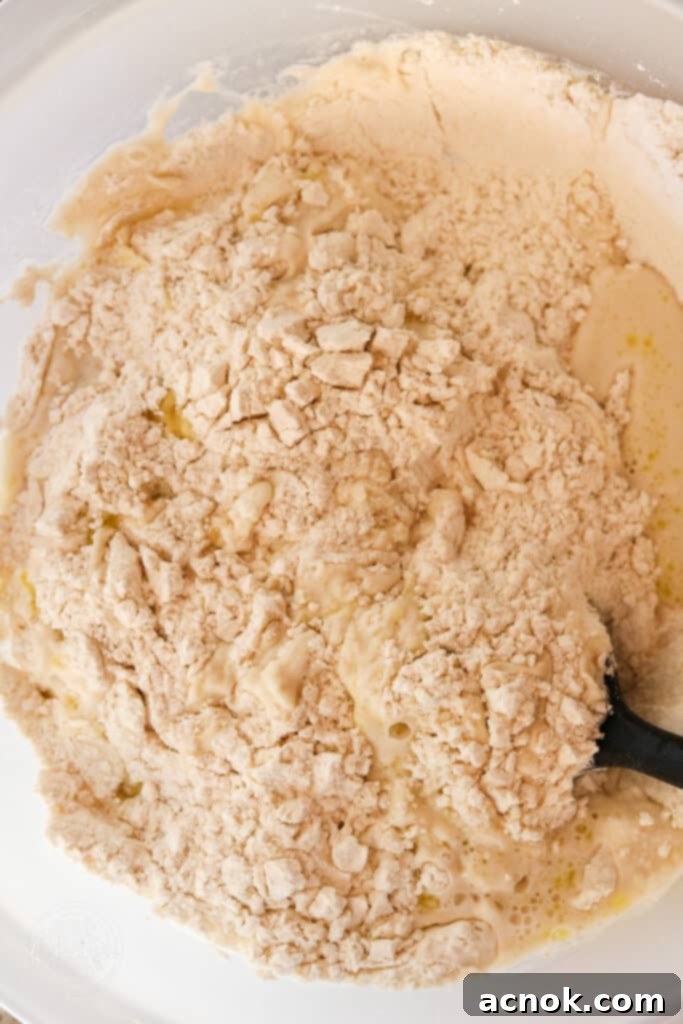
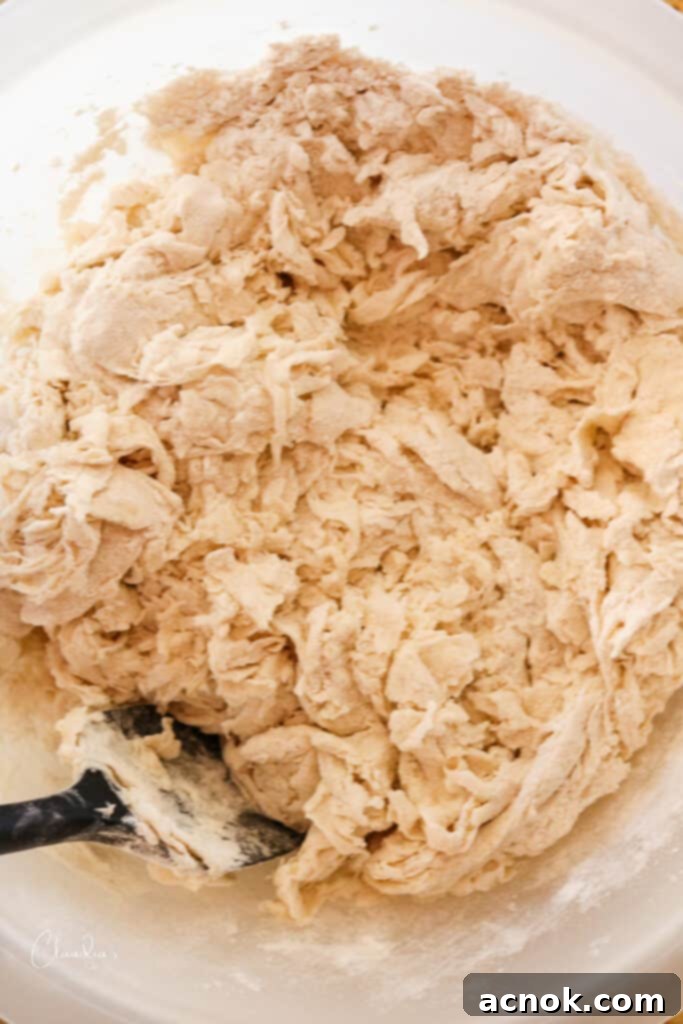
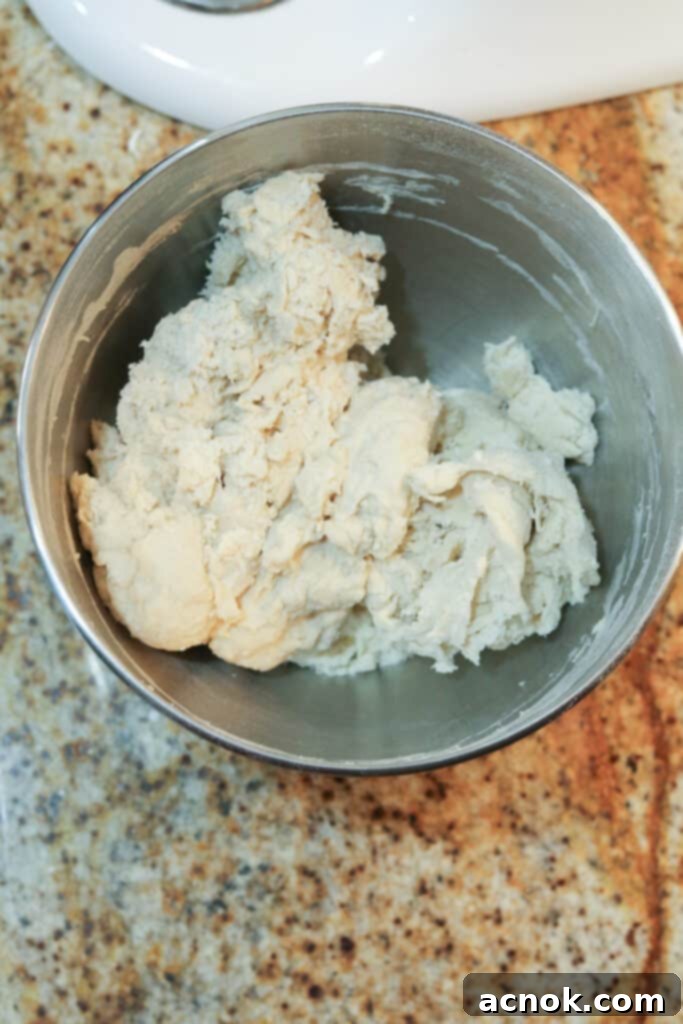
In your large mixing bowl, thoroughly combine the measured flours, yeast, sugar, and salt using a whisk until all dry ingredients are evenly distributed. Next, pour in the warm water and the 2 tablespoons of extra virgin olive oil. Mix these wet ingredients into the dry with a sturdy wooden spoon until they are just combined. At this stage, the mixture will appear shaggy and somewhat rough, with some loose flour at the bottom – don’t worry, this is exactly the correct consistency and part of the process for forming a great dough.
Now, prepare your second large bowl by adding 1 tablespoon of olive oil. Ensure the entire bottom and sides of the bowl are lightly coated with the oil to prevent sticking during proofing. Set this aside. If you plan to knead by hand, generously sprinkle extra flour onto a clean, dry kneading surface. If using a stand mixer, you can skip this step for now.
Kneading Pizza Dough by Hand
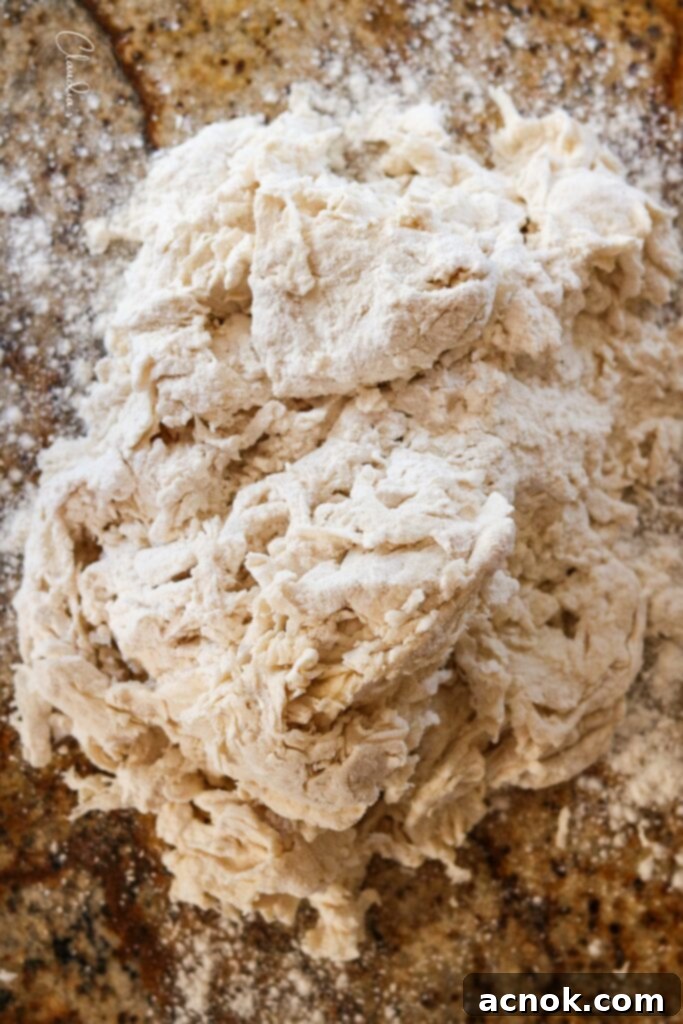
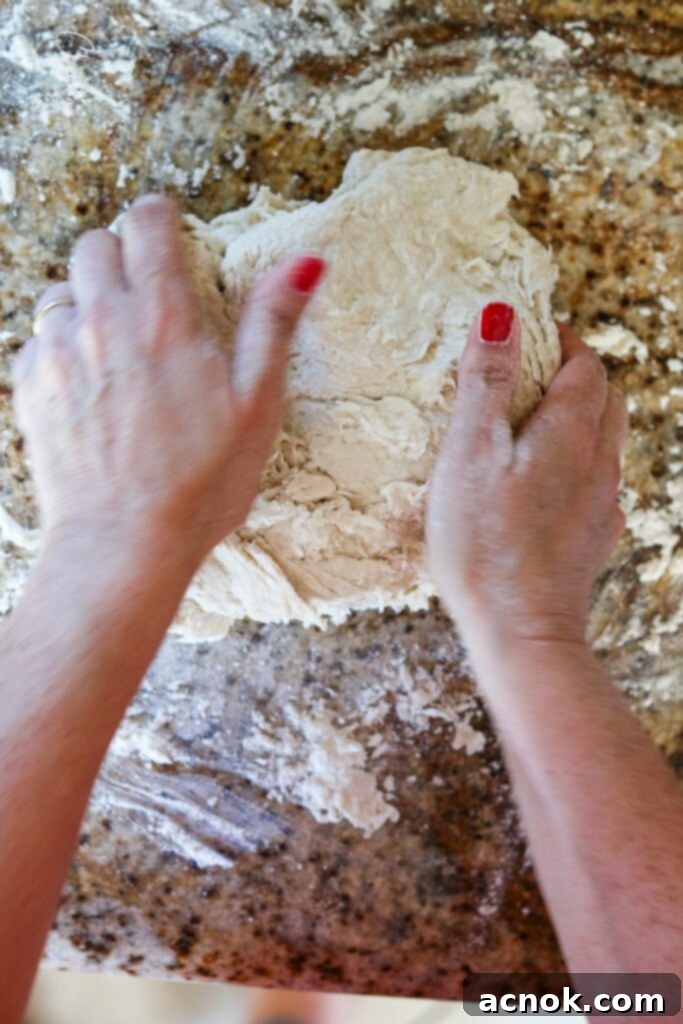
Transfer the shaggy dough mixture from your bowl directly onto your generously floured surface. Begin to knead the dough by hand, using a rhythmic push, fold, and turn motion. Continue kneading for 4-5 minutes. Within about a minute or two of kneading, you’ll notice the dough begin to transform, becoming progressively smoother, more elastic, and less sticky. Once it reaches this smooth and pliable consistency after the full 4-5 minutes, gently form the dough into a cohesive ball. Place this dough ball into the second, pre-oiled bowl, turning it once or twice to ensure both sides are lightly coated in oil. Tightly cover the bowl with plastic wrap and place it in a warm, draft-free area to rest and rise for 2 hours.
TIP: If your home feels particularly cool or drafty, don’t despair! You can create a perfect warm environment by turning your oven on to its lowest setting (around 175 degrees Fahrenheit) for a few minutes, then turning it off. Place your covered dough bowl on top of the stove to benefit from the residual warmth, which will significantly aid in the dough’s rise.
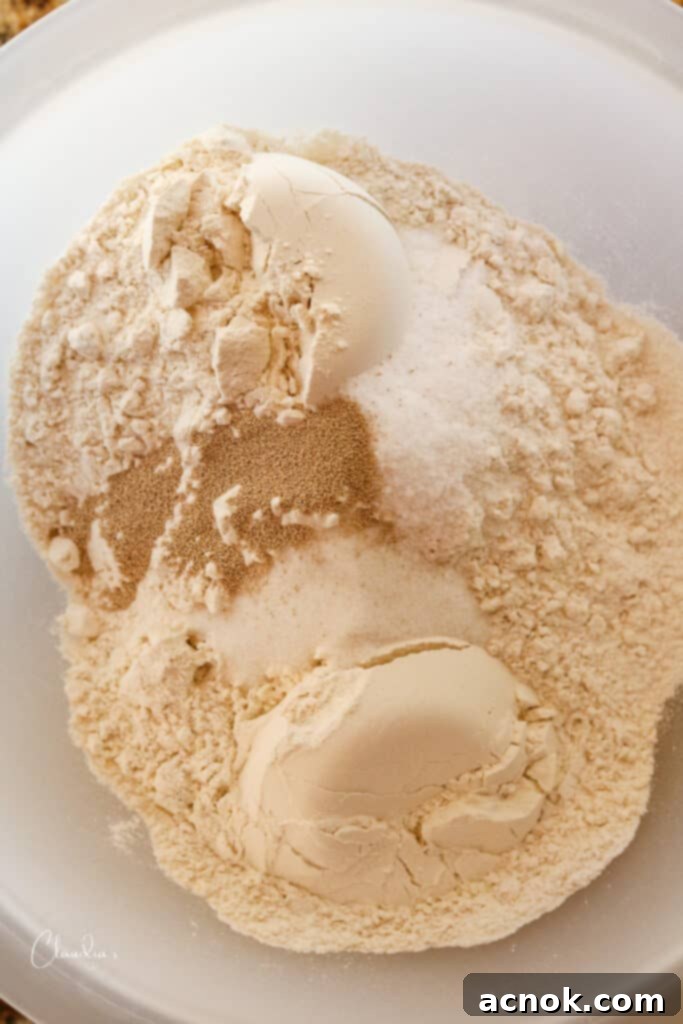
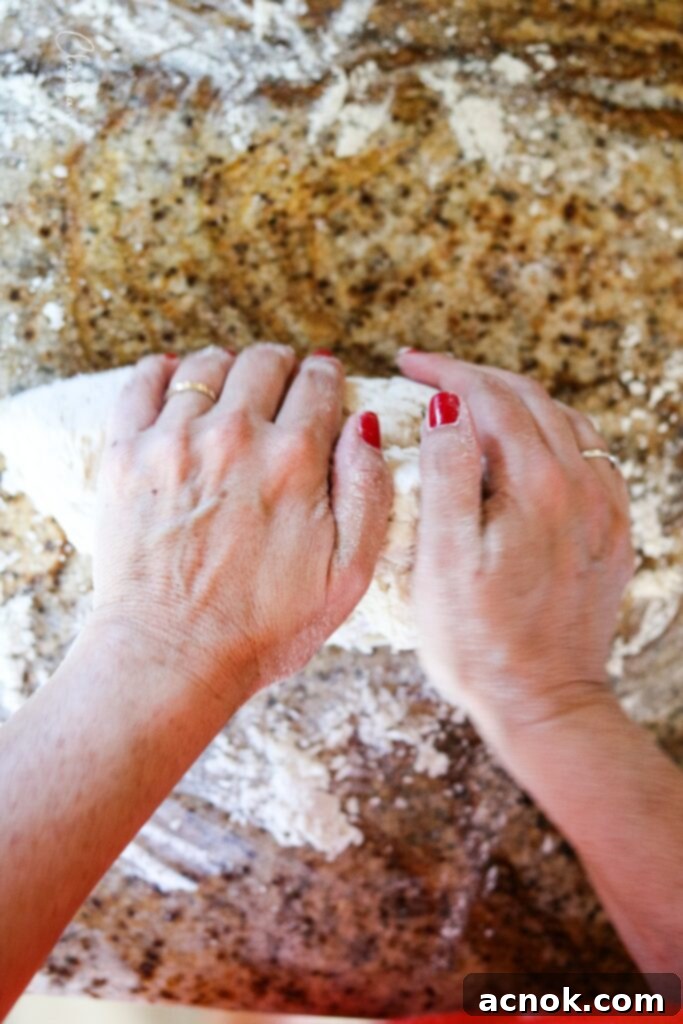
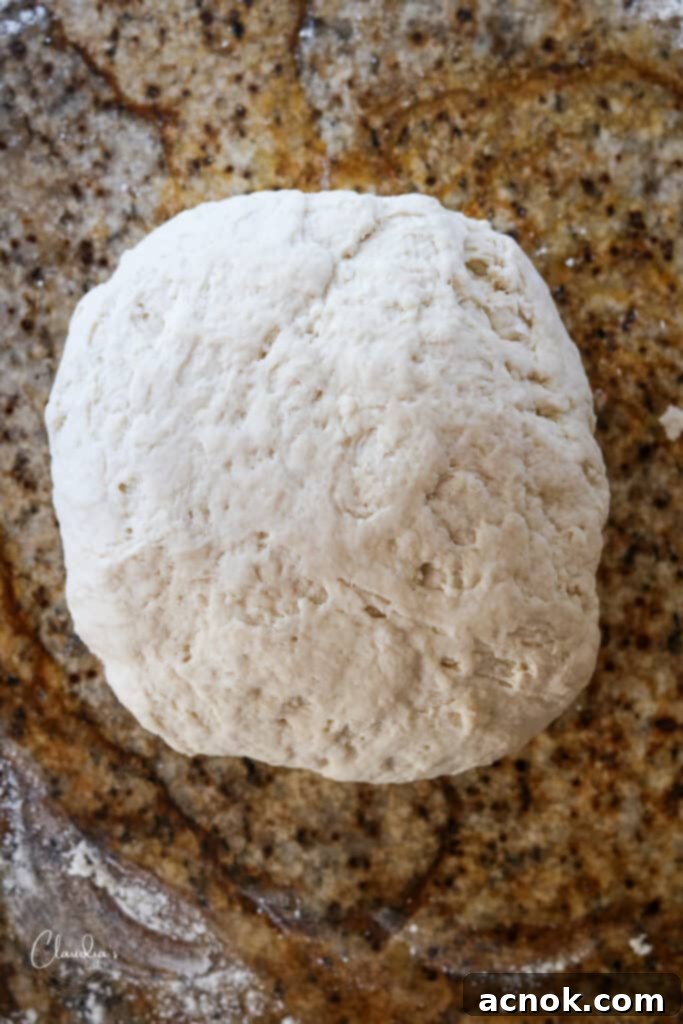
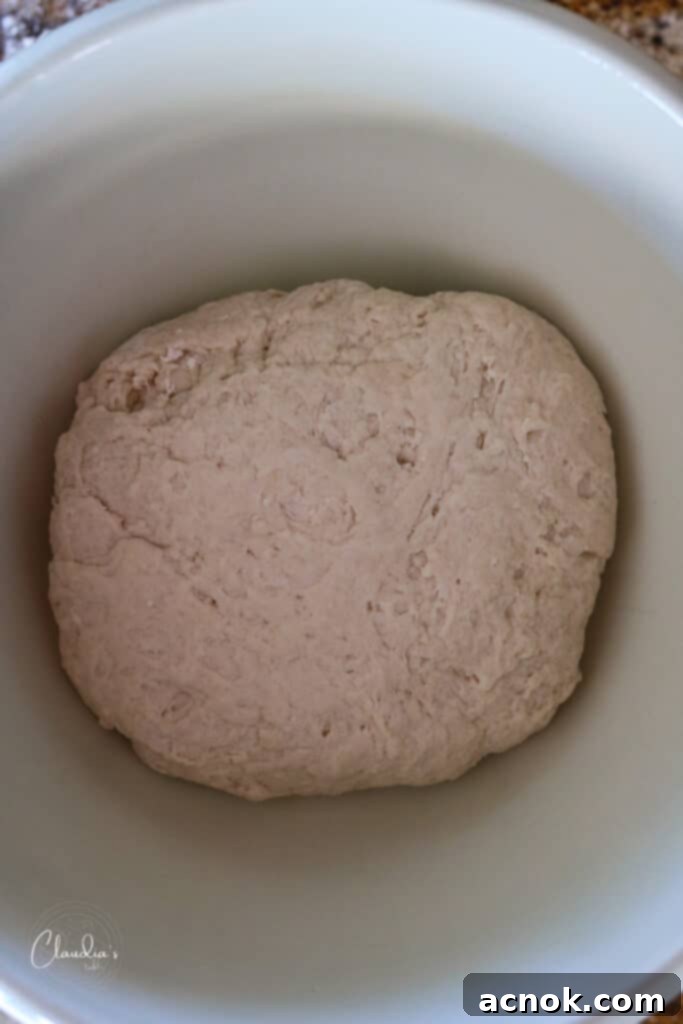
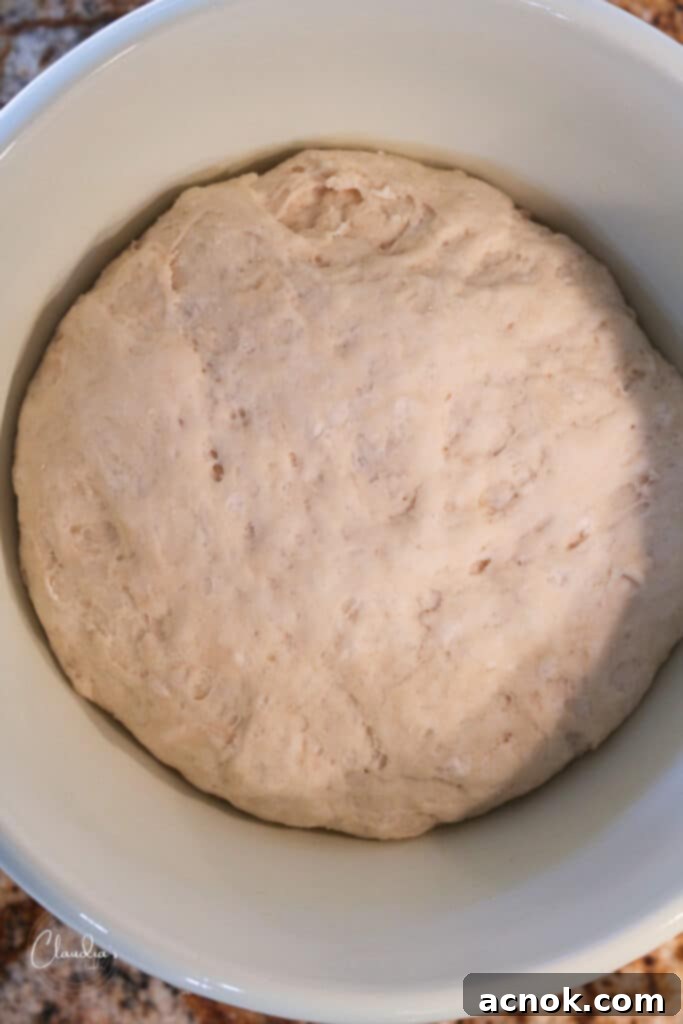
How to Knead Pizza Dough with a Stand Mixer
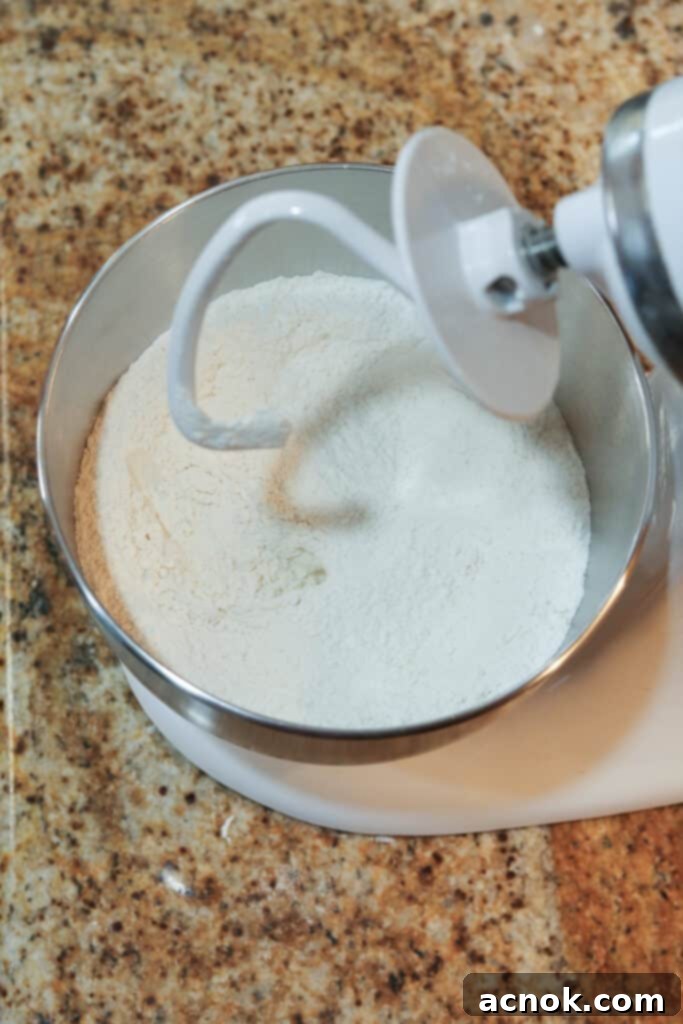
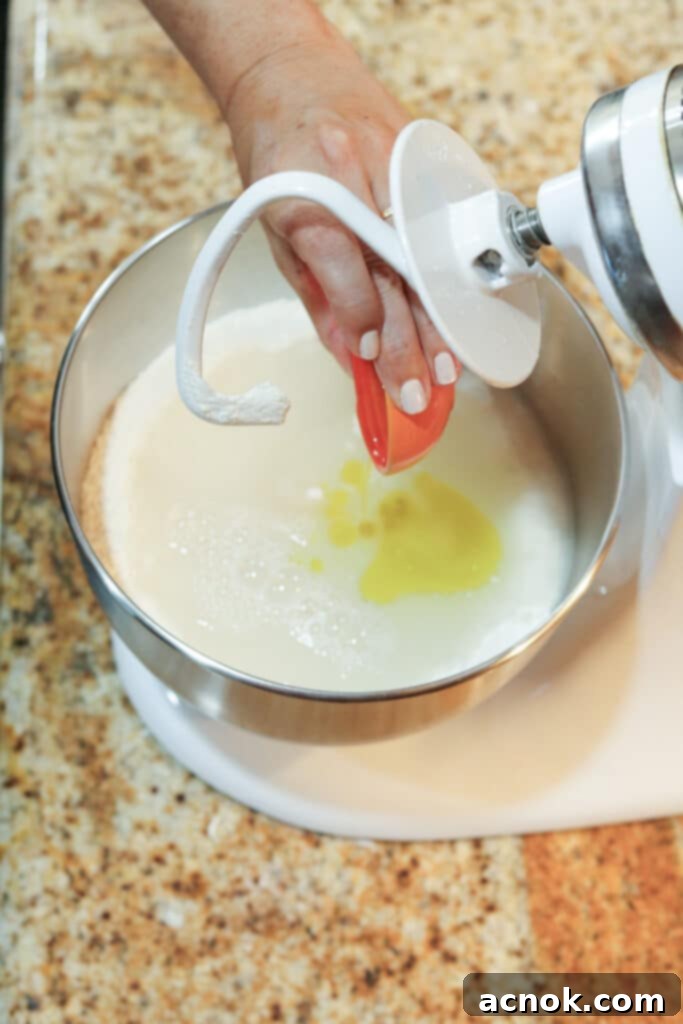
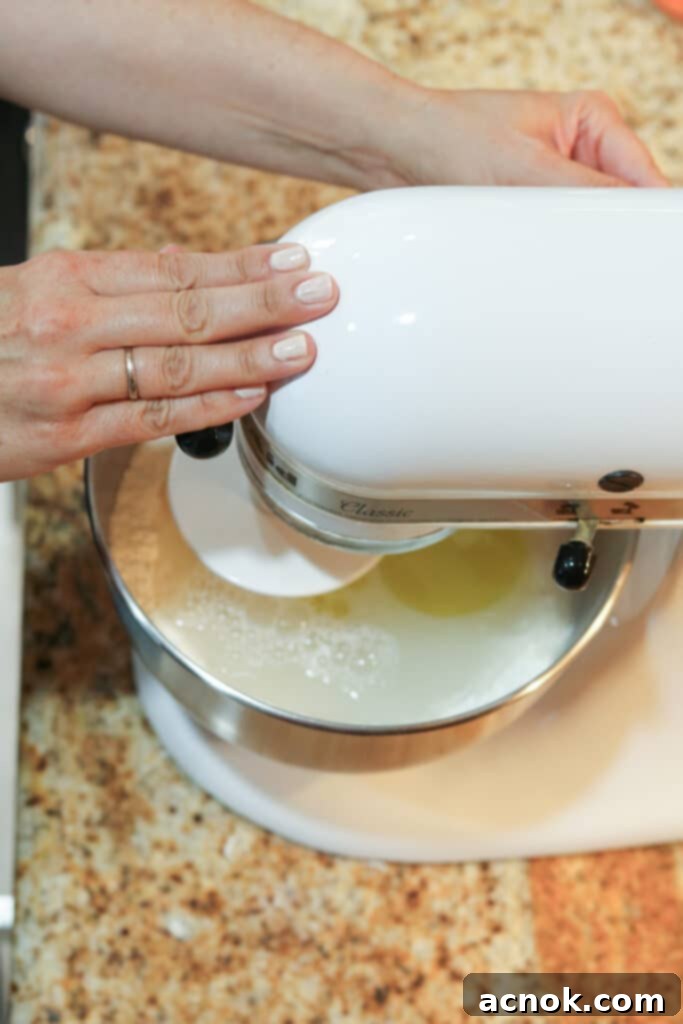
For a hands-off approach, your stand mixer is an invaluable tool. Begin by adding all the measured flours, yeast, sugar, and salt directly into the stand mixer bowl. Attach the dough hook. Gently mix these dry ingredients on a low power level (around 1 or 2) for approximately 30 seconds to ensure they are well combined. Next, pour in the warm water and the extra virgin olive oil. Increase the mixer speed slightly to power level 2 and continue mixing until the ingredients are thoroughly incorporated, which should take about 30 seconds to 1 minute.
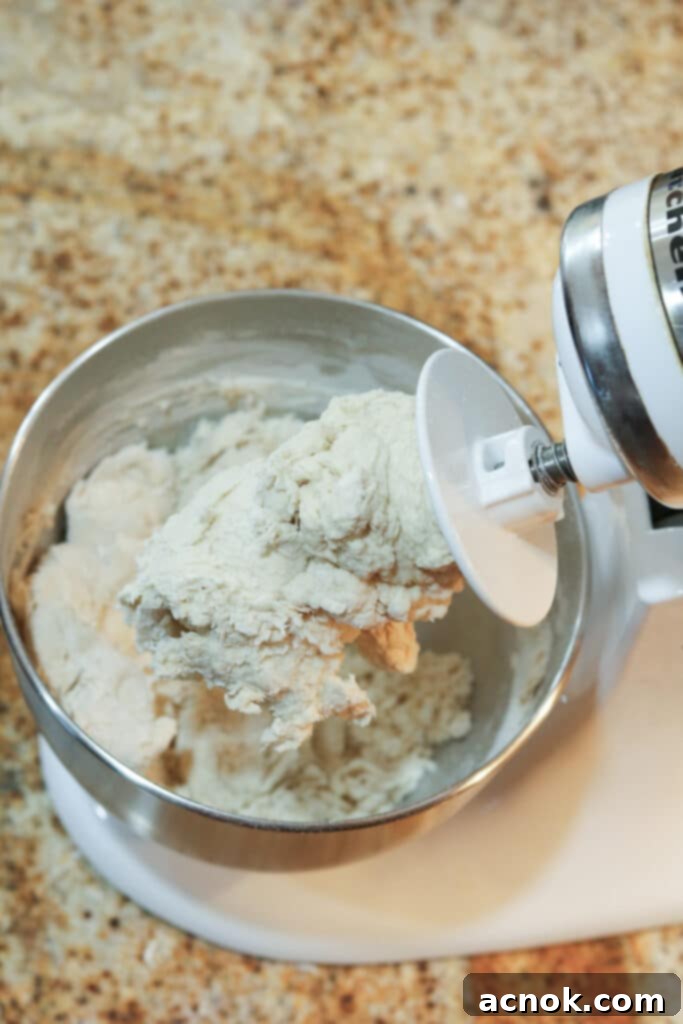
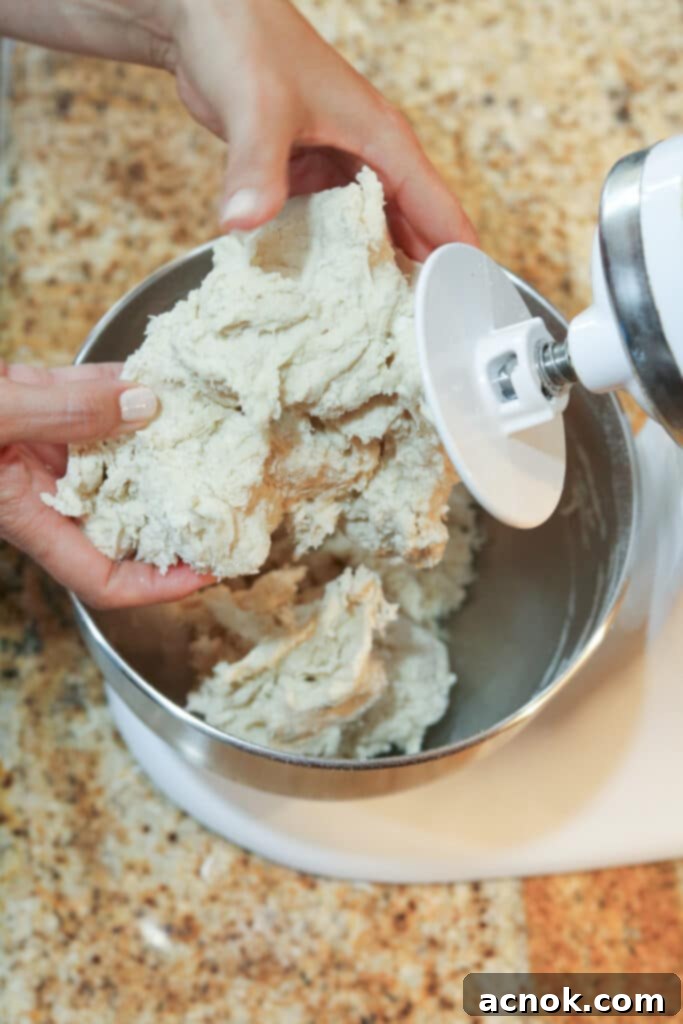
At this point, the dough mixture will still appear shaggy and somewhat rough, with some flour potentially clinging to the bottom of the bowl – this is perfectly normal and correct. Continue to “knead” the dough mixture on power level 2 for an additional 2-3 minutes. During this time, the dough will start to come together, though it might still look shaggy or occasionally stick to the dough hook. If it becomes too sticky and wraps around the hook excessively, simply turn off the mixer, carefully remove the dough from the attachment, and resume kneading until the full 2-3 minutes are complete. Once kneading is finished, remove the dough, shape it into a smooth ball, and place it in your prepared oiled bowl, turning to coat both sides. Cover the bowl tightly with plastic wrap and allow it to rise in a warm, draft-free area for 2 hours.
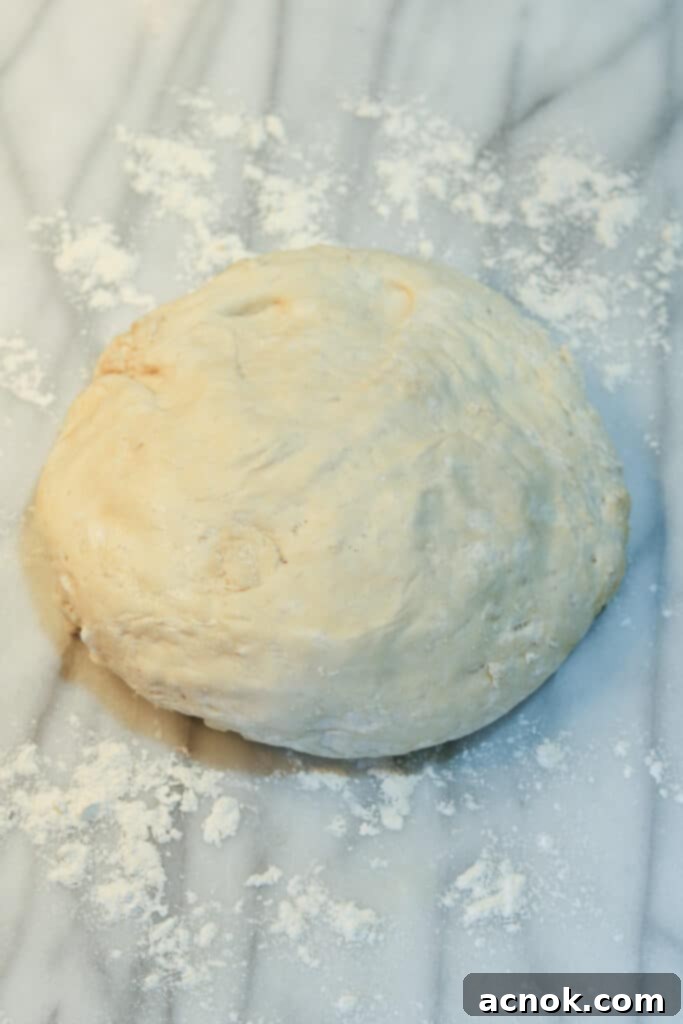
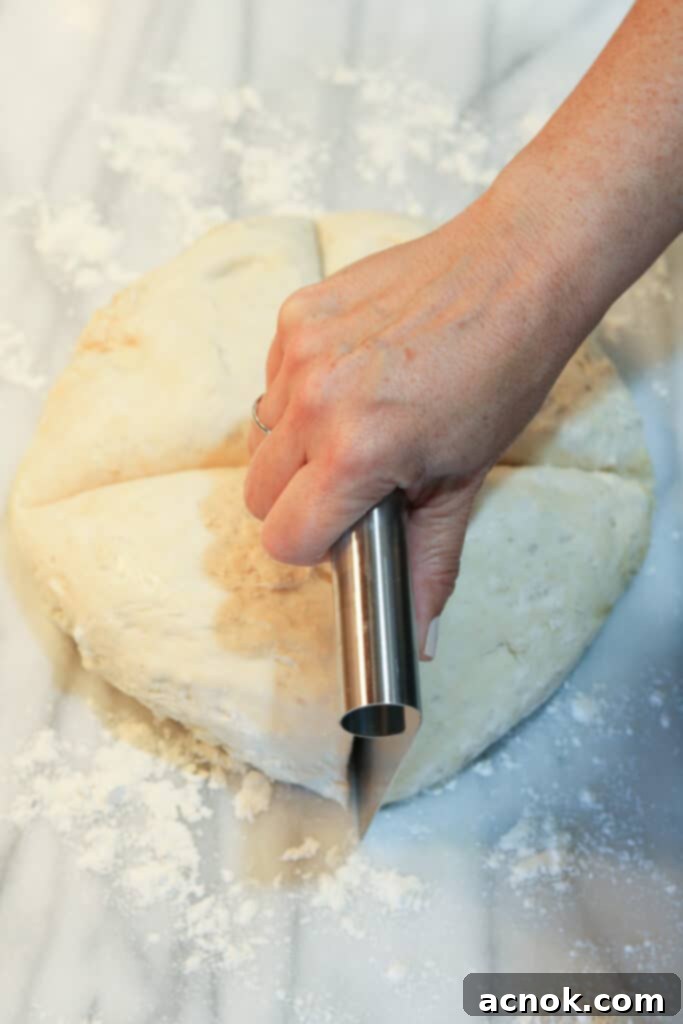
After the two-hour rise, your dough should have noticeably increased in size and be soft and airy. Carefully turn the risen dough out onto a lightly floured surface. Divide the dough into 4 equal-sized portions. Gently form each portion into a smooth ball. Place these dough balls back into the bowl (or onto a lightly floured tray) and allow them to continue resting while you preheat your oven or grill. This brief second rest helps the gluten relax, making the dough easier to stretch.
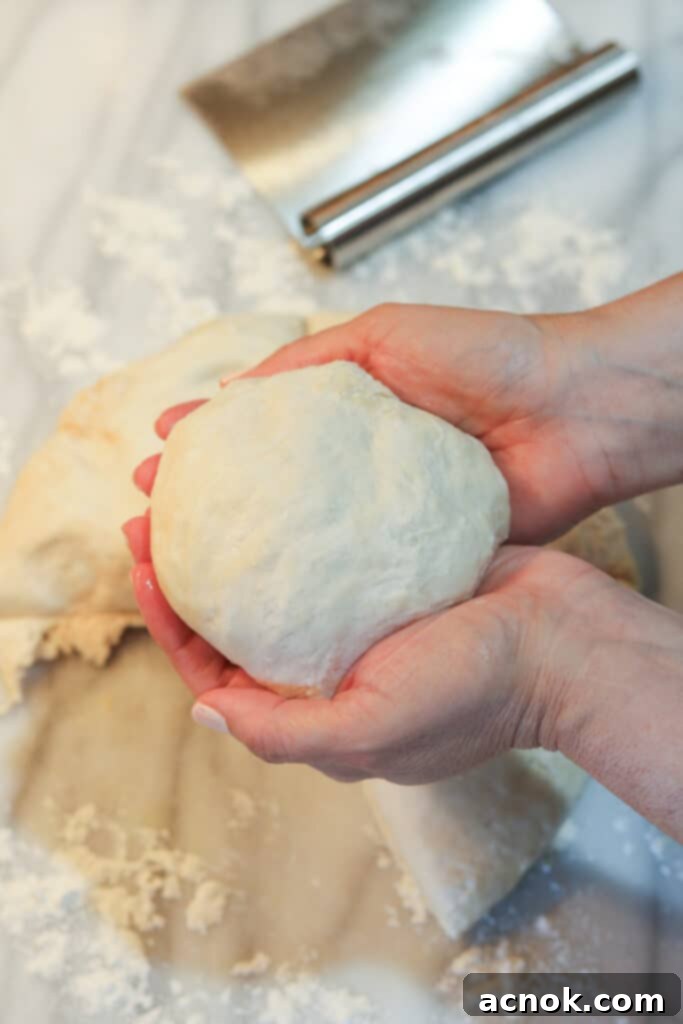
How to Stretch Pizza Dough Like a Pro
One of the aspects we love most about this Perfect All-Purpose Pizza Dough recipe is its exceptional ease of handling. Unlike some specialized flours, like 00 flour, which can produce a fantastic crust but be notoriously difficult to stretch, our blend offers a beautifully even and manageable stretch. This makes it significantly easier to achieve your desired shape and seamlessly transfer it onto your pizza stone or baking surface. Remember, achieving a perfectly round pizza comes with practice, and embracing the learning process is all part of the fun of homemade pizza!
- Start by placing one dough ball on a well-floured surface. Begin pressing the dough gently from the center outwards with your fingertips, creating a small, flattened disc. Rotate the dough as you press to maintain an even shape.
- To continue stretching and enlarge the dough, I find using gravity to be very effective. Carefully pick up the dough, holding it by the edges in front of you, and let its weight gently pull and stretch it downwards. Continuously rotate the dough, allowing gravity to work its magic and prevent any single area from becoming too thin.
- As you stretch the dough, consciously aim for a consistent thickness across the entire circle. This uniformity is crucial for even baking, preventing some parts from being undercooked or over-crispy while others are perfect.
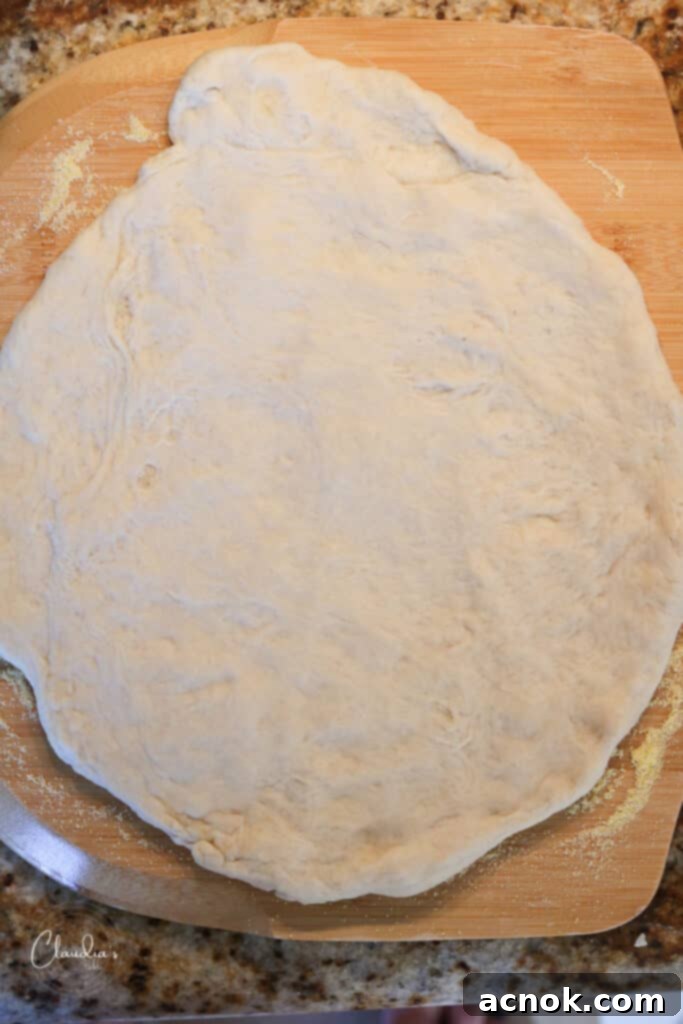
- Once you’ve achieved a significant stretch using gravity, place the dough back on your floured surface. Continue to gently pull and stretch the edges and center until you reach a desired circle of about 10-12 inches in diameter. Don’t worry if it’s not perfectly round; rustic shapes are charmingly homemade!
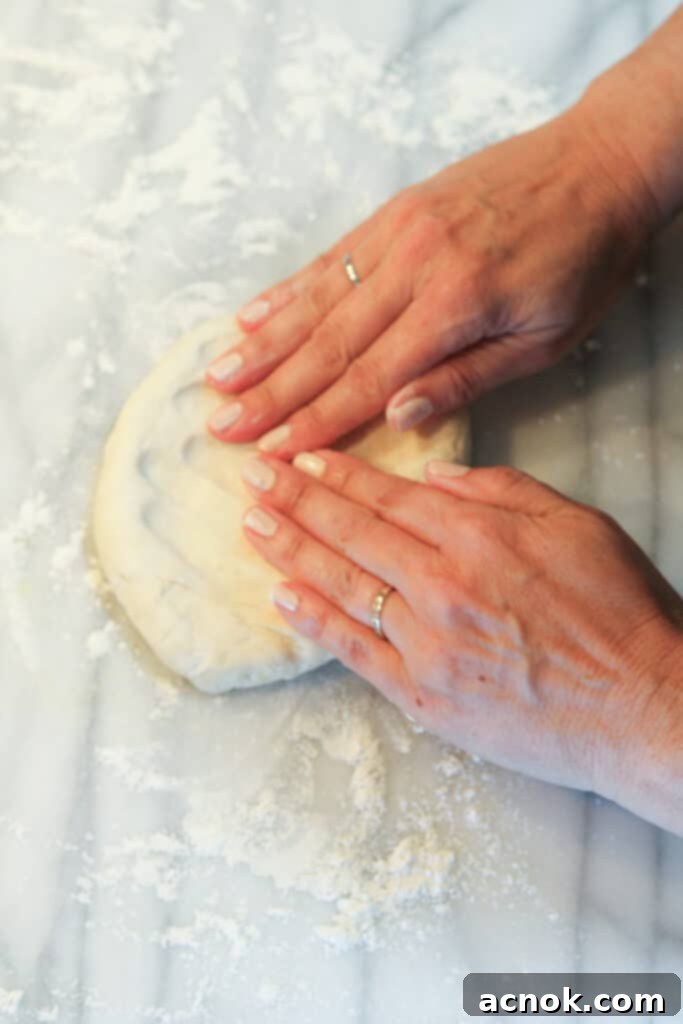
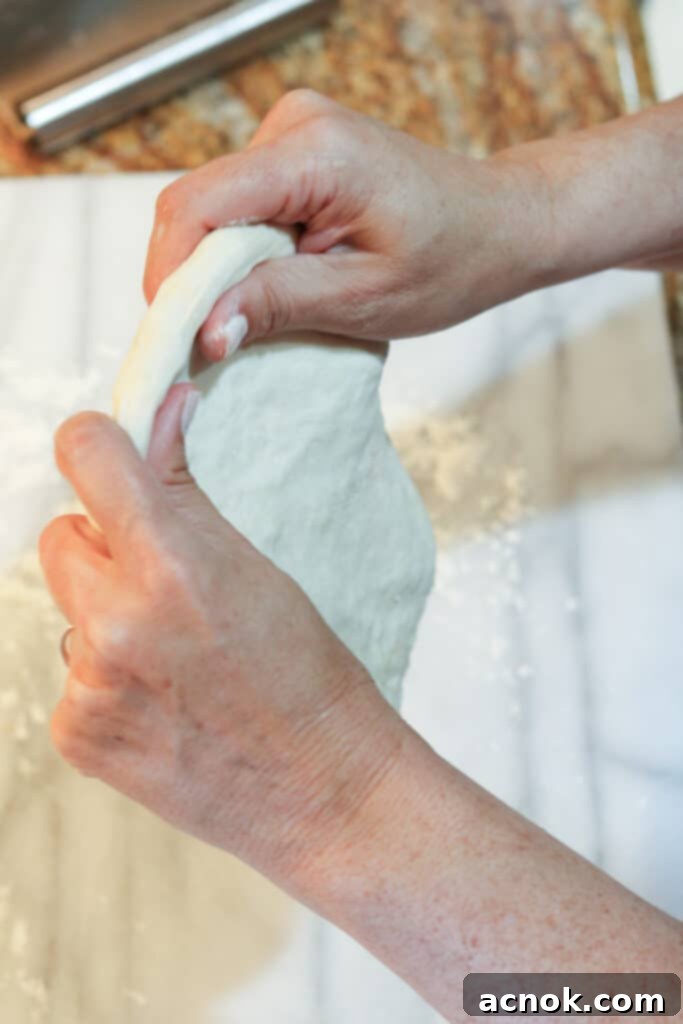
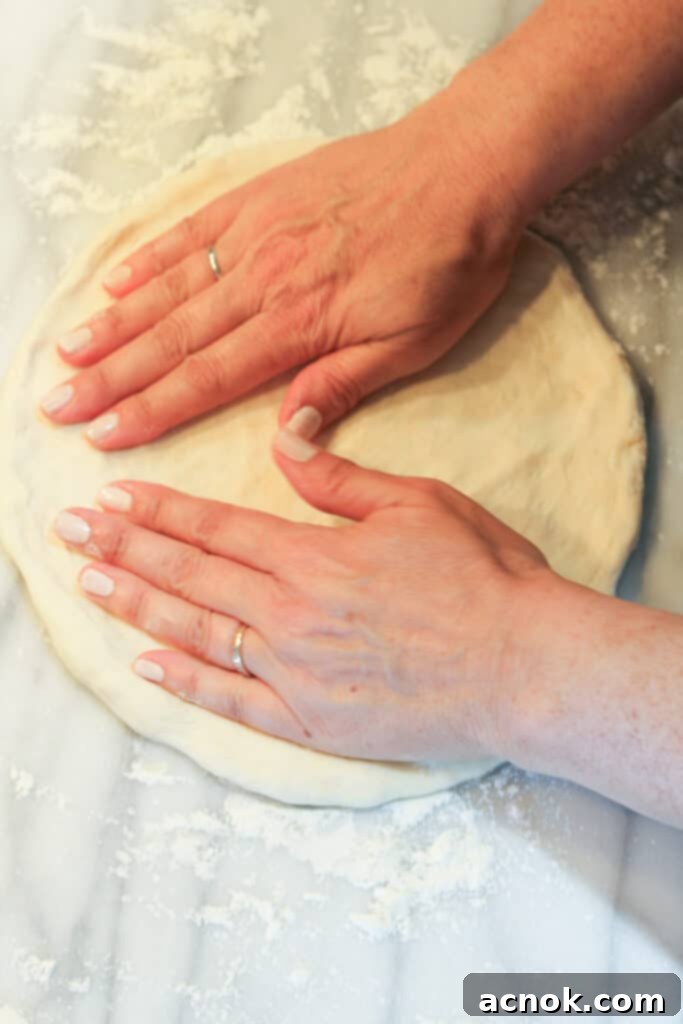
How to Assemble Your Pizza for Baking
Once your dough is perfectly stretched, it’s time to bring your pizza to life with your favorite toppings! A crucial first step for easy transfer to a hot cooking surface is proper preparation of your pizza peel or baking sheet.
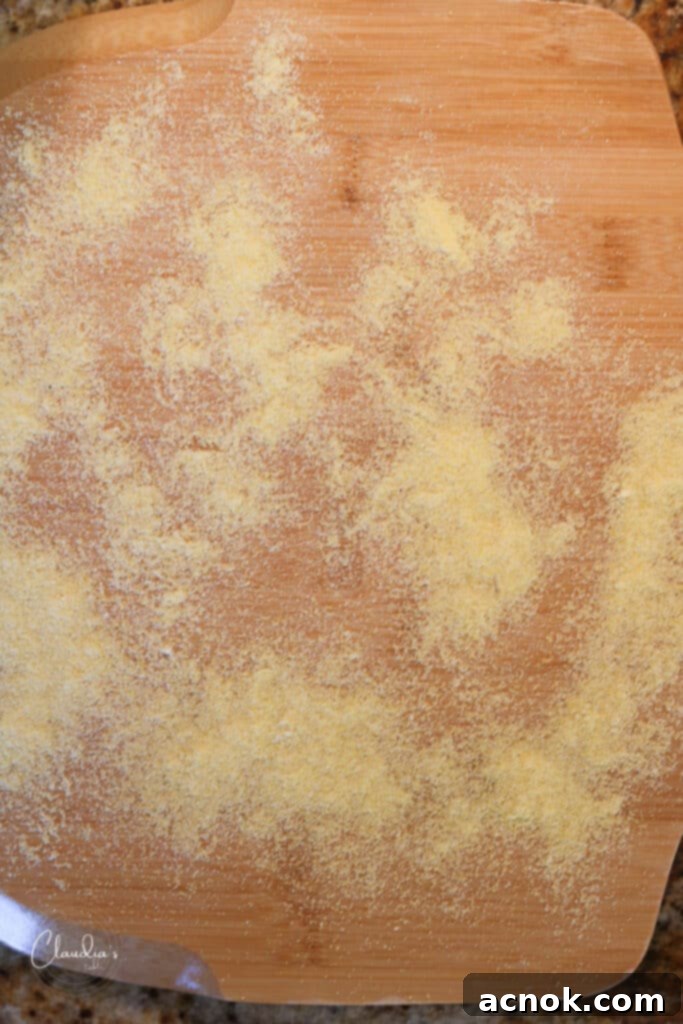
- Generously sprinkle your pizza peel or a flat cookie sheet with cornmeal. This acts as tiny ball bearings, allowing the dough to slide effortlessly off the peel onto the hot surface.
- Carefully lay your stretched pizza dough onto the cornmeal-dusted pizza peel.
- **Optional step for enhanced flavor:** Lightly brush the dough with a small amount of olive oil and sprinkle with dried Italian herbs. This adds an extra layer of aroma and a subtle savory note to your crust.
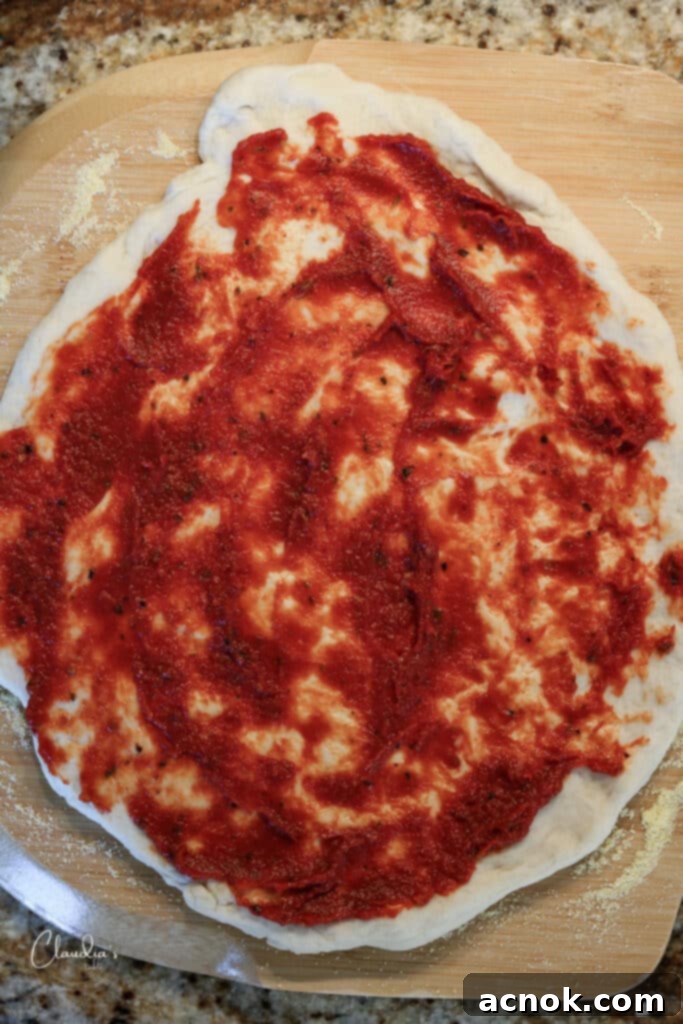
- Spoon approximately 1/2 cup of your chosen pizza sauce onto the dough, spreading it evenly but leaving a small border for the crust.
- Finally, top with your favorite cheeses and other delicious toppings. Remember not to overload the pizza; a balanced amount ensures even cooking and prevents a soggy center.
Suggested Toppings for Your Homemade Pizza
An truly excellent homemade pizza begins with a superb crust, but it’s equally dependent on a fantastic sauce. Luckily, we have you covered: our Rich and Zesty Pizza Sauce is the perfect companion. This sauce truly checks all the boxes – it’s incredibly flavorful, boasts a desirable thickness, offers a delightful zest, and is bursting with rich taste. Its perfect consistency ensures it holds your toppings beautifully without making your crust watery or soggy, which is crucial for a crisp, well-baked pie. We highly recommend either making your own pizza sauce from scratch or purchasing a high-quality, dedicated pizza sauce, as its texture and spice profile are specifically formulated for pizza, differing significantly from standard pasta sauce.
So, what are my personal favorite ways to top a pizza? A classic combination I adore features savory pepperoni, briny olives, earthy mushrooms, and creamy fresh mozzarella. Once baked, I love to finish it with a sprinkle of freshly grated Parmesan cheese. However, I must admit, my current obsession is the unique and vibrant Chorizo, Shrimp & Corn Pizza with Roasted Jalapeño Cilantro Pesto and Manchego (pictured below). The sky truly is the limit when it comes to toppings, but here’s one golden rule: don’t overload your pizza. Too many toppings can prevent even cooking and lead to a less than ideal crust. For vegetables like peppers or onions, I recommend thinly slicing them and, if desired, lightly sautéing them first to ensure they are almost cooked through before adding them to the pizza. This pre-cooking step guarantees they soften beautifully without releasing too much moisture onto your crust during the quick bake.

These thin-crust pizzas cook incredibly fast, typically between 1 and 15 minutes, depending on your chosen baking method. Yes, it can be as quick as one minute for those fortunate enough to own high-temperature pizza ovens like the Gozney Roccbox or Ooni, which reach extreme temperatures.
Optimal Cooking Times for Homemade Pizza
To help you achieve the perfect bake, we’ve compiled a list of suggested cooking times for various homemade pizza scenarios. Please remember that every oven and grill varies slightly in heat output and consistency, so these times are a guide. Always keep a close eye on your pizza, as it can go from perfectly golden to slightly overdone very quickly, especially with thin crusts.
- **Outdoor Gas Grill with Pre-heated Pizza Stone:** 6-8 minutes (preheat grill to 600°F+ for 30 minutes with stone inside).
- **Charcoal Grill (e.g., Weber) with Pizza Stone:** 5-8 minutes (aim for 500-600°F, preheat for 30 minutes with stone inside).
- **Conventional Oven (500°F) with Pizza Stone:** 10-12 minutes (place stone in a cold oven, then preheat to 500°F for 15 minutes; bake on middle rack).
- **Conventional Oven (500°F) with Copper Mat:** 10-12 minutes (preheat oven to 500°F for 10 minutes; bake on the second to lowest rack).
- **Conventional Oven (475°F) with Cookie Sheet or Rimmed Baking Sheet:** 15-18 minutes (preheat oven for 10 minutes with sheet inside).
- **Gas or Wood-Burning Pizza Oven (e.g., Gozney Roccbox or Ooni):** 1-3 minutes (times vary significantly by brand; always follow manufacturer’s directions for optimal heat and cooking).
- **Directly on a Copper Mat on an Outdoor Gas Grill:** 8-10 minutes (target 500°F; *caution:* copper mats are generally not suggested for use over 500°F, so monitor temperature closely as heat can quickly rise with the grill lid closed).
- **Preheated Oven (500°F) using a Preheated Baking Steel/Sheet:** 7-10 minutes (preheat for 10 minutes).
- **Cast Iron Pan** **on an Outdoor Grill:** 10-12 minutes (preheat grill for 10 minutes, then place pan on grill to preheat before adding pizza).
*Important Note on Pizza Stones: Always place your pizza stone in a cold oven or grill to allow it to gradually preheat with the appliance. This prevents thermal shock that could crack the stone. Preheat for at least 15-30 minutes after reaching your target temperature to ensure the stone is thoroughly hot for a crispy crust.
How to Transfer Pizza from Peel to Cooking Surface
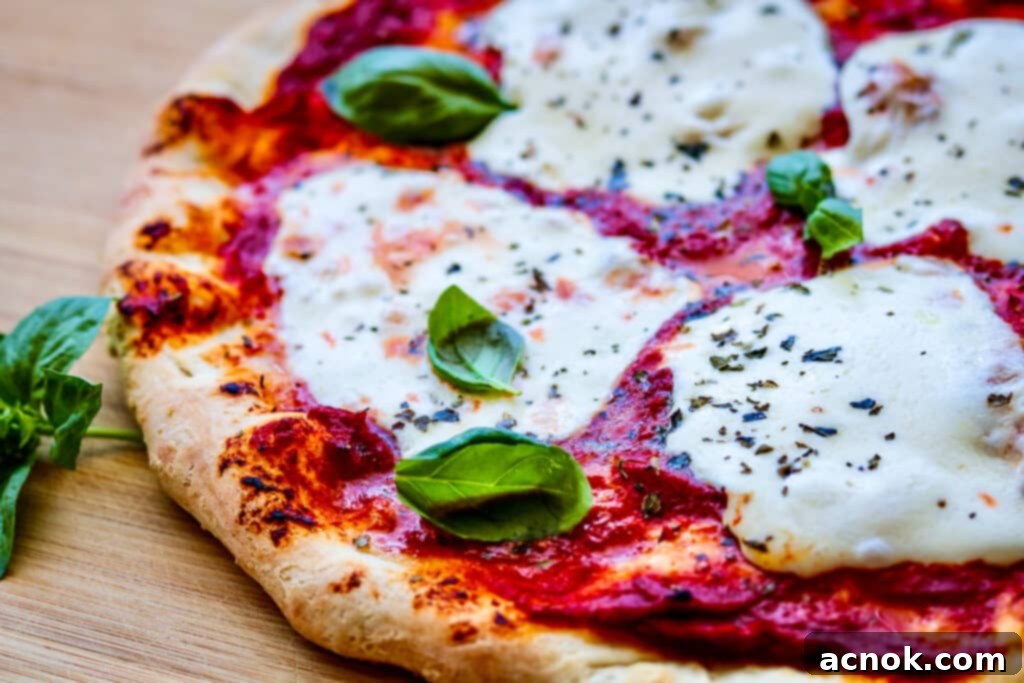
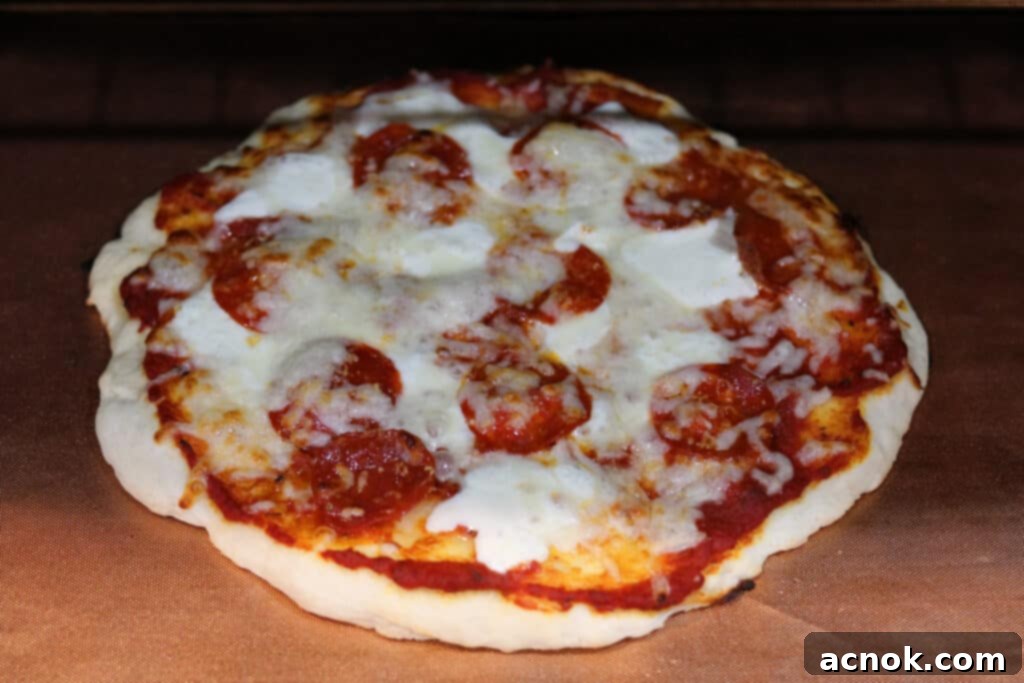
Once your dough is perfectly stretched and topped, the moment of truth arrives: transferring it to the hot cooking surface. If using a pizza peel, generously dust it with cornmeal before placing the dough. This creates a low-friction surface that allows the pizza to slide smoothly onto your pre-heated stone or grill. If you don’t have a specialized pizza peel, a flat cookie sheet with a generous dusting of cornmeal works as an excellent alternative. To release the pizza, place the front edge of the peel on the cooking surface, then with a quick, confident shimmy, pull the peel back, allowing the pizza to slide off. A thin metal spatula can be used gently to assist if needed. Your pizza is baked to perfection when the edges and crust are beautifully golden brown and the cheese is melted and bubbly.
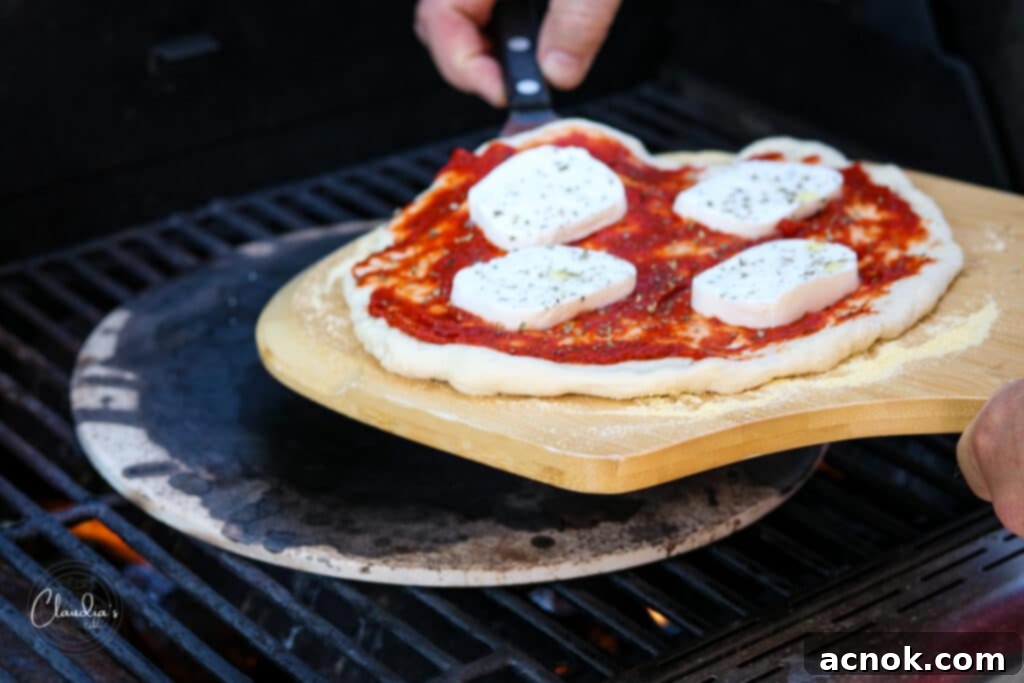
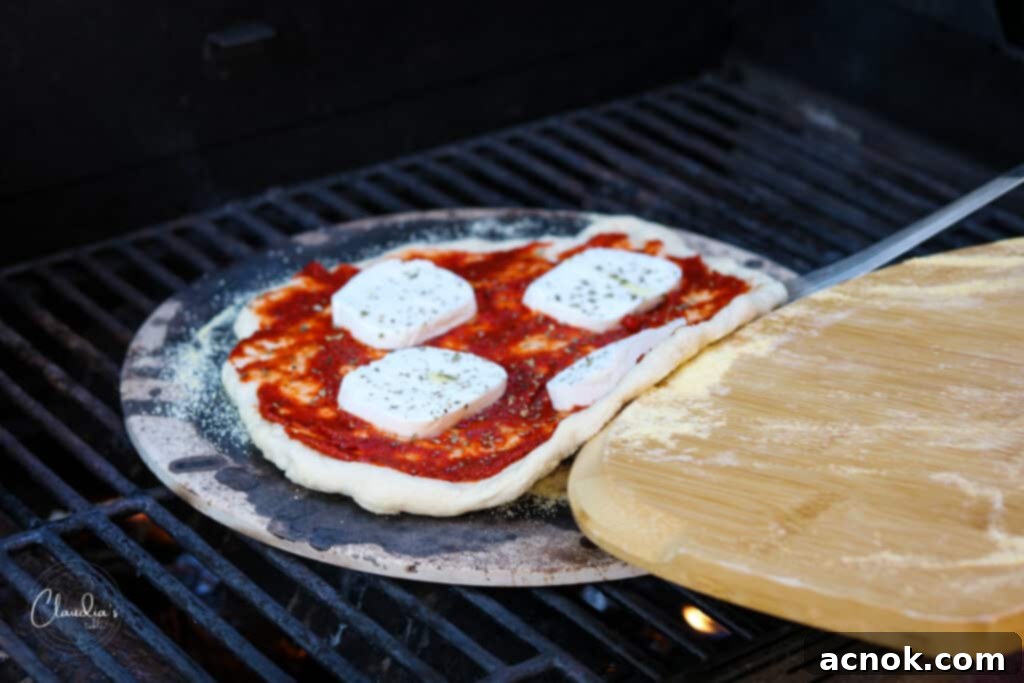
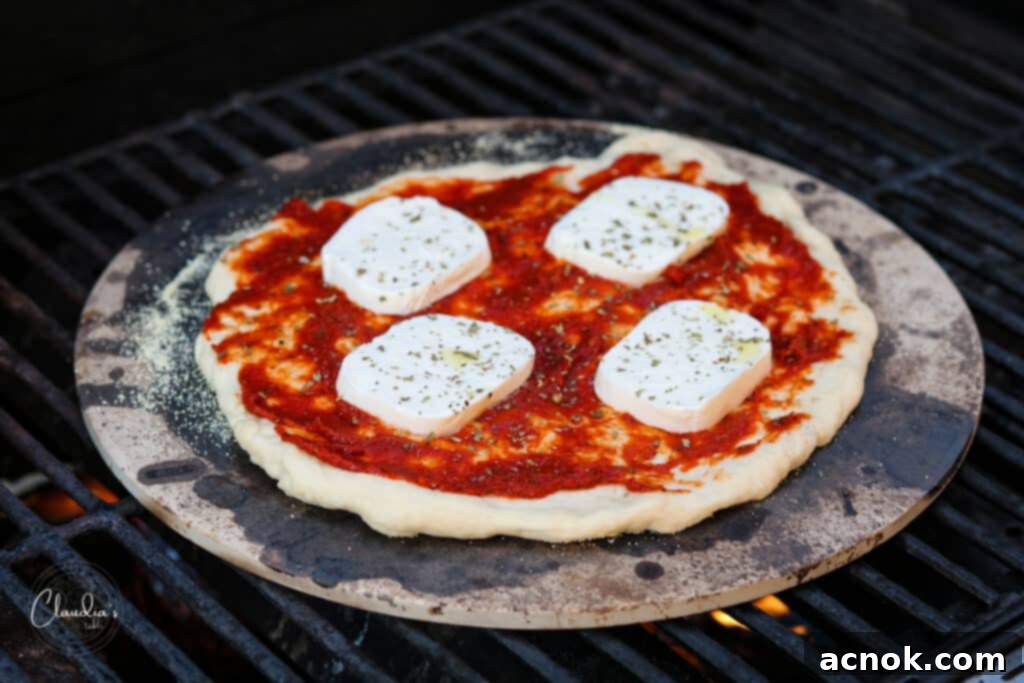
Another fantastic, easy option is to assemble your pizza directly onto a copper mat. This method is incredibly convenient because it eliminates the need for cornmeal and the slight learning curve of the pizza peel. Simply build your pizza on the mat, then transfer the entire mat with the pizza to your preheated oven or grill. Just remember to carefully slide the baked pizza off the copper mat before slicing to avoid damaging the mat’s surface with your pizza cutter.
Serving Suggestions for an Epic Pizza Night
To truly elevate your homemade pizza night from great to unforgettable, consider offering a range of flavorful condiments and fresh sides. These small additions can dramatically enhance the dining experience, allowing everyone to customize their slice. Here are some of our favorite garnishes and pairings:
- **Grated Parmesan Cheese:** A classic finish that adds a salty, umami kick.
- **Hot Honey:** Drizzle this sweet and spicy combination for an unexpected burst of flavor that complements savory toppings beautifully.
- **Crushed Red Pepper Flakes:** For those who love an extra layer of heat.
- **Calabrian Chiles:** These fiery Italian chilies, often preserved in oil, offer a deeper, more complex heat than standard red pepper flakes.
- **Pickled Jalapeño Slices:** A tangy, spicy crunch that cuts through rich flavors.
- **Hot Sauce:** A splash of your favorite hot sauce for a customizable heat level.
- **Basil Pesto:** A dollop of fresh pesto adds vibrant herbaceousness.
- **Marinated Balsamic Red Onions**: Their sweet and tangy bite provides a delightful contrast to savory pizza.
Additionally, if you’re enjoying the versatility of your grill for pizza, why not grill your salad too? For a perfectly balanced meal, I highly recommend pairing your homemade pizza with one of my favorite grilled salads for pizza night or summer gatherings: my refreshing Grilled Romaine and Radicchio Caesar Salad, or the elegant Hearts Salad with Prosciutto. These light, flavorful salads offer a wonderful counterpoint to the richness of the pizza.
Frequently Asked Questions & Expert Tips
Yes, absolutely! While our recipe suggests a blend, you can certainly use either 100% all-purpose flour or 100% bread flour. Both will work beautifully, with slight variations in the chewiness of the final crust.
Yes, this dough freezes wonderfully! After the initial two-hour rise, divide the dough into quarters and form them into balls. Wrap each ball tightly in plastic wrap, then place them in a freezer-safe bag or container. Each dough ball will yield a 10-inch pizza. To defrost, simply remove the dough from the freezer and allow it to thaw completely and come to room temperature, which can take several hours on the counter or overnight in the refrigerator. Once defrosted, stretch the dough as instructed and bake as directed.
Unfortunately, no. This specific recipe is not formulated to be suitable for gluten-free flour, as the gluten structure is crucial for its texture and rise. However, we highly recommend checking the King Arthur Baking website for an excellent gluten-free pizza crust recipe that delivers fantastic results.
Absolutely, and it’s highly encouraged! Adding seasonings directly into the dry ingredients of the dough can infuse your crust with extra flavor. We also love to brush a little olive oil mixed with dried Italian herbs onto the stretched dough before adding the sauce and toppings for a fragrant boost.
When time is short, the easiest and best ready-made pizza dough we’ve found is Trader Joe’s Pizza Dough, typically available in their refrigerated section. It’s a convenient and reliable option for a quick homemade pizza.
Any leftover pizza can be stored in zip-top bags or an airtight container in the refrigerator. It will keep well for up to 3 days, maintaining its flavor and texture relatively well.
For best results, I prefer to reheat pizza on a nonstick pan over medium-low heat on the stovetop until the crust crisps up and the cheese melts. Alternatively, you can loosely wrap it in foil and reheat it in a conventional oven, or place it directly on the rack in a toaster oven for a quick crisp.
If you’ve tried this recipe, please share your experience by commenting below and leaving us some stars! We 🫶🏼 appreciate your feedback and support!
All content and photographs ©Claudia’s Table and claudiastable.com

Perfect All-Purpose Pizza Dough
Ana | Claudia’s Table
September 10, 2023
Pin Recipe
Equipment
-
2 Large bowls
-
1 quick read thermometer
-
1 Pizza stone recommended for best results
-
Cookie sheet for baking or as a makeshift pizza peel
-
Stand mixer with a dough hook optional, for easier kneading
-
Pizza Peel optional, but highly recommended for transferring pizza
-
Copper mats optional, great for grill or oven baking
Ingredients
- 3 cups unbleached bread flour spooned into a dry measuring cup and leveled with a knife
- 2 cups unbleached all-purpose flour + extra for kneading dough, spooned into a dry measuring cup and leveled with a knife
- 1 teaspoon active dry yeast Fleischmann’s recommended
- 1 tablespoon white sugar or honey
- 1 tablespoon Kosher salt or 2 tsp table salt/sea salt
- 1 3/4 cup warm water (110-120°F)
- 5 tablespoons extra virgin olive oil – divided + extra for large bowl and for brushing onto pizza crust (optional)
- 1 cup cornmeal for baking pizza transfer
- 1 tablespoon olive oil optional, for brushing crust
- 1 teaspoon dried Italian herbs optional, for brushing crust
Instructions
How to Prepare Pizza Dough
-
In a large bowl, combine the flours, yeast, sugar, and salt. Mix thoroughly with a whisk.
-
Add the warm water and 2 tablespoons of extra virgin olive oil. Mix with a wooden spoon until all ingredients are just combined. The mixture will be shaggy with some flour remaining at the bottom; this is normal.
-
In a second large bowl, add 1 tablespoon of olive oil and coat the bottom and sides completely. Set aside.
-
Generously flour your kneading surface (if kneading by hand).
-
Turn the dough mixture onto the floured surface and knead by hand for 4-5 minutes. The dough should become smooth and elastic after a minute or so. (Alternatively, use a stand mixer with a dough hook on low speed for 2-3 minutes after initial mixing.)
-
After kneading, form the dough into a ball and place it in the oiled bowl. Turn to coat both sides. Cover tightly with plastic wrap and place in a warm, draft-free area.
-
Allow the dough to rest and rise for 2 hours.
How to Stretch Pizza Dough & Preheat
-
Place your pizza stone in a cold grill or oven.
-
Preheat the oven to 500°F or the outdoor grill to 600°F (or refer to our detailed time chart for other methods) for at least 30 minutes with the pizza stone inside to ensure it’s thoroughly hot.
-
Once risen, divide the dough into 4 equal parts and gently form each into a ball. Let them rest while the oven/grill preheats.
-
On your pizza peel or a cookie sheet, add a generous amount of cornmeal. This prevents sticking and helps the pizza slide onto the hot cooking surface.
-
On a clean, flat surface, sprinkle a generous amount of flour.
-
Take one dough ball and, on the floured surface, begin stretching it out from the center, working your way outwards with your fingertips.
-
Lift the dough and use gravity to help stretch it further by gently pulling with one hand while holding the edge with the other. Continue stretching and rotating until you have an even 10-12 inch circle.
How to Assemble Pizza for Baking
-
Ensure your pizza peel or cookie sheet is well-dusted with cornmeal.
-
Carefully place the stretched dough circle onto the prepared peel/sheet.
-
Optional: Lightly brush the dough with olive oil and sprinkle with dried Italian herbs for extra flavor.
-
Spread about 1/4 to 1/2 cup of Rich and Zesty Pizza Sauce (or your favorite store-bought sauce) evenly over the dough, leaving a small border for the crust.
-
Top with your chosen cheeses and toppings. Remember to go light on the toppings to ensure even baking and a crispy crust.
How to Bake Pizza
-
Gently slide the assembled pizza onto the preheated pizza stone (or other hot cooking surface). Use a spatula to help push it off the peel if needed.
-
If using a grill, cover and bake for 6-8 minutes, checking for doneness and crispiness. For an oven, close the door and bake for 7-10 minutes. Adjust time as needed based on your appliance.
-
Once the crust is golden brown and the cheese is bubbly, carefully remove the pizza from the stone using the pizza peel and transfer it to a cutting board.
-
Slice into 4-6 wedges. Enhance with extra grated Parmesan cheese and a sprinkle of crushed red pepper flakes if desired. Enjoy your delicious homemade pizza!
Notes
Nutrition
Nutritional information is calculated online and should be used as a guide.
All content and photographs ©Claudia’s Table and claudiastable.com
Explore More New & Delicious Recipes Below
- Pasta with Grilled Vegetables, Feta, and Lemon
- Grilled Asian Marinated Flank Steak
- Classic Homemade Chunky Blue Cheese Dressing
- 3-Ingredient Crispy Oven-Roasted Potatoes
- Grilled Peach Avocado Chicken Salad
