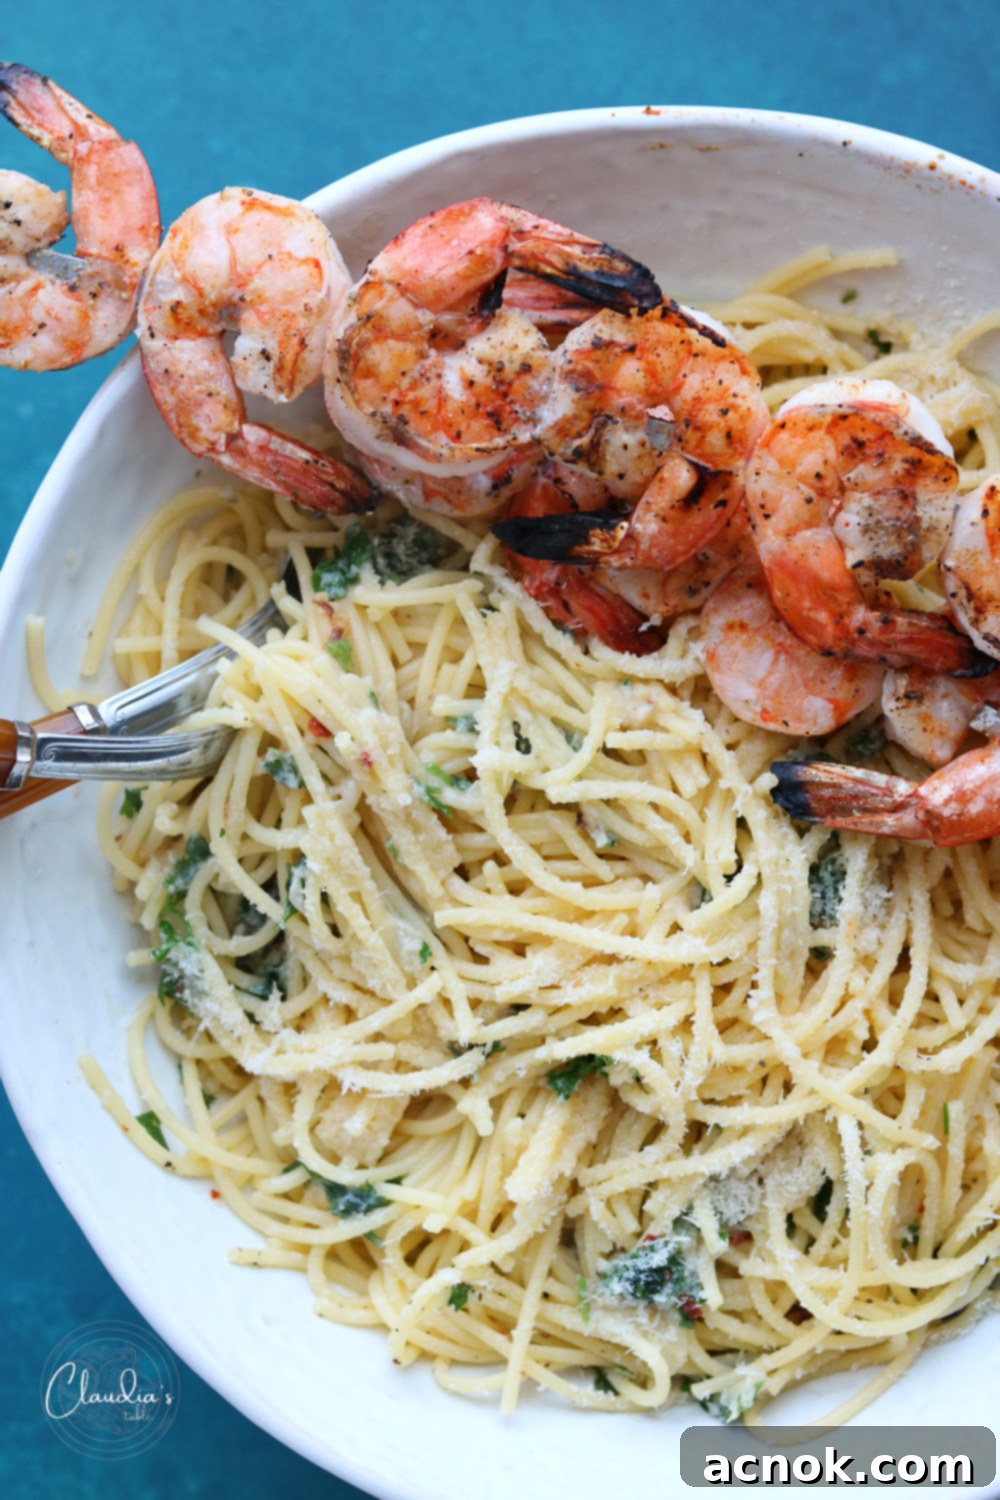
Roasted Garlic and Shrimp Spaghetti: Your Ultimate Weeknight Flavor Boost
Tired of mundane weeknight dinners? Prepare to turn your frown upside down with this incredible Roasted Garlic and Shrimp Spaghetti! This dish is a true culinary masterpiece, combining an abundance of tender, sweet roasted garlic with luscious, creamy spaghetti and perfectly cooked, succulent shrimp. It’s an instant win, whether you’re whipping up a quick meal after a long day or impressing guests on a special weekend evening.
What makes this pasta truly stand out is its luxurious, silky sauce – achieved without a single drop of heavy cream. The secret lies in the magical transformation of roasted garlic cloves, emulsified with rich olive oil, savory Parmesan cheese, a touch of butter, and the starchy goodness of reserved pasta water. This creates a remarkably flavorful and surprisingly light sauce that clings perfectly to every strand of spaghetti.
And for our vegetarian friends, fret not! This spaghetti is absolutely divine on its own, offering a profound depth of flavor that needs no additional protein. If you’re exploring other delightful vegetarian options, be sure to check out my Kale, Pistachio and Feta Pesto Spaghetti – another fantastic recipe to save for later.
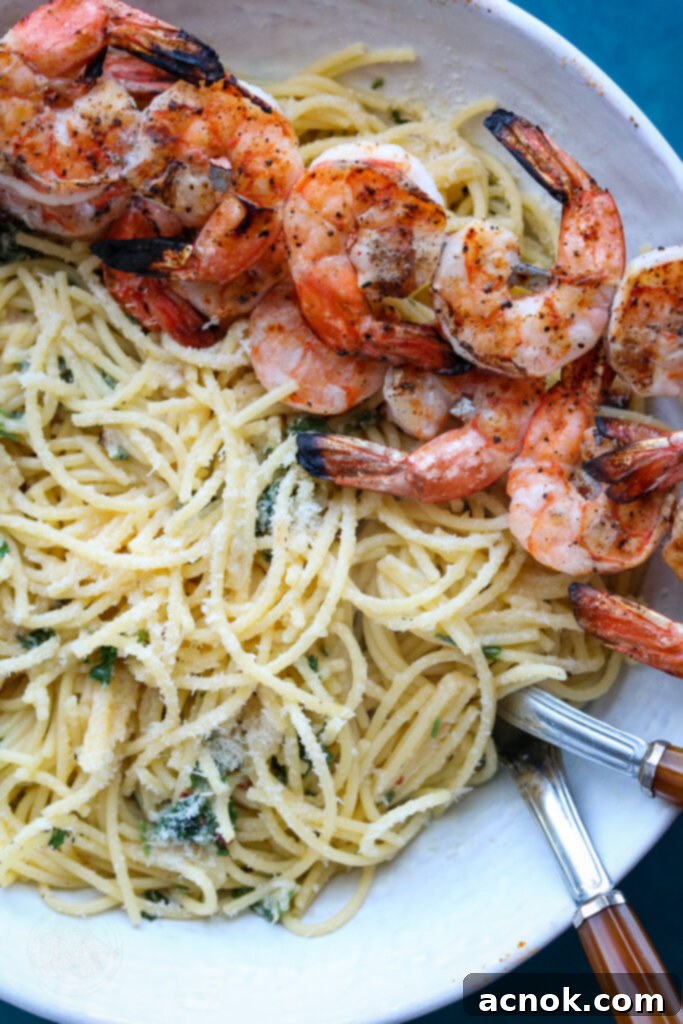
The star of this dish, besides the tender shrimp, is undoubtedly the roasted garlic. Roasting whole heads of garlic transforms its pungent, sharp flavor into something incredibly mild, sweet, and nutty. This mellowed garlic not only contributes an unparalleled taste but also acts as a natural thickener for our sauce, providing that desired creamy texture. While it requires a little patience, this crucial step is absolutely worth every minute and should not be skipped. Trust us, your taste buds will thank you!
How to Roast Whole Garlic Heads: Unlocking Sweet, Mellow Flavor
If you’re a true garlic enthusiast, mastering the art of roasting whole garlic heads is a culinary game-changer. Beyond this incredible pasta dish, roasted garlic can elevate countless recipes. Imagine spreading warm, softened garlic cloves onto a crusty baguette, mashing them into a flavorful salad dressing, or even adding them to mashed potatoes or hummus. The possibilities are endless once you have this aromatic ingredient on hand.
The process of roasting garlic is surprisingly simple and yields consistently delicious results. It takes approximately 45 minutes, largely hands-off, allowing you to prep other ingredients or relax while your kitchen fills with an enticing aroma. Here’s how to do it:
- Preheat your oven: Set your oven to 375ºF (190ºC). This moderate temperature ensures the garlic slowly caramelizes without burning.
- Prepare the foil: Tear off a piece of aluminum foil, about 10 inches long, and lay it flat on a work surface. This will create a sealed packet for the garlic, trapping in moisture and flavor.
- Trim the garlic: Take two fresh bulbs (or heads) of garlic. Using a sharp knife, carefully cut about 1/2 inch off the top of each bulb, just enough to expose the tops of the individual garlic cloves. Discard these trimmed tops.
- Season generously: Drizzle a generous amount of olive oil over the exposed garlic cloves. The oil helps them soften and brown beautifully. Sprinkle fresh thyme leaves or dried thyme and a small pinch of kosher salt over the garlic. Thyme complements garlic perfectly, but feel free to experiment with other herbs like rosemary or oregano.
- Create a packet: Fold the aluminum foil around the garlic bulbs, sealing them tightly to form a packet. This ensures the garlic steams and roasts evenly. Place the packet on a small sheet pan – this makes it easier to handle and catches any potential drips.
- Roast to perfection: Roast in the preheated oven for about 45 minutes, or until the cloves are incredibly tender and have turned a lovely golden-brown. You can gently squeeze a bulb through the foil to check for tenderness.
- Cool and extract: Once the garlic is cool enough to handle, carefully open the foil packet. Using a fork or your fingers, squeeze or scoop out the soft, roasted cloves from their skins and transfer them to a small bowl. They should practically melt out of their papery skins.
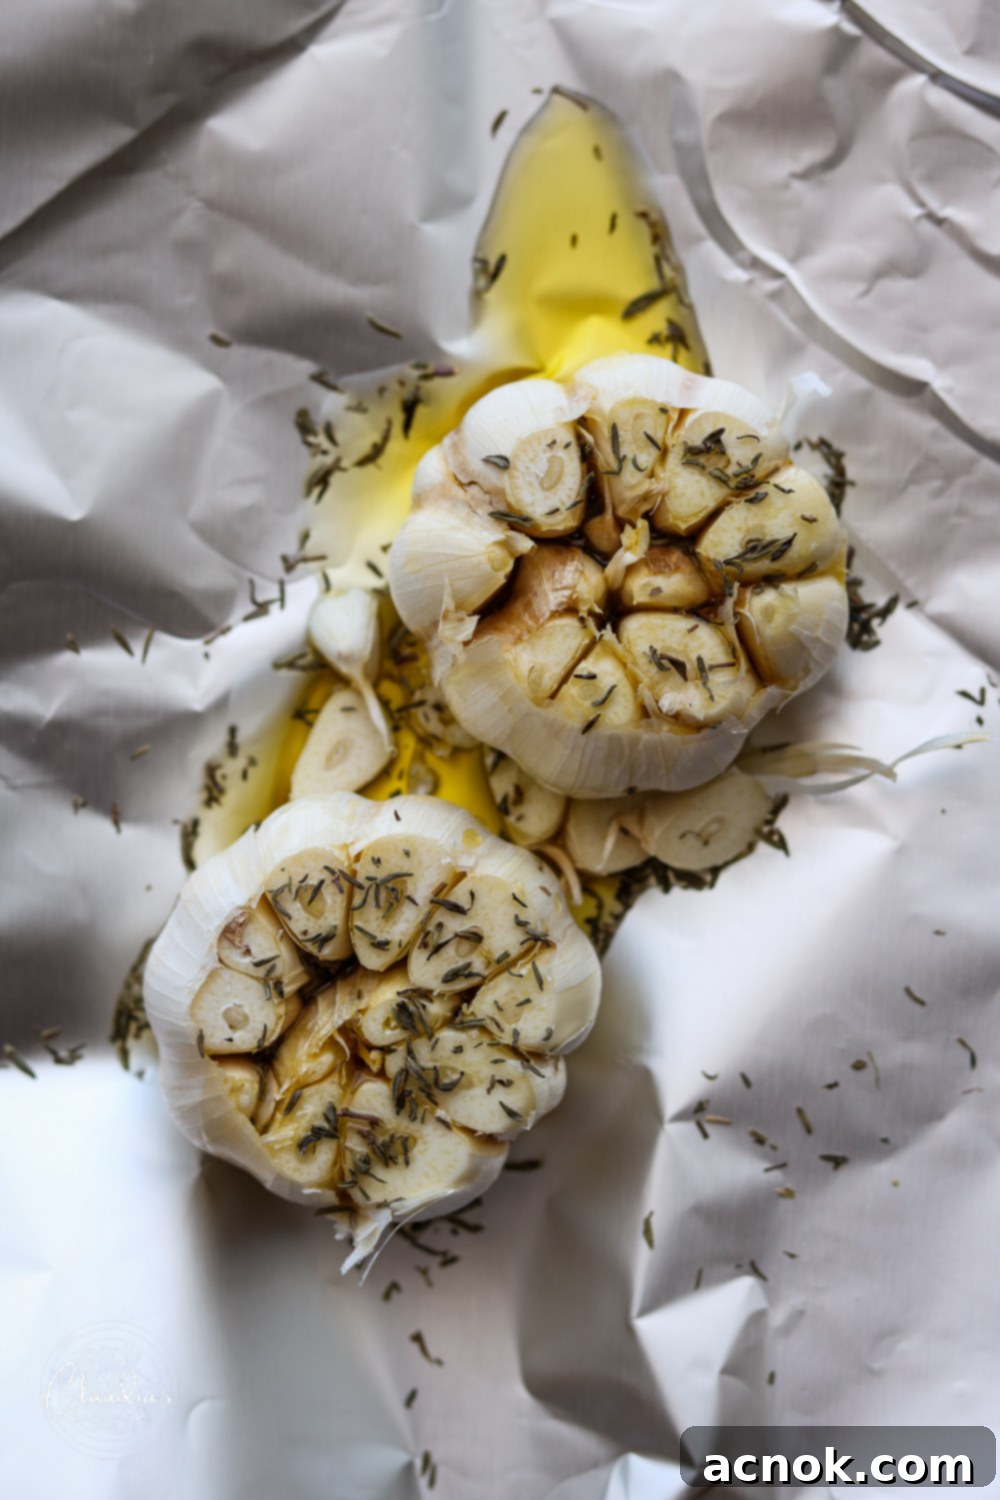
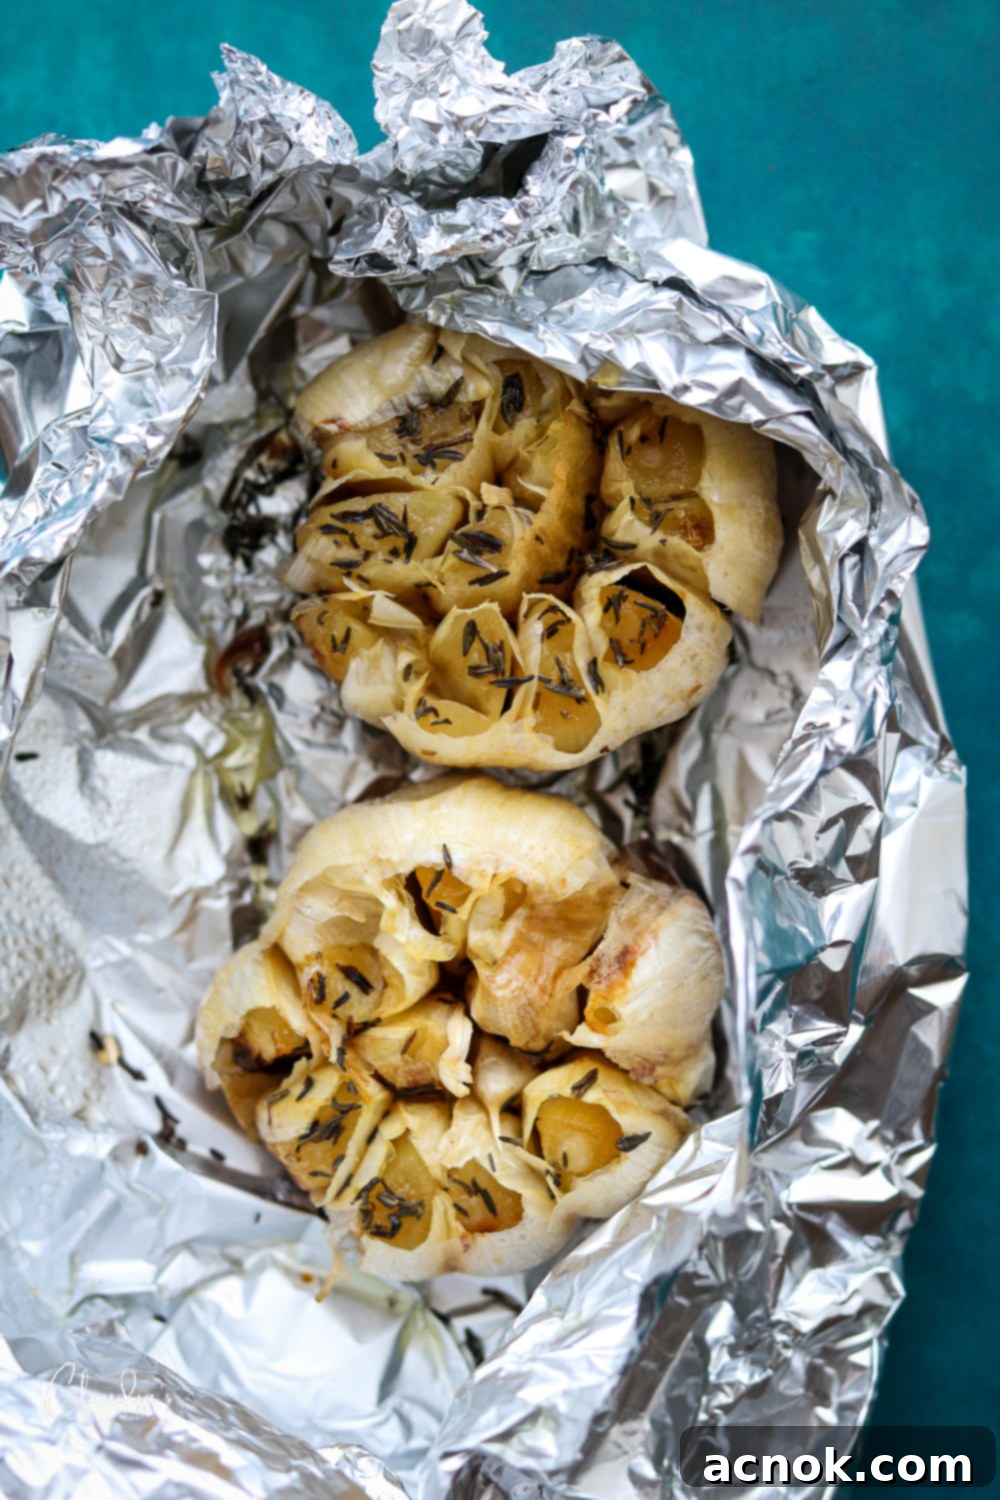
Pro Tip for Outdoor Grilling: You can achieve equally fantastic results by roasting your garlic on an outdoor grill! Simply follow the same steps to prepare the garlic in foil packets. Preheat your grill on low heat, ensuring the temperature does not exceed 400ºF (200ºC). Place the garlic packets on the cooler side of the grill and roast for about 20-25 minutes. Keep a close eye on it, as grills can vary in temperature. If the garlic burns, it will unfortunately become bitter and unusable, which would be a culinary tragedy! 🙁
Crafting the Irresistible Roasted Garlic Spaghetti
With your glorious roasted garlic ready, the rest of this dish comes together remarkably quickly. The key to a truly great pasta dish is timing and technique, especially when creating a “creamy” sauce without actual cream.
- Cook the spaghetti: Begin by cooking your spaghetti according to the package instructions. Aim for al dente – firm to the bite, as it will continue to cook slightly in the sauce. If you’re using gluten-free spaghetti, remove it about 1 minute before the suggested cooking time to prevent it from becoming too soft and breaking apart.
- Prep your ingredients: While the pasta boils, take a few minutes to get everything else ready. Finely chop 1 cup of fresh flat-leaf parsley – its vibrant color and fresh flavor are essential. Measure out 1 cup of shredded Parmesan cheese, have 1 tablespoon of butter at room temperature, and 1/4 cup of good quality olive oil ready. Gather any other spices like crushed red pepper flakes, salt, and black pepper. This mise en place ensures a smooth and quick assembly once the pasta is cooked.
- Reserve pasta water: This is a non-negotiable step for any successful pasta sauce without cream! Before draining your pasta, ladle out at least 1 cup of the starchy pasta water and set it aside. This water is liquid gold – its starch content helps to emulsify the sauce, creating that rich, glossy, and creamy texture. Once you’ve reserved the water, drain the pasta and leave it in the colander.
- Build the sauce base: Using the same pot you cooked the spaghetti in (less cleanup!), add 1/4 cup of fresh olive oil. Heat it gently, then add the beautiful roasted garlic cloves, the chopped parsley, a pinch of crushed red pepper flakes (adjust to your spice preference), salt, and black pepper. Sauté this mixture for 1-2 minutes over medium heat, gently crushing the roasted garlic cloves with the back of a spoon as you stir. This releases their sweet, aromatic oils and helps them integrate into the sauce, creating a thick, flavorful paste.
- Create the emulsion: Add 1/2 cup of the shredded Parmesan cheese and 1/2 cup of the reserved pasta water to the pot. Stir continuously. The hot, starchy water, combined with the melted cheese and garlic-infused oil, will start to form a luxurious, emulsified sauce.
- Combine and finish: Now, add the drained, cooked spaghetti back into the pot with your aromatic garlic and olive oil mixture. Add the remaining Parmesan cheese, a splash more of the reserved pasta water (if needed to reach your desired consistency – you might not use the full cup), and the tablespoon of butter. Toss gently but thoroughly to combine, ensuring every strand of spaghetti is completely coated in the glorious, creamy sauce. The butter adds an extra layer of richness and gloss.
Note on Protein Alternatives: While shrimp is a fantastic addition, this roasted garlic spaghetti is incredibly versatile. It’s equally delicious with other proteins like chicken, salmon, or steak! You can use the same simple spice blend mentioned for the shrimp (garlic salt, paprika, pepper, lemon) to season any of these alternatives, ensuring a harmonious flavor profile across the dish.
Easy Sautéed or Grilled Shrimp: The Perfect Protein Partner
The beauty of this recipe is that both the Roasted Garlic Spaghetti and the shrimp can stand alone as delicious dishes. However, together, they create an unforgettable meal. I personally grilled the shrimp for this recipe, which adds a lovely smoky char, but sautéing them in a skillet is often easier and faster for a busy weeknight.
How to Sauté Shrimp for Quick Perfection
Sautéing shrimp is a fantastic method for achieving tender, flavorful shrimp in minutes. Here’s how:
- Prepare the shrimp: Start with 1 pound of thawed, peeled, and deveined shrimp. For best results, pat the shrimp thoroughly dry with paper towels to remove any excess moisture. This ensures they sear rather than steam, leading to a better texture.
- Season the shrimp: In a bowl, toss the dried shrimp with 1/2 to 1 tablespoon of olive oil, 1/2 teaspoon of garlic salt, 1/2 teaspoon of paprika (sweet or smoked, depending on preference), and 1/4 teaspoon of black pepper. Squeeze the juice of half a fresh lemon over them. Toss everything until the shrimp are evenly coated in the spices. Feel free to adjust the spice level to your liking – a pinch of cayenne can add a nice kick!
- Sauté to perfection: Preheat a skillet (cast iron or non-stick works well) over medium-high heat. Once hot, add the seasoned shrimp in a single layer, being careful not to overcrowd the pan. Cook for about 2-3 minutes per side, or until the shrimp turn opaque pink and begin to curl into a “C” shape. Overcooked shrimp become tough and rubbery, so watch them closely!
- Serve immediately: Remove the cooked shrimp from the heat and serve them immediately alongside your warm Roasted Garlic Spaghetti.
Important Note: The cooking time for shrimp varies significantly with size. For this recipe, I recommend using jumbo shrimp (16-20 pieces per pound) for a more substantial bite. Smaller shrimp will cook much faster, typically in 2-3 minutes total.
How to Grill Shrimp for Smoky Flavor
Grilling imparts a wonderful smoky flavor and a beautiful char to shrimp, making them an excellent complement to the rich pasta. Here’s how to grill them perfectly:
- Select your shrimp: For grilling, extra-large or jumbo shrimp (16-20 count or larger) are best as they are less likely to overcook and fall through the grates. If you only have medium or smaller shrimp, the sauté method is generally a safer bet. Ensure they are thawed, peeled, and deveined.
- Season and skewer: In a bowl, combine the shrimp with garlic salt, sweet paprika, fresh lemon juice, olive oil, and black pepper. Toss to coat. Carefully thread the shrimp onto skewers. I prefer using two skewers per shrimp (side-by-side) for better stability on the grill, preventing them from spinning when you flip them.
- Prepare the grill: Preheat your grill to medium-high heat. Once hot, clean the grates thoroughly and lightly oil them to prevent sticking.
- Grill the shrimp: Place the skewers on the hot grill. Grill for approximately 2-3 minutes per side. The shrimp are cooked when they have completely turned pink and have a slight curl. Again, avoid overcooking!
- Serve hot: Remove the grilled shrimp from the skewers and serve them immediately over the Roasted Garlic Spaghetti.
Serving Suggestions: Completing Your Culinary Masterpiece
To complete this delightful meal, divide the luscious Roasted Garlic Spaghetti into four large bowls. Generously top each serving with your perfectly sautéed or grilled shrimp. For a bright finish, squeeze a little fresh lemon juice over the top – it really enhances the flavors. Garnish with an extra sprinkle of fresh parsley and, if desired, a dusting of additional Parmesan cheese to taste. This dish pairs wonderfully with a simple, crisp tossed salad dressed with a light vinaigrette, and a side of warm, crusty garlic bread is always a welcome addition to sop up any extra sauce.
Tips and Substitutions: Customizing Your Dish
While technically possible, for this specific dish, I strongly recommend cooking the shrimp separately, either by sautéing or grilling. This approach allows the shrimp to develop a more distinct flavor and a better texture (seared or charred) rather than being steamed or boiled within the sauce. Cooking them separately also prevents overcooking, ensuring they remain succulent. However, if you’re truly short on time or want to minimize cleanup, you can add them to the pan with the olive oil and garlic mixture for the last few minutes, but be mindful of the cooking time to avoid rubbery shrimp.
Absolutely! Fresh parsley provides a bright, herbaceous note that complements the garlic and shrimp beautifully. However, fresh basil is another excellent choice that would add a lovely, aromatic sweetness. You could also experiment with a hint of fresh oregano or chives, but parsley and basil tend to be the most harmonious options for this flavor profile.
This spaghetti is incredibly adaptable to other proteins. You can use the same simple seasoning blend (garlic salt, paprika, pepper, lemon) to flavor them. Here’s how to integrate them:
- Chicken: Chicken needs to be cooked thoroughly. I recommend baking, pan-frying, or grilling chicken breasts or thighs prior to starting the spaghetti. Once cooked, slice or shred the chicken and add it to the finished spaghetti just before serving.
- Salmon: Salmon cooks quite quickly. It’s best pan-fried or grilled after the spaghetti is made. Flake the cooked salmon gently into the pasta or serve a whole fillet on top.
- Steak: Cook your steak to your desired doneness on the grill or in a skillet after you’ve prepared the spaghetti. Let it rest, then slice it thinly and arrange it over the pasta, ensuring it can be enjoyed at its optimal cooked temperature.
Yes, you can use pre-cooked shrimp to save time, but they generally require less cooking. If using pre-cooked shrimp, add them to the olive oil and garlic mixture in the pot for just 1-2 minutes, along with your spices, to warm them through and allow them to absorb some of the delicious flavors. This step is crucial, as simply adding them at the end might result in bland shrimp. Be very careful not to overcook them, as they can become rubbery quickly.
While the dish is best enjoyed fresh, especially the pasta and shrimp, you can prepare certain components ahead of time. The roasted garlic can be made days in advance and stored in an airtight container in the refrigerator (or even frozen). The shrimp can be seasoned a few hours ahead. It’s best to cook the pasta and combine the sauce just before serving for the optimal creamy texture.
Traditional durum wheat spaghetti works wonderfully, providing a great al dente bite. However, you can use other long pasta shapes like linguine, fettuccine, or even bucatini for a slightly different texture. As mentioned, if you’re using gluten-free pasta, be extra careful not to overcook it, as it can become mushy more easily.
If you tried this delightful recipe and loved it as much as we do, please help other readers by commenting below and sharing some stars! We 🫶🏼 appreciate you! Your feedback helps our community of home cooks grow and discover new favorites.
All content and photographs ©Claudia’s Table and claudiastable.com
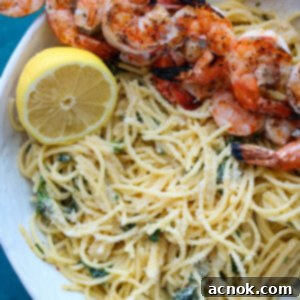
Roasted Garlic Spaghetti and Grilled Shrimp
Ana | Claudia’s Table
July 5, 2022
Pin Recipe
Equipment
-
outdoor grill optional
Ingredients
Roasted Garlic
- 2 heads garlic fresh
- 2 tbsp olive oil extra virgin
- 1 tsp thyme dried
Roasted Garlic Spaghetti
- 12 oz spaghetti dry
- 1/4 cup olive oil extra virgin
- 1 cup parsley, fresh chopped
- 1 tbsp butter
- 1 cup pasta water reserved
- salt and pepper
- 1/2 lemon for serving
Sautéed or Grilled Shrimp
- 1 lb shrimp (16-20 count) fresh, jumbo
- 1 tbsp olive oil extra virgin
- 1/2 tsp paprika ground
- 1/2 tsp garlic salt
- pinch pepper ground
- 1/2 lemon juice of
Instructions
How to Roast Garlic
-
Preheat oven to 375ºF (190ºC).
-
Cut a piece of aluminum foil about 10 inches long and lay it flat.
-
Take two heads of fresh garlic and cut about 1/2 inch from the top to expose the cloves. Discard the garlic tops.
-
Drizzle generously with extra virgin olive oil, sprinkle with fresh or dried thyme, and a small pinch of kosher salt.
-
Fold the foil tightly around the garlic into a packet, place on a small sheet pan, and roast for about 45 minutes or until tender and golden.
-
Once cool enough to handle, remove the roasted garlic cloves with a fork and set aside in a bowl.
Roasted Garlic Spaghetti
-
Start by cooking spaghetti as directed on the package instructions, aiming for al dente. If using gluten-free spaghetti, remove about 1 minute before suggested cooking time to reduce breakage.
-
While the pasta is cooking, chop 1 cup of flat-leaf parsley, shred or measure out 1 cup of Parmesan cheese, get 1 tablespoon of butter, and 1/4 cup of olive oil ready. Prepare your other spices as the dish comes together quickly once the pasta is cooked.
-
Once the pasta is ready to drain, reserve 1 cup of pasta water. Drain the pasta and leave it in the colander.
-
In the same pot you cooked the spaghetti in, add 1/4 cup of olive oil, the roasted garlic, chopped parsley, crushed red pepper, salt, and pepper. Sauté until hot and aromatic, crushing the garlic as you go, for 1 to 2 minutes. Add 1/2 cup of Parmesan cheese and 1/2 cup of the reserved pasta water. Continue to stir until a creamy sauce begins to form.
-
Now, add the cooked pasta back into the pot with the garlic and olive oil mixture. Add the remaining Parmesan cheese, a splash more pasta water (if needed for desired consistency), and 1 tablespoon of butter. Toss gently to combine, ensuring the sauce completely covers the spaghetti.
Preparation of Shrimp – Sauté and Grilling Directions Below
-
TO SAUTÉ: Use 1 pound of thawed, peeled, and deveined jumbo shrimp (16-20 count). Preheat a skillet on medium-high heat. Pat the shrimp dry to remove any excess water. In a bowl, add 1/2-1 tablespoon of olive oil, 1/2 tsp of garlic salt, 1/2 tsp of paprika, and 1/4 tsp of pepper. Add the juice of half a lemon. Toss until the shrimp is evenly coated. Adjust spice level to your preference.
-
Add shrimp to the hot skillet and cook for about 2-3 minutes per side, or until the shrimp are completely pink and start to curl into a “C” shape. Do not overcook. Remove from heat and serve immediately with the Roasted Garlic Spaghetti.
-
NOTE: The smaller the shrimp, the faster the cook times. Adjust accordingly to avoid rubbery shrimp.
-
TO GRILL: Use 1 pound of thawed, peeled, large, deveined shrimp (extra-large and jumbo shrimp are best for grilling; for medium/smaller, opt for sautéing). You will need garlic salt, sweet paprika, fresh lemon, olive oil, and pepper. Carefully pierce each piece of shrimp onto skewers (using two skewers per shrimp can provide more stability). Once all shrimp are on skewers, spray or brush with olive oil, sprinkle garlic salt, then sweet paprika, and finally pepper. Season both sides of the shrimp skewer. Squeeze fresh lemon juice onto each skewer.
-
On a medium-hot grill, grill skewers for about 2-3 minutes on each side. Shrimp will be cooked when they have completely turned pink and are starting to curl. Remove from grill and serve immediately.
Notes
Nutrition
Nutritional information is calculated online and should be used as a guide.
All content and photographs ©Claudia’s Table and claudiastable.com
Explore More Delicious Recipes from Claudia’s Table
Always looking for fresh ideas? Don’t miss out on our latest and greatest culinary creations. Here are some new and delicious posts from Claudia’s Table that you might love:
- Pasta with Grilled Vegetables, Feta, and Lemon: A Zesty Summer Delight
- Grilled Asian Marinated Flank Steak: Tender and Flavorful
- Classic Homemade Chunky Blue Cheese Dressing: Perfect for Salads and Wings
- 3-Ingredient Crispy Oven-Roasted Potatoes: Simple, Yet Irresistible
- Grilled Peach Avocado Chicken Salad: A Refreshing Summer Meal
