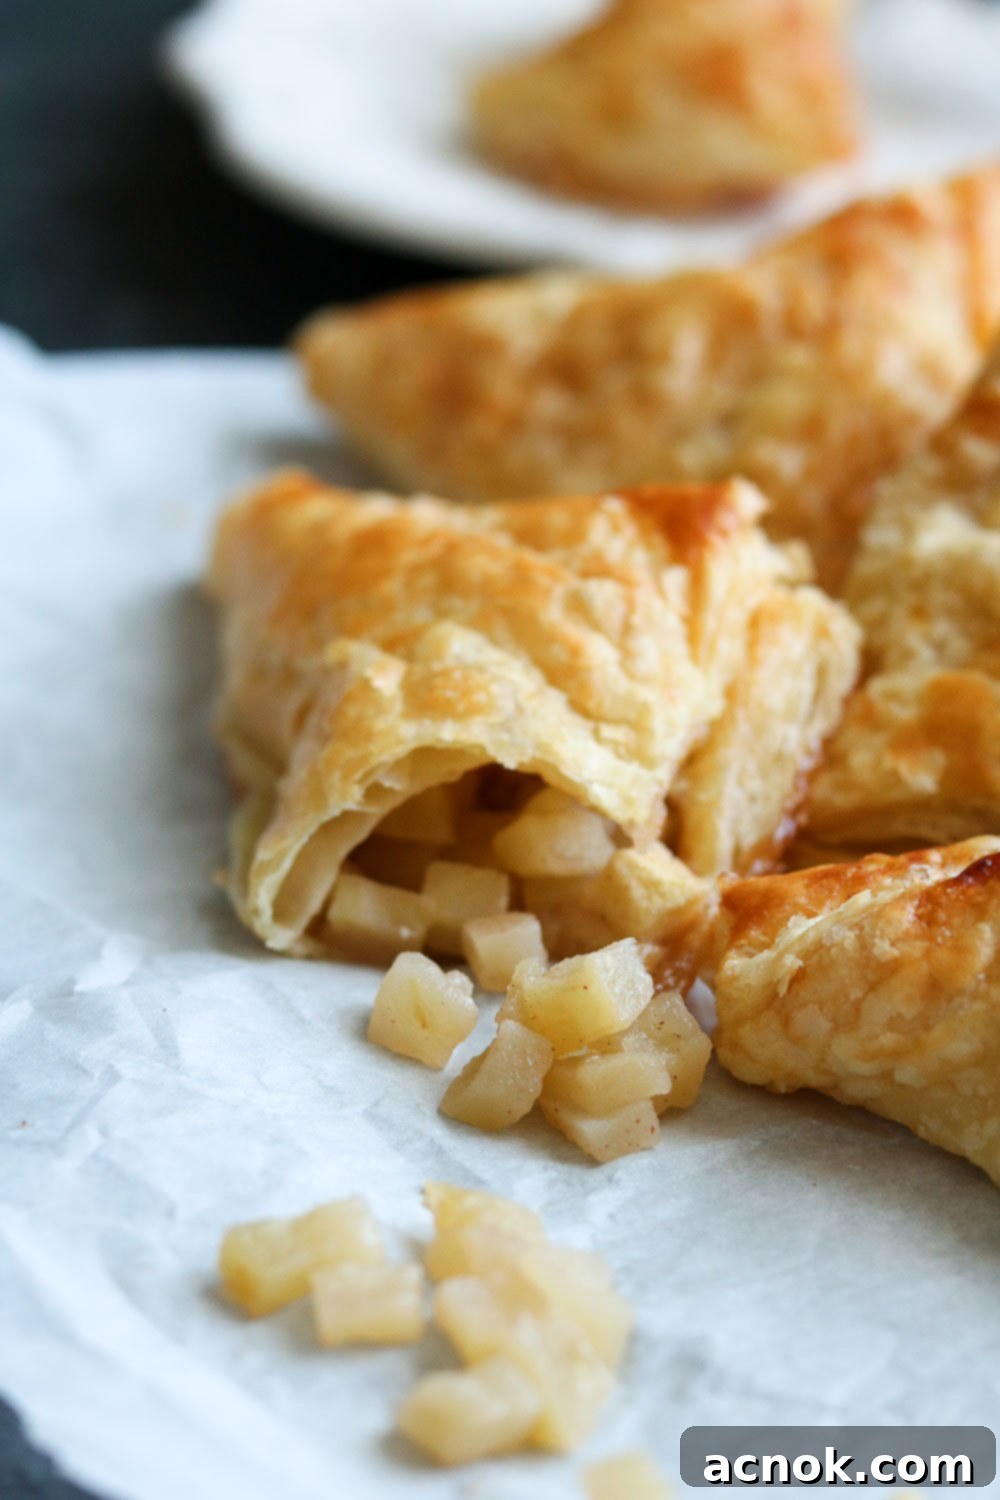
Easy Apple Pie Puffs: Your Ultimate Guide to Simple & Delicious Flaky Desserts
There’s an undeniable magic to puff pastry. Its ethereal, golden layers possess the power to transform even the simplest ingredients into an exquisite culinary experience. While many might view it as a gourmet component, puff pastry is, in fact, incredibly versatile and surprisingly easy to work with, making it a fantastic foundation for both savory and sweet creations. These Easy Apple Pie Puffs are a shining example of this versatility, offering all the comforting warmth and rich flavor of a traditional apple pie in a charming, convenient, and utterly irresistible bite-sized package.
From their straightforward preparation to their effortless serving, these delightful apple treats are designed to become a cherished addition to your recipe repertoire. Whether you’re planning an elaborate holiday feast for Thanksgiving, a cozy family gathering, or simply craving a quick and satisfying dessert, these Apple Pie Puffs will not disappoint. And here’s an extra bonus that makes them even more appealing: we’ve carefully balanced the natural sweetness of the apples with just the right amount of sugar, creating a dessert that feels wonderfully indulgent yet remains surprisingly light. It’s truly a win-win, allowing you and your guests to savor every flaky, fruit-filled bite with pure joy.
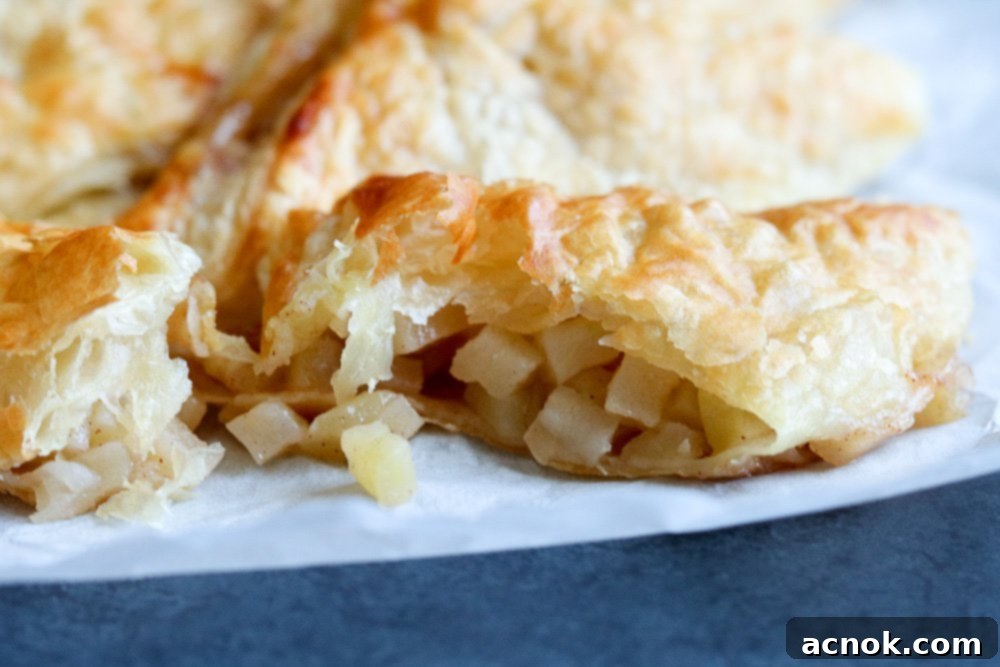
Why These Easy Apple Pie Puffs Will Become Your New Favorite Dessert
Beyond their charming appearance, these Apple Pie Puffs offer a multitude of reasons to fall in love. They are incredibly adaptable, allowing you to easily switch up the fruit filling based on seasonal availability or personal preference. While we adore the classic combination of sweet and tart apples, feel free to experiment with pears, peaches, or a medley of your favorite berries for a unique twist. The key is to choose fruits that hold up well to baking and create a delicious, slightly thickened filling. For apples, varieties like Honeycrisp or Granny Smith are ideal, offering that perfect balance of sweetness and tartness, along with a firm texture that prevents them from turning mushy during cooking.
This recipe is also incredibly flexible when it comes to serving size. You can effortlessly yield four generously sized puffs, perfect for a more substantial individual dessert, or gently roll out the dough a bit further to create eight smaller, two-to-three-bite pastries. These smaller puffs are absolutely ideal for appetizer spreads, dessert buffets, or when you simply want a delightful little treat without overindulging. Their compact size makes them super easy to handle, meaning no need for forks or plates – just grab and enjoy!
Crafting Your Easy Apple Pie Puffs: A Step-by-Step Guide
Let’s dive into the simple steps required to create these exquisite little pastries. The process is broken down into easily manageable stages, ensuring a smooth and enjoyable baking experience, even for novice bakers.
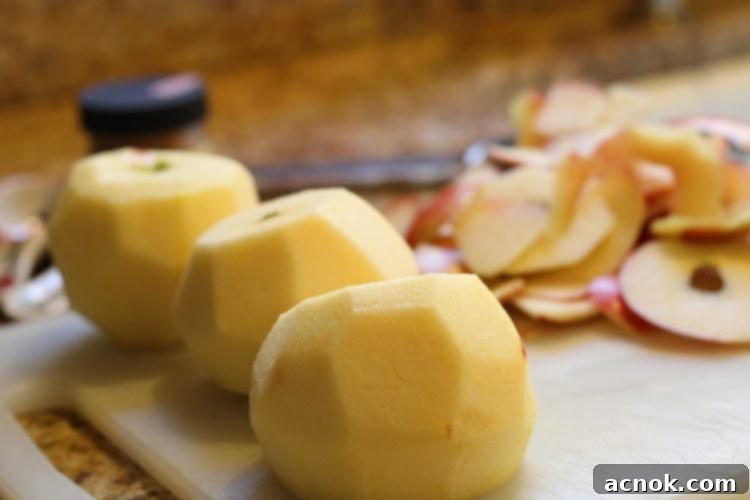
1. Preparing Your Apples: The Foundation of Flavor
The journey to perfect apple pie puffs begins with meticulously prepared apples. Start by peeling the apples, then carefully removing the core and seeds. Once clean, chop them into uniform, bite-sized pieces. Consistency in size is crucial here, as it ensures the apples cook evenly and tenderly in the pan. Place your chopped apples in a mixing bowl and gently toss them with flour, sugar, and cinnamon. The flour acts as a thickening agent, creating that lovely, saucy filling, while the sugar sweetens and the cinnamon adds warmth and classic apple pie spice. Ensure every piece of apple is evenly coated to guarantee a perfectly balanced flavor in every bite.
Pro Tip: If you’re preparing a larger batch of apples or working at a slower pace, you might notice the chopped apples starting to brown. To prevent this unsightly oxidation, simply place them in a bowl of water with a generous squeeze of lemon juice. The citric acid will keep them fresh and vibrant until you’re ready to cook.
2. Cooking the Apple Filling: Achieving Perfect Tenderness
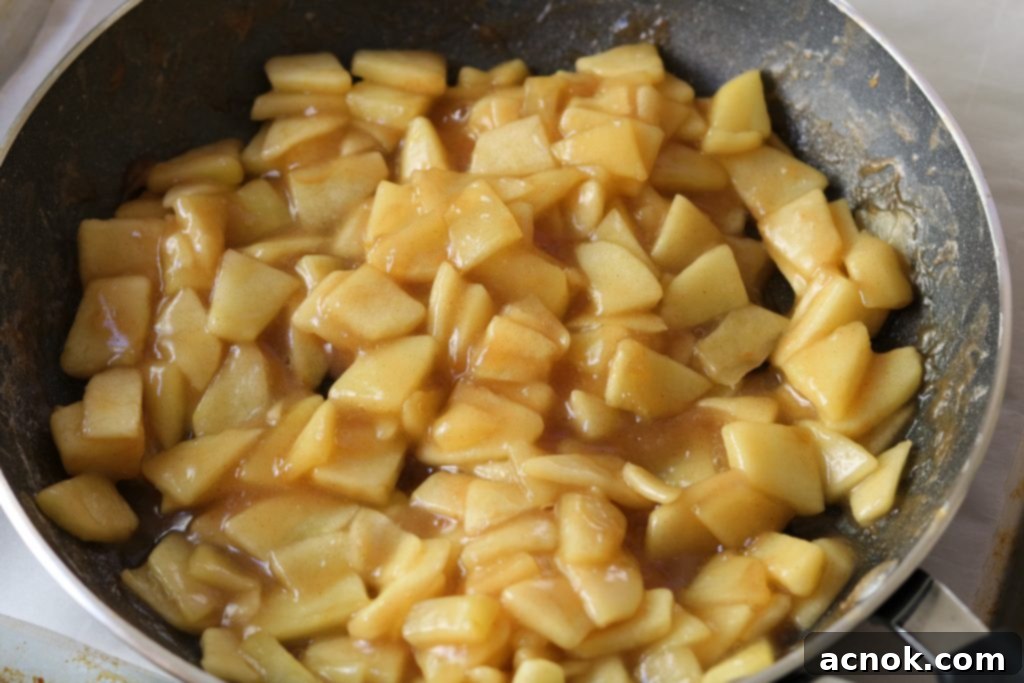
With your apples coated, it’s time to create that luscious, fork-tender filling. Transfer the apple mixture to a nonstick pan and place it over medium-low heat. Add an initial 1/4 cup of water. As the apples begin to warm, the natural moisture from the fruit, combined with the added water, will start to dissolve the sugar and activate the flour, quickly forming a sauce. It’s important to stir frequently to prevent the apples from sticking to the pan and to ensure they cook evenly. You’re aiming for a thickened, glossy sauce, but not one that is overly watery.
Continue to cook, stirring often. If the mixture appears too thick or starts to dry out, add water one to two tablespoons at a time, allowing it to incorporate before adding more. This controlled approach ensures you achieve the ideal consistency – a thick, syrupy coating for the apples, rather than a thin, runny liquid. Cook until the apples are fork-tender, meaning they yield easily when pierced, but still retain a slight bite. This usually takes about 10-15 minutes, depending on the apple variety and the size of your chopped pieces. Once cooked, remove the pan from the heat and allow the filling to cool slightly; this helps prevent the puff pastry from becoming soggy.
3. Working with Puff Pastry: The Flaky Magic
Now, for the “magic” that turns a simple apple filling into a spectacular puff! Carefully unroll your sheet of puff pastry. Ensure it’s properly defrosted according to package directions, usually about 20-30 minutes at room temperature. A slightly chilled but pliable pastry is easiest to work with. On a lightly floured surface, you can gently roll out the dough a bit more, if desired, to achieve thinner puffs or to yield eight smaller servings instead of four larger ones. The goal is to maintain a relatively square shape. Once rolled, use a sharp knife or a pizza cutter to divide the puff pastry sheet into 4 or 8 even squares.
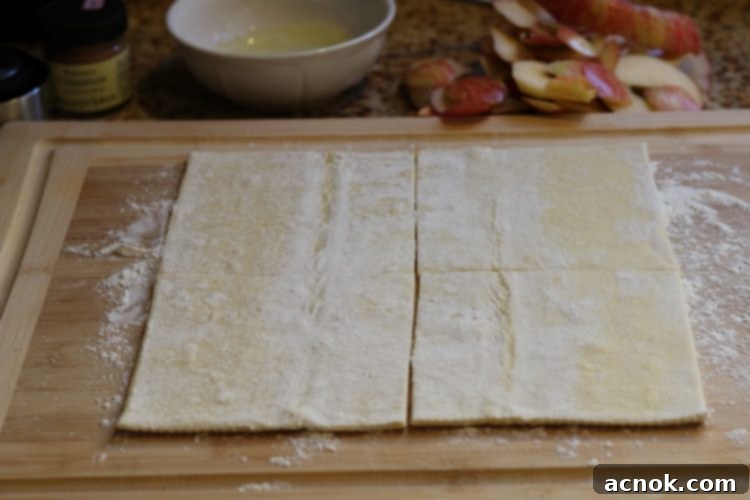
4. Assembling and Sealing Your Puffs
The assembly is where your puffs truly take shape. Spoon a generous amount of the cooled apple mixture onto the center of each puff pastry square. Be mindful not to overfill, as this can make sealing difficult and lead to leakage during baking. You should have enough filling for each puff to have a satisfying center, while still allowing the corners of the dough to meet when folded. Gently fold one corner of the pastry over to meet the opposite corner, forming a triangle. Alternatively, you can fold the pastry in half to create a rectangular or square pocket.
Once folded, carefully pinch the edges together to seal them completely. For a more secure seal and a beautiful golden-brown finish, prepare an egg wash by whisking one egg white with a tablespoon of water. Brush this mixture lightly along the edges before pinching, and then lightly brush the entire surface of each puff. This egg wash creates that desirable crispy, golden crust we all love.
A little secret I like to employ: don’t worry if a tiny bit of filling peeks out or “oozes” during baking. In fact, I encourage it! Why? Because those caramelized bits of apple filling that escape the pastry become wonderfully chewy and add an extra layer of texture and flavor. Plus, they perfectly complement a scoop of creamy vanilla ice cream. Is there anything better than the classic pairing of warm apple pie (or in this case, apple puffs) and cold vanilla ice cream? I think only puppies come close! 🐶
5. Baking to Golden Perfection
Place your assembled Apple Pie Puffs onto a rimmed baking sheet lined with parchment paper or a Silpat baking mat. This prevents sticking and makes cleanup a breeze. Ensure your oven is preheated to 375ºF (190ºC). Bake the puffs for approximately 20 minutes, or until they are beautifully golden brown and the pastry has puffed up significantly. You’ll notice that once cooked, the apple filling is lightly sauced and not overly sweet, allowing the natural, fresh taste of the apples to truly shine through, rather than being overshadowed by sugar.
As soon as they emerge from the oven, their aroma will fill your kitchen, a delightful preview of the treat to come. And yes, have that scoop of vanilla ice cream ready, because these warm, flaky puffs are utterly divine when served alongside a melting dollop of your favorite frozen delight!
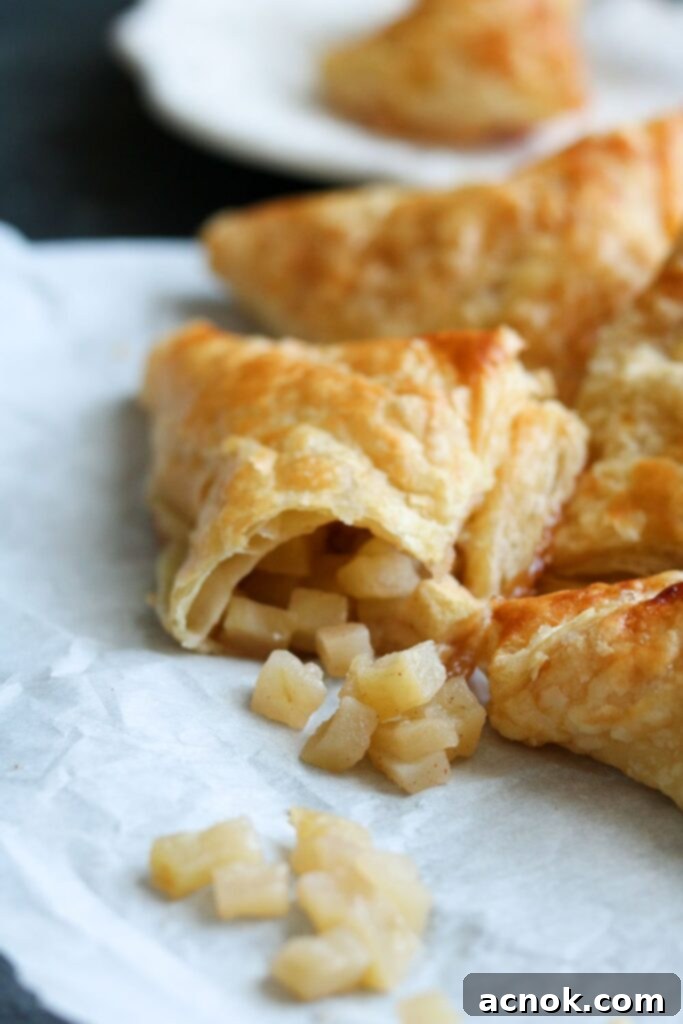
Tips for Perfect Puff Pastry Puffs Every Time
- Don’t Overwork the Pastry: Puff pastry performs best when handled minimally. Too much rolling or stretching can inhibit its ability to puff up into those beautiful flaky layers.
- Keep it Cold: Work with puff pastry when it’s still relatively cold from the fridge (after thawing). If it gets too warm, the butter layers can melt, resulting in less flaky results.
- Even Apple Chunks: Cut your apples into uniform pieces to ensure even cooking and a consistent texture in your filling.
- Don’t Overfill: While tempting, overfilling can cause the pastry to burst during baking. Leave enough room to comfortably seal the edges.
- Ventilation (Optional): For some pastry shapes, a small slit on top can help steam escape, creating a crispier crust. For these puffs, the slight “oozing” helps with this naturally.
- Serve Warm: While delicious at room temperature, these puffs are truly magical when served warm, especially with cold ice cream.
Delicious Variations & Serving Suggestions
While the classic apple and cinnamon filling is undeniably perfect, don’t hesitate to get creative with your Easy Apple Pie Puffs:
- Fruit Swaps: As mentioned, try thinly sliced pears (Bosc or Anjou work well), peaches (fresh or well-drained canned), or a mix of berries (strawberries, blueberries, raspberries). Adjust sugar content based on the sweetness of the fruit.
- Spice It Up: Add a pinch of nutmeg, a dash of allspice, or a tiny amount of ground cloves to your apple filling for a more complex spice profile. A touch of ginger can also add a delightful kick.
- Nutty Addition: Fold in a tablespoon or two of finely chopped walnuts, pecans, or almonds into your apple filling for added texture and flavor.
- Citrus Zest: Grate a bit of lemon or orange zest into the apple mixture to brighten the flavors.
- Glaze Them: For an extra touch of sweetness and shine, whisk together powdered sugar with a few drops of milk or lemon juice to create a simple glaze, and drizzle it over the cooled puffs.
- Caramel Drizzle: A warm caramel sauce takes these apple puffs to the next level, especially when paired with vanilla ice cream.
- Whipped Cream: A dollop of freshly whipped cream is always a welcome accompaniment.
- Dust with Sugar: A simple dusting of powdered sugar just before serving adds an elegant finish.
Enjoy these versatile and undeniably delicious Easy Apple Pie Puffs. They bring the comfort of homemade apple pie to your table with minimal effort, making them a perfect choice for any occasion.
All content and photographs ©Claudia’s Table and claudiastable.com
Easy Apple Pie Puffs
Ana | Claudia’s Table
September 2, 2019
Pin Recipe
Equipment
-
rimmed baking sheet
-
parchment paper or Silpat
-
Non stick pan
Ingredients
- 1 sheet puff pastry
- 4 apples, medium peeled and chopped into small bite sized pieces
- 1/4 cup water plus extra
- 1/2 cup sugar
- 2 tbsp flour all purpose
- 1/2 tsp cinnamon ground
- 1 pinch salt kosher
- 1 egg white plus tbsp water (for egg wash)
Instructions
-
Unwrap and prepare puff pastry according to package directions. Allow it to defrost at room temperature for about 20 minutes until pliable.
-
Preheat oven to 375 degrees F (190 C). Line a baking sheet with parchment paper or a Silpat mat.
-
In a medium bowl, combine the peeled and chopped apples, all-purpose flour, granulated sugar, and ground cinnamon. Toss gently until the apple pieces are evenly coated.
-
Transfer the coated apples to a nonstick pan. Add 1/4 cup of water. Cook on low to medium-low heat, stirring occasionally to prevent the mixture from sticking. As the apples cook, the mixture will thicken. If it becomes too thick or dry, add additional water, 1 tablespoon at a time, until a thick, saucy consistency is achieved.
-
The apple filling is done when the apples are fork-tender, typically after about 10-15 minutes of cooking. Remove from heat and allow to cool slightly before assembling the puffs.
-
On a lightly floured surface, gently roll out the puff pastry dough, keeping the square shape as intact as possible. Cut the pastry into 4 or 8 even squares using a sharp knife or pizza cutter.
-
Spoon a portion of the cooled apple mixture onto the middle of each puff pastry square. Ensure you leave enough space around the edges to seal.
-
Fold one corner of the dough over to the opposite corner, or fold in half, so the corners or edges meet. Lightly pinch the sides of the pastry together to seal the edges securely.
-
In a small bowl, whisk together the egg white and 1 tablespoon of water to create an egg wash. Lightly brush the tops of each puff pastry with the egg wash for a golden-brown finish.
-
Bake in the preheated oven for about 20 minutes, or until the puff pastry is beautifully golden brown and fully puffed.
-
Remove from oven and let cool slightly on the baking sheet before serving. Best served warm with a scoop of vanilla ice cream.
Notes
Nutrition
Nutritional information is calculated online and should be used as a guide.
All content and photographs ©Claudia’s Table and claudiastable.com
For another delicious puff pastry recipe, consider trying our savory Puff Pastry with Pears, Gorgonzola and Walnuts – a perfect blend of sweet and savory notes for your next appetizer!
