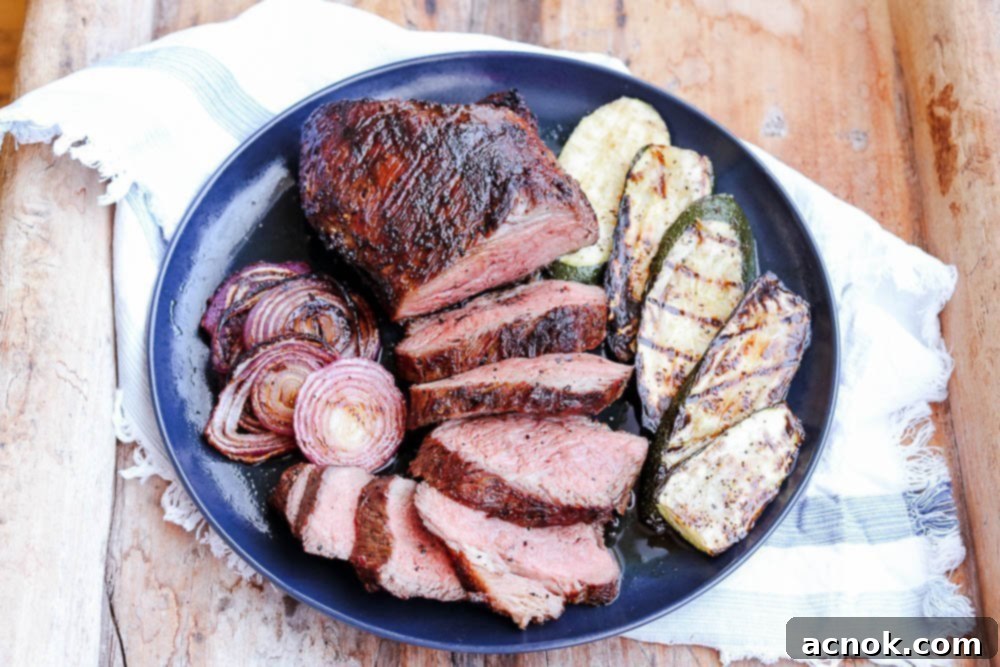
Unlock Juiciness: The Easiest Two-Ingredient Grilled Tri-Tip Roast Recipe for Ultimate Tenderness
Prepare to revolutionize your grilling game with this incredibly simple yet profoundly effective two-ingredient grilled Tri-Tip roast recipe. This method is my unwavering go-to whenever I prepare this often-underestimated cut of beef. If you’re not yet acquainted with Tri-Tip, it’s a distinct cut from the bottom sirloin, famously known for its unique triangular shape, robust grain, and impressive thickness. While it can certainly be roasted in an oven, I wholeheartedly champion grilling it. This specific technique not only enhances its natural flavors but also ensures unparalleled tenderness, transforming a good cut into an extraordinary culinary experience. And the secret to this amazing result? Just two simple ingredients: a light beer and a robust seasoning blend.
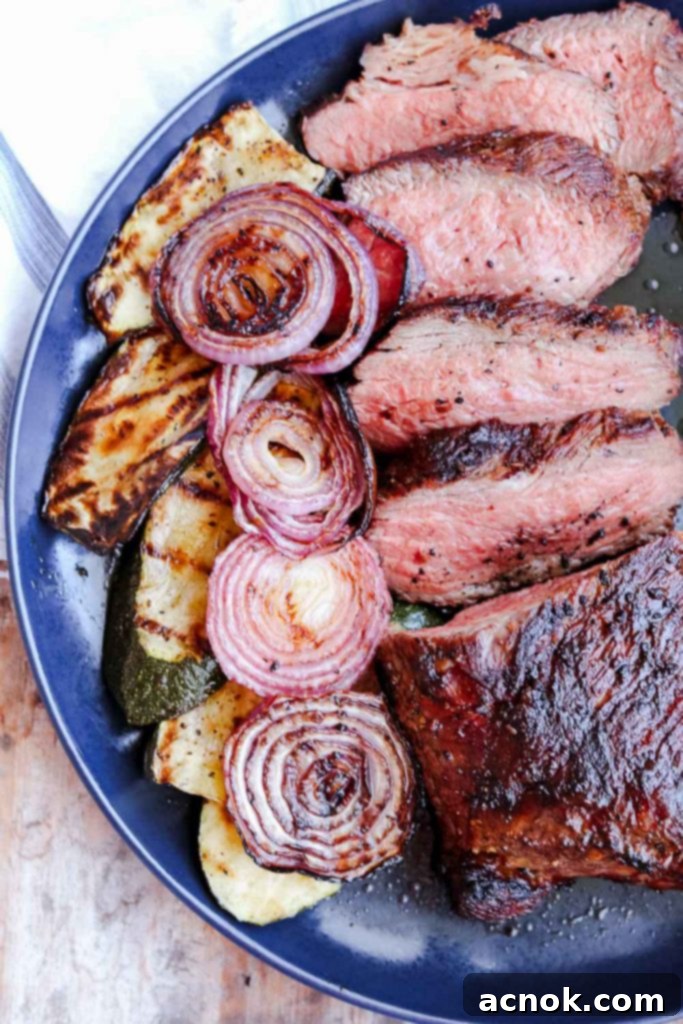
The Enduring Appeal of Tri-Tip: A Californian Grilling Classic
Tri-Tip roast holds a special place in the hearts of many, particularly in California, where it’s a staple at butcher shops and grocery stores. Its widespread availability and popularity often lead to it being prepared in what’s known as “Santa Maria Style” barbecue. This cherished tradition, according to santamariavalley.com, boasts a rich history spanning over 150 years. Originating as a way for rancheros and cowboys to gather and share a communal meal, Santa Maria barbecue is more than just a cooking method; it’s a celebration of community and flavor.
Traditionally, Santa Maria-style Tri-Tip is prepared with a simple yet potent dry rub, then cooked over an open fire fueled by local red oak wood, imparting a distinctive smoky flavor. It’s typically served alongside classic accompaniments such as Pinquito beans, a crisp salad, fresh salsa, and warm bread. This combination creates a truly authentic and incredibly satisfying meal. The Tri-Tip itself is a generously sized cut, making it perfect for sharing amongst a lively group of family and friends, ensuring everyone gets to savor its delicious, hearty flavor. Our simplified two-ingredient method pays homage to this tradition by focusing on the core elements of tender meat and bold seasoning.
Understanding the Tri-Tip Cut: Shape, Grain, and Fat
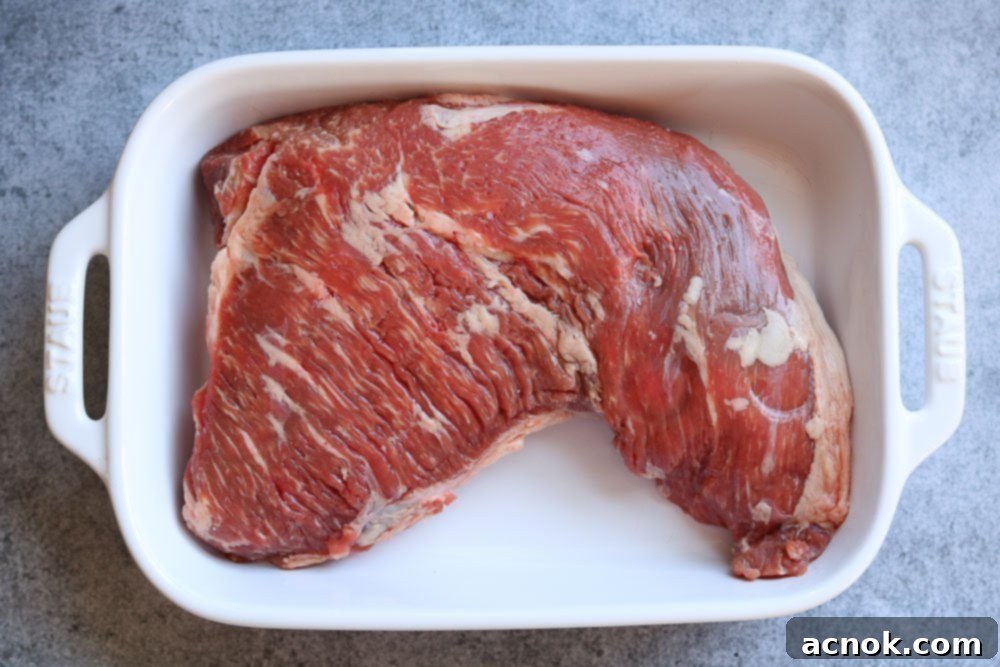
Before diving into the grilling process, it’s essential to understand the characteristics of the Tri-Tip cut. As its name suggests, it’s a triangular piece of meat, typically weighing between 1.5 to 3 pounds. This unique shape is part of what makes it so versatile, allowing for different levels of doneness across the roast. One side of the Tri-Tip, often referred to as the “bottom side,” typically features a significant layer of fat, known as the fat cap. For this particular recipe, I advocate for leaving this fat cap intact. Why? Because as the Tri-Tip cooks, this fat renders down, basting the meat and contributing immensely to its moisture, tenderness, and rich flavor. Trimming it off prematurely can lead to a drier, less flavorful roast.
Another crucial aspect is the meat’s grain. The Tri-Tip has a distinct grain that runs in two different directions, converging towards the center. Understanding this is paramount for slicing the meat correctly after cooking, which directly impacts its tenderness. Slicing against the grain shortens the muscle fibers, making each bite much more tender and enjoyable. We’ll delve deeper into this slicing technique later in the guide, but recognizing the grain before cooking will help you plan your cuts.
The Magic of Marinade: Preparing Your Tri-Tip for the Grill
The secret to achieving an incredibly tender and flavorful grilled Tri-Tip with just two key ingredients lies in the simple, yet effective, marination process. This step is critical for breaking down muscle fibers and infusing the meat with deep flavor before it even touches the grill. Here’s how to master this crucial preparation phase, ensuring your Tri-Tip is primed for perfection.
Selecting Your Seasoning: The Flavor Foundation
For this two-ingredient grilled Tri-Tip roast, a generous coating of McCormick Grill Mates Montreal Steak Seasoning is my top recommendation. This widely available spice blend is a powerhouse of flavor, featuring a robust mix of coarse salt, black pepper, garlic, onion, and a hint of paprika. Its balanced profile complements beef perfectly, creating a delicious, savory crust when grilled. It’s designed to bring out the best in hearty cuts of meat, and Tri-Tip is no exception.
However, if Montreal steak seasoning isn’t readily available, or if you prefer to customize your flavors, you can easily create an equally effective substitute. Simply combine coarse ground salt and pepper, granulated garlic, granulated onion, and a good pinch of crushed red pepper for a touch of heat. The key here is to use coarse-ground ingredients, as they adhere well to the meat and form that desirable crust during grilling. Remember, when using individual spices, adjust quantities to your preference – the suggested amounts are approximate and can be tailored to your taste for saltiness or spiciness. The goal is a generous, even coating that will stand up to the heat of the grill.
Regardless of your chosen seasoning, apply a very generous amount to both sides of the Tri-Tip. Don’t be shy; a good layer of seasoning is essential for building that irresistible flavor crust and ensuring every bite is seasoned to perfection. Massage the seasoning into the meat gently to ensure it adheres well to all surfaces.
The Beer Marinade: Tenderizing and Infusing Flavor
Once seasoned, place the Tri-Tip into a casserole dish or a similar container deep enough to hold the liquid. Now comes the second magical ingredient: light beer. Pour one can or bottle of any light beer over the roast. The choice of light beer isn’t just for flavor; its slight acidity and natural enzymes play a crucial role in breaking down tougher muscle fibers, tenderizing the beef without overpowering its natural taste. The subtle malty notes of the beer also add another layer of complexity to the overall flavor profile, creating a nuanced and appealing taste in the finished product.
For those with gluten sensitivity or dietary restrictions, rest assured that you can still enjoy this incredible recipe. Simply substitute regular light beer with a gluten-free alternative, such as Omission (which I personally used for this preparation). The tenderizing properties and flavor contribution of gluten-free beer are just as effective, ensuring everyone can partake in this delicious and inclusive meal. The important part is the liquid and its enzymes, not necessarily the gluten.
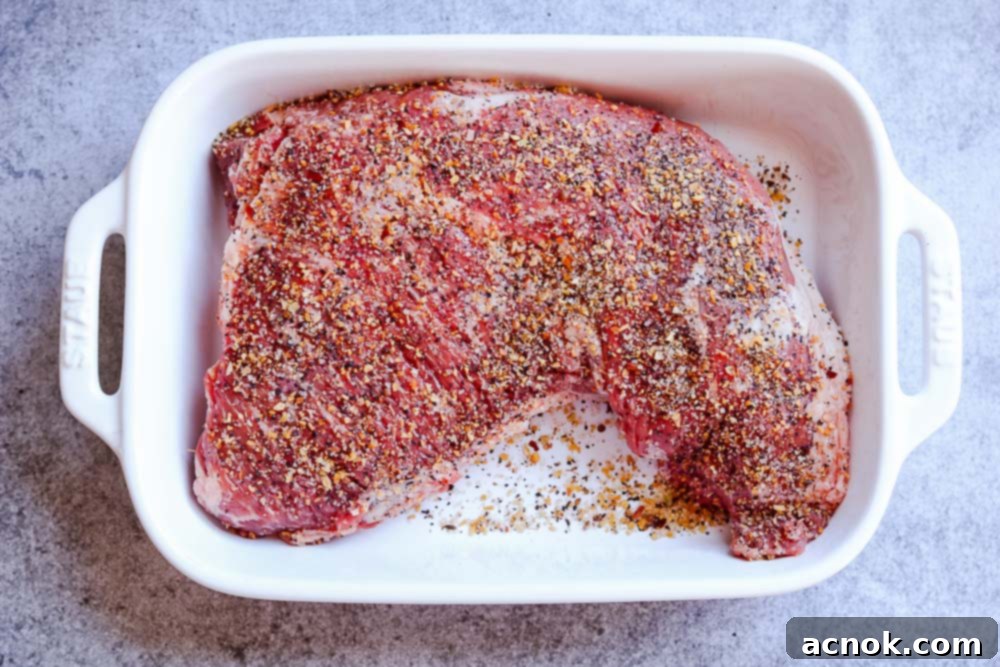
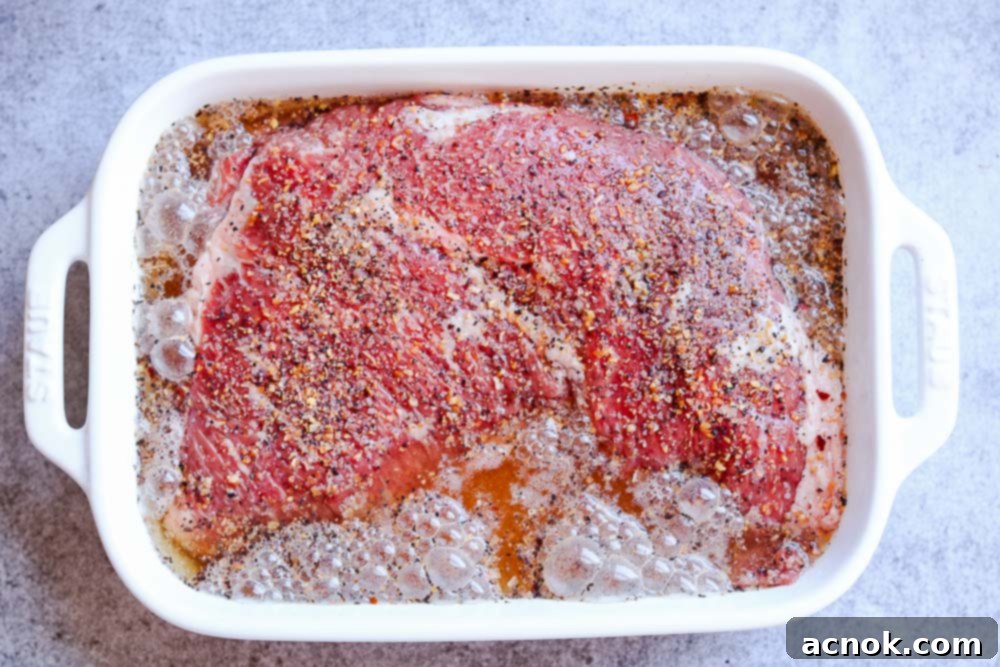
The Marinating Process: Timing is Key
Once the beer is added, tightly wrap the casserole dish with clear plastic wrap to prevent any spills and ensure the marinade fully bathes the meat. Place the dish in the refrigerator. I’ve found that marinating the Tri-Tip on the morning of your barbecue, typically for about 6 hours, provides the optimal balance of flavor infusion and tenderization. This duration allows the beer and seasoning to penetrate the meat effectively without making it mushy or changing its texture too drastically. A shorter marinade might not yield as much tenderness, while an excessively long one could break down the fibers too much.
To ensure even marination, make sure to flip the Tri-Tip at the halfway mark, around 3 hours. This guarantees that both sides of the roast are equally exposed to the tenderizing liquid and seasoning, leading to a consistently delicious result throughout the entire cut. About 30 to 60 minutes before you plan to grill, remove the Tri-Tip from the refrigerator. Discard the marinade, as it has served its purpose and should not be used for basting or serving due to potential bacterial growth from raw meat contact. For an extra boost of flavor and to ensure a perfect crust, give the Tri-Tip another light seasoning on both sides before it hits the hot grill. This final seasoning layer adheres to the slightly damp surface, creating an even more robust and appetizing exterior.
Grilling Your Tri-Tip to Perfection: Step-by-Step Guide
Grilling Tri-Tip requires a combination of high heat searing and a lower, more controlled cooking environment to achieve that coveted tender interior and beautifully caramelized exterior. This two-step approach is crucial for cooking a thick cut like Tri-Tip without drying it out. Follow these precise steps for a perfectly grilled Tri-Tip roast every time, ensuring juicy and flavorful results.
Setting Up Your Grill: Heat Zones Are Crucial
Begin by preheating your grill to a medium-high temperature. For optimal results, aim for two-zone cooking if your grill allows it: dedicate one side with direct medium-high heat for searing, and another side with lower or indirect heat for finishing the cook. This setup provides maximum flexibility and control, which is essential for managing a thick cut like Tri-Tip that requires both a crust and even internal cooking. Ensure your grill grates are meticulously clean and lightly oiled to prevent the meat from sticking, which can tear your beautiful crust.
The Searing Phase: Building Flavor and Crust
Once your grill is thoroughly preheated and ready, place the Tri-Tip on the direct heat side, fat side up. The primary goal during this initial phase is to sear the meat aggressively, creating a delicious, flavorful crust and locking in the precious internal juices. Allow it to sear undisturbed for about 10 minutes. During this time, the high heat will begin to caramelize the seasoning and develop deep, rich umami flavors on the surface of the meat.
After 10 minutes, carefully flip the Tri-Tip so the fat side is down. This is where you need to be particularly vigilant. The rendering fat, now directly exposed to the heat, can cause significant flare-ups, which you absolutely want to avoid to prevent burning the meat. Keep a close eye on the grill, and if flames erupt, immediately move the roast temporarily to a cooler part of the grill until the flames subside, then return it to finish searing. Sear the fat side down for approximately 5 minutes, allowing that fat to crisp up beautifully and contribute even more rendered flavor to the roast. After this, flip it back to fat side up for the next stage of cooking.
Finishing the Cook: Indirect Heat for Even Doneness
Once both sides have been adequately seared and a crust has formed, reduce your grill’s temperature to medium-low, or move the Tri-Tip to the indirect heat zone if you’re using a two-zone setup. The aim now is to cook the roast gently and evenly to your desired internal doneness without overcooking the exterior. This slower, more controlled heat allows the internal temperature to rise gradually. Check the internal temperature of the roast after about 10 minutes using a reliable meat thermometer inserted into the thickest part of the meat. At this stage, you can perform a quick flip again (still mindful of the fat side and any potential flare-ups) and then return it fat side up for another 8 minutes or so. Continue to monitor the internal temperature diligently until it approaches your target range.
Achieving Perfect Doneness: Temperature Guidelines and Resting
Knowing exactly when your Tri-Tip is done is crucial for optimal tenderness and juiciness. A good quality meat thermometer is your best friend here. Insert it into the thickest part of the roast, avoiding any bone or large pockets of fat. Here are the internal temperature guidelines for various levels of doneness:
- Rare: 125°F (52°C)
- Medium Rare: 135°F (57°C)
- Medium: 145°F (63°C)
- Medium Well: 150°F (66°C)
- Well Done: 160°F (71°C)
It’s vital to remember that the roast will continue to cook even after it’s removed from the grill, a process known as “carryover cooking.” Therefore, I strongly advise removing the Tri-Tip from the heat slightly before it reaches your target temperature. For example, if you’re aiming for a perfect medium-rare, pull the roast off the grill when its internal temperature reads closer to the rare mark (around 125-130°F). Immediately after removing it, transfer the Tri-Tip to a cutting board, cover it loosely with aluminum foil, and let it rest for at least 10 minutes (15-20 minutes for larger roasts). This resting period is non-negotiable! It allows the meat fibers to relax and reabsorb the juices that have been pushed to the center during cooking, ensuring a uniformly moist and tender result. Skipping this crucial step means all those precious juices will run out when you slice, leaving you with a dry, less flavorful roast.
By following these precise temperature guidelines and allowing for proper resting, your Tri-Tip will be absolutely perfect upon serving, radiating with succulence and flavor, making every bite a delight.
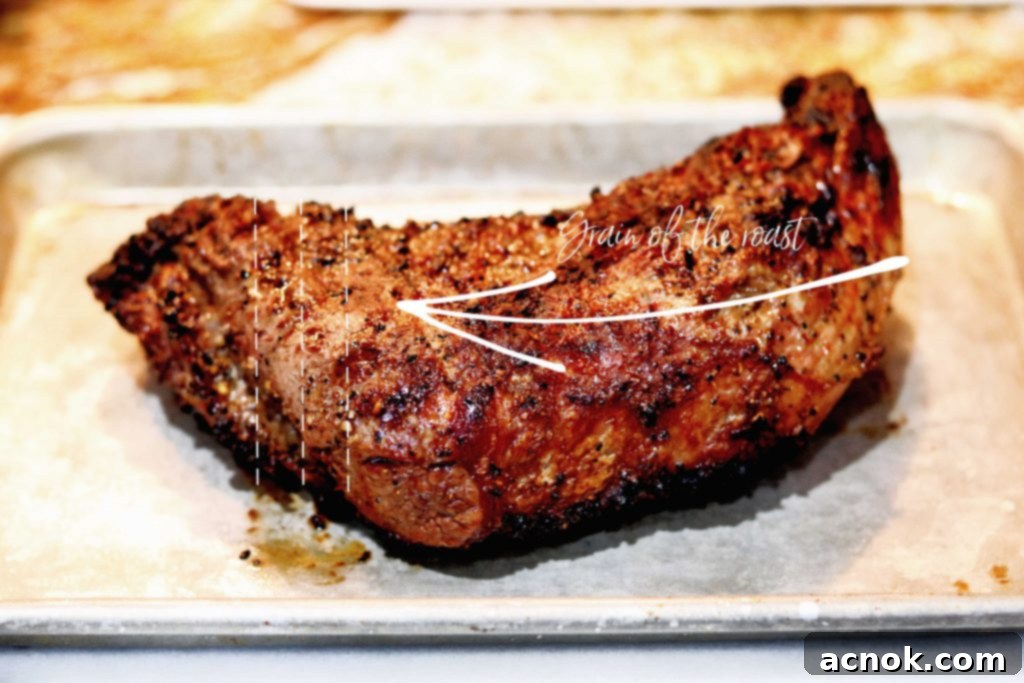
The Art of Slicing: Maximizing Tenderness
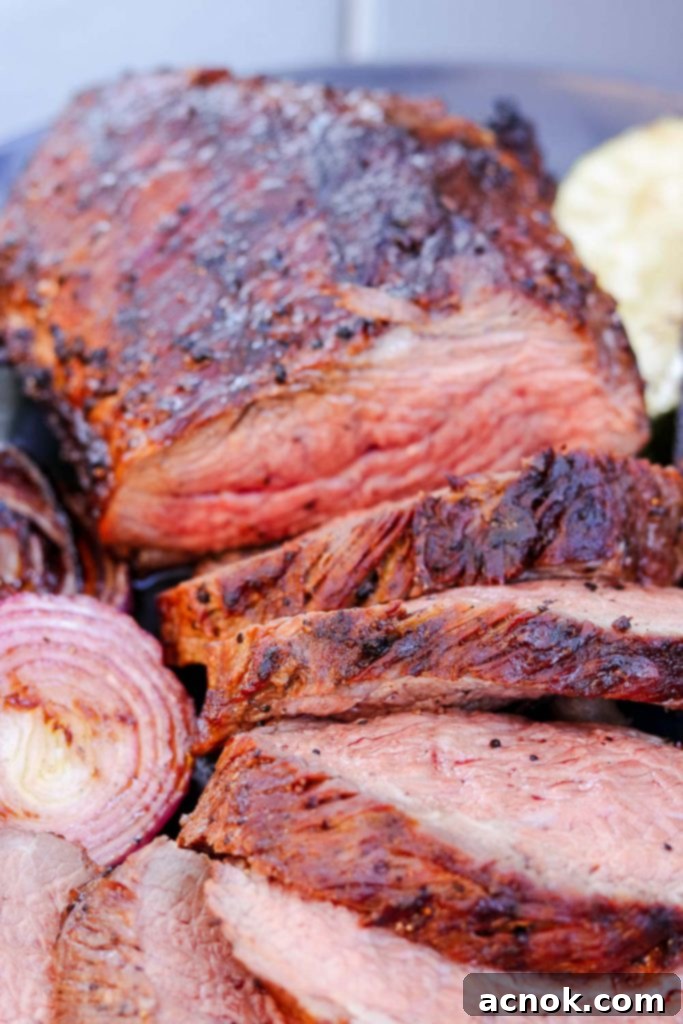
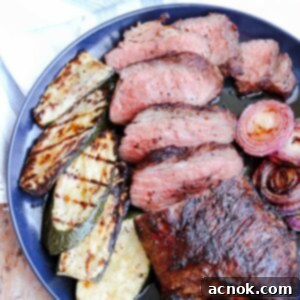
Once your beautifully grilled Tri-Tip has rested for the recommended time, the final step to ensuring maximum tenderness and an enjoyable eating experience is proper slicing. As mentioned earlier, the Tri-Tip has a unique grain that changes direction, often at a roughly 45-degree angle in the middle of the roast. To achieve the most tender slices, you must always slice *against* the grain. Take a moment to look closely at the meat fibers; you’ll notice they run in a certain direction. Orient your knife perpendicular to these fibers and slice thin pieces, ideally about 1/4 to 1/2 inch thick. You might need to rotate the roast halfway through to adjust for the changing grain, ensuring all slices are cut correctly. This technique shortens the meat fibers, making each bite incredibly tender, easy to chew, and maximizing the perceived juiciness.
At this point, your Tri-Tip should slice up beautifully, revealing a tender, juicy interior that will impress even the most discerning palates. Its rich flavor, enhanced by the simple marinade and expert grilling, speaks for itself, and the perfect slice completes the masterpiece.
Serving Suggestions and Perfect Pairings
While this grilled Tri-Tip is undeniably delicious on its own, its versatility means it can be further elevated with your favorite accompaniments. Consider serving it with a tangy BBQ sauce, a vibrant chimichurri, a rich garlic herb butter, or even a simple fresh salsa. For side dishes, classic pairings include roasted vegetables, a fresh green salad, or the traditional Santa Maria-style Pinquito beans for a truly authentic and complete meal. Don’t forget some crusty bread to soak up all those amazing juices.
To complement the rich, beefy flavors of the Tri-Tip, consider pairing it with a glass of a bold Pinot Noir, a full-bodied Cabernet Sauvignon, or a robust Zinfandel. For a refreshing and lighter twist, especially during warmer months, my delightful Summer Sangria offers a wonderful contrast. Either choice will enhance your dining experience and make this simple Tri-Tip meal truly memorable, perfect for any gathering or a special weeknight dinner.
Why This Two-Ingredient Tri-Tip Recipe is a Game-Changer
This two-ingredient grilled Tri-Tip recipe isn’t just easy; it’s a testament to how minimal ingredients can yield maximum flavor and tenderness. The beer marinade works wonders in breaking down tough muscle fibers, while the simple yet potent seasoning creates an irresistible crust. It’s a method that consistently produces succulent, juicy Tri-Tip, making it an ideal choice for both seasoned grill masters and beginners alike. The beauty lies in its simplicity and the remarkable results it delivers every single time.
Whether you’re hosting a backyard barbecue, looking for a simple yet impressive weeknight dinner, or simply craving a delicious beef roast, this recipe is guaranteed to become a favorite in your culinary repertoire. It celebrates the inherent quality of the Tri-Tip cut, allowing its natural beefy flavor to shine through, perfectly complemented by just the right amount of seasoning and moisture. Give it a try, and taste the difference that just two ingredients can make!
For another fantastic beef recipe, don’t miss this delicious Flat Iron Steak with Lemon Soy and Crispy Garlic. If you’re seeking more inspiration for your summer barbecue, explore a fantastic roundup of easy recipes here. These additional resources will help you expand your grilling skills and discover new favorite dishes, ensuring your next outdoor cookout is a resounding success.
Inspired by this recipe and ready to fire up your grill? Make sure to mention us or tag us on Instagram when you share your delicious creations! We love seeing your culinary triumphs. All content and photographs ©Claudia’s Table and claudiastable.com.
Two-Ingredient Grilled Tri-Tip Roast
Ana | Claudia’s Table
July 11, 2020
Pin Recipe
Equipment
-
Gas Grill
-
Casserole Dish
-
Meat Thermometer
Ingredients
- 1 2.5lb Tri-Tip Roast
- 2 tbsp Montreal Steak Seasoning by McCormick
- 1 can/bottle light beer Gluten-free beer will work fine for those with sensitivities.
Substitute for Montreal Steak Seasoning (if not available):
- 1 tbsp coarse salt
- 1 tbsp coarse pepper
- 1/2 tbsp granulated onion
- 1/2 tbsp granulated garlic
- pinch crushed red pepper optional, for a hint of heat
Instructions
Prepare Tri-Tip:
-
Leave the fat cap on the bottom side of the Tri-Tip. Generously apply Montreal steak seasoning (or the homemade substitute) to both sides of the roast. Ensure a good, even coating for maximum flavor.
-
Place the seasoned Tri-Tip in a casserole dish and pour one can or bottle of light beer over it. Use gluten-free beer if preferred or necessary. Tightly wrap the dish with plastic wrap and refrigerate.
-
Marinate for approximately 6 hours. Flip the roast at the 3-hour mark to ensure both sides are evenly tenderized and flavored by the beer marinade.
-
About 30 to 60 minutes before grilling, remove the Tri-Tip from the fridge to allow it to come closer to room temperature. Discard the marinade completely. Re-season both sides lightly to build a fresh, flavorful crust during cooking.
How to Grill the Tri-Tip:
-
Preheat your grill to medium-high heat, ideally setting up for two-zone cooking (direct and indirect heat). Place the Tri-Tip fat side up on the direct, medium-high heat. Sear for 10 minutes to develop a crust. Flip to fat side down and sear for about 5 minutes, carefully monitoring for flare-ups. Flip back to fat side up.
-
Reduce grill heat to medium-low or move the Tri-Tip to the indirect heat zone. Continue cooking, checking the internal temperature after 10 minutes. You can perform a quick flip (still mindful of the fat side) and then return it fat side up for another 8 minutes, or until desired doneness is reached.
-
Refer to the temperature guidelines for doneness: 125°F for rare, 135°F for medium-rare, 145°F for medium, 150°F for medium-well, and 160°F for well done. Remember to remove the roast slightly before your target temperature, as it will continue cooking while resting. Cover loosely with foil and let rest for 10-15 minutes.

-
Once rested, slice the Tri-Tip against the grain into thin pieces. Serve immediately with your favorite sides and enjoy the incredibly tender and flavorful results!
Notes
Nutritional information provided is an estimate based on ingredients and preparation, and may vary depending on exact product usage. Always use a reliable meat thermometer for accurate doneness and food safety.
Nutrition
Nutritional information is calculated online and should be used as a guide.
All content and photographs ©Claudia’s Table and claudiastable.com
Explore More Delicious Recipes from Claudia’s Table!
- Pasta with Grilled Vegetables, Feta, and Lemon
- Grilled Asian Marinated Flank Steak
- Classic Homemade Chunky Blue Cheese Dressing
- 3-Ingredient Crispy Oven-Roasted Potatoes
- Grilled Peach Avocado Chicken Salad
