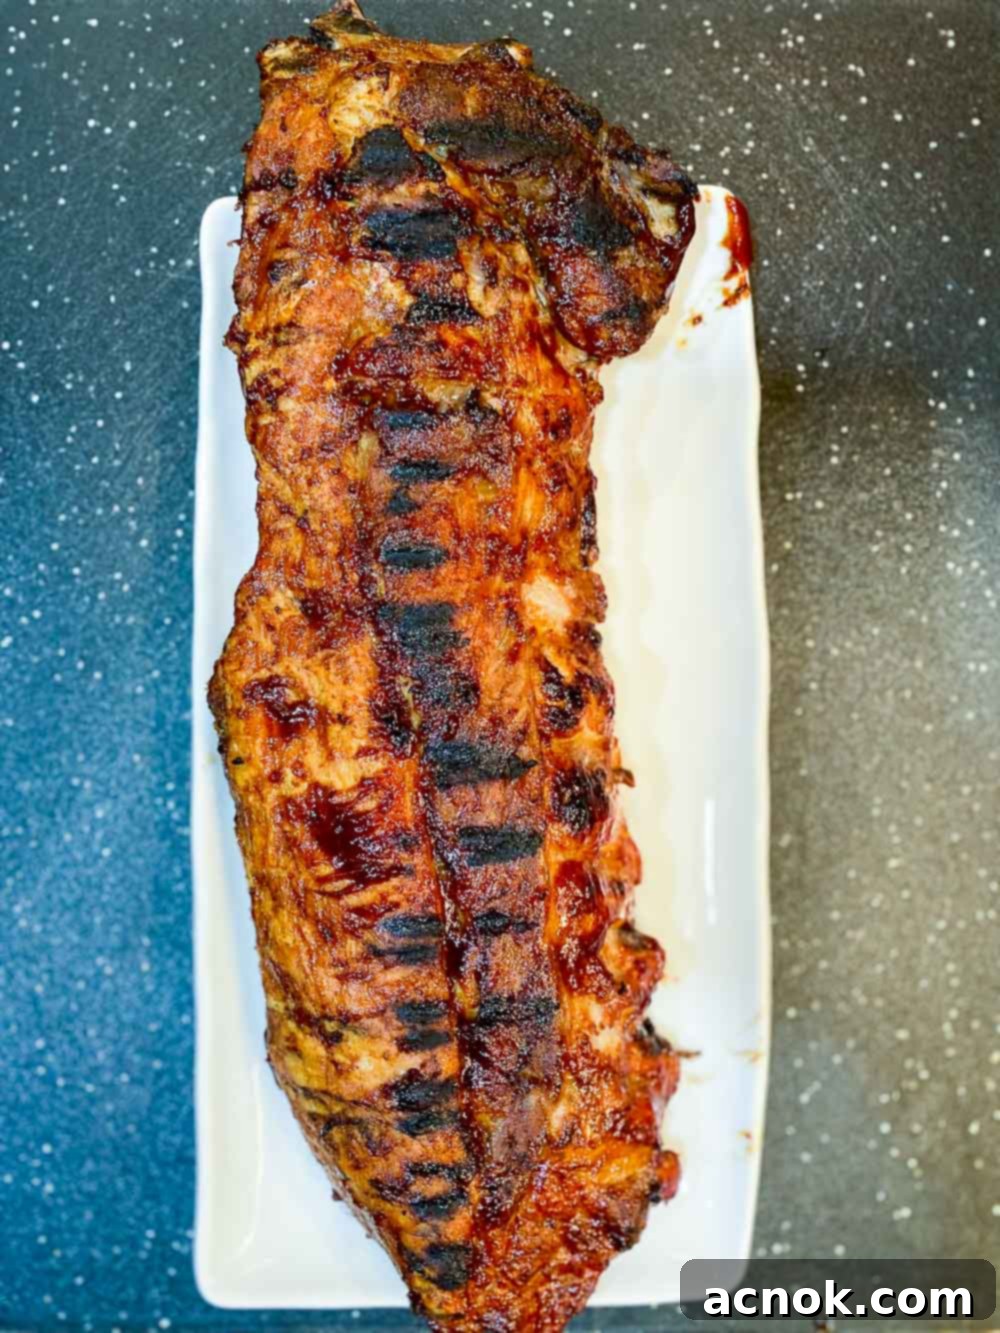
Mastering Mouthwatering BBQ Ribs at Home: Your Ultimate Bake-Then-Grill Guide
Making incredibly delicious, fall-off-the-bone ribs at home might seem like a daunting culinary challenge, often reserved for seasoned pitmasters or restaurant kitchens. However, we’re here to reveal a surprisingly simple and foolproof method that allows you to achieve perfection in your own backyard: the bake-then-grill technique. This approach combines the best of both worlds, ensuring your ribs are consistently tender and juicy while still developing that irresistible smoky char and caramelized crust we all crave from outdoor grilling.
Forget the long hours of constantly monitoring a smoker or the risk of dry, tough ribs from direct high heat. Our two-step process—baking followed by grilling—is designed for ease and spectacular results. It’s a fantastic starting point for anyone looking to master their BBQ rib routine, offering a flexible foundation to experiment with your favorite rubs and sauces. Get ready to impress your family and friends with ribs that rival any BBQ joint!
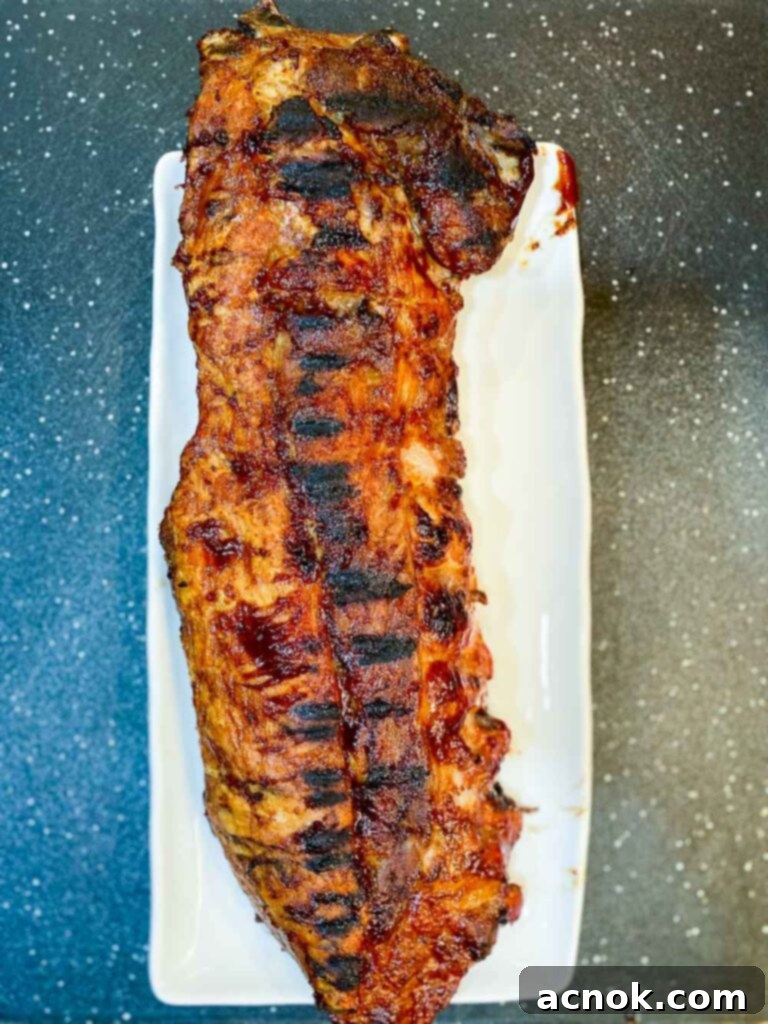
The baking phase is the secret weapon for achieving unparalleled tenderness. By cooking the ribs low and slow in the oven, we ensure that the tough connective tissues break down gently, rendering the meat incredibly succulent without any risk of burning. Ribs cook more quickly than you might imagine due to their bone structure and relatively thinner meat compared to a large, boneless roast. This initial bake guarantees that every bite will be tender and moist, setting the stage for the final grilling flourish.
Once baked to perfection, the ribs transition to the grill. This critical step is where the magic of char and flavor development truly happens. Grilling allows the ribs to obtain that coveted smoky aroma, beautiful grill marks, and a slight crispness on the exterior that contrasts wonderfully with the tender interior. This method expertly balances tenderness with the smoky char, preventing the ribs from drying out or becoming overcooked on the grill, a common pitfall when grilling from raw. We also prefer a subtle approach to saucing; rather than slathering them in thick sauce before cooking, we recommend a light brush towards the end of grilling, saving the bulk of the sauce for individual serving. This allows the natural flavors of the pork and the dry rub to shine through, letting everyone customize their saucy experience.
Preparing Your Ribs for Perfection: The Foundation of Flavor
The journey to perfectly tender and flavorful BBQ ribs begins well before they ever touch the heat. Proper preparation is paramount, setting the stage for a truly unforgettable culinary experience. There’s no question that a quality dry rub is essential. It’s not just about flavor; a good rub also aids in tenderizing the meat, creating a delicious crust, and locking in moisture during cooking. While I currently rely on high-quality store-bought rubs as I continue to perfect my own blend, the key is to be generous with its application. Don’t be shy – cover every inch!
Choosing Your Ribs: Baby Back vs. Spare Ribs
Before you even think about rubs, let’s talk about the star of the show: the ribs themselves. You’ll typically encounter two main types at your butcher or grocery store: Baby Back Ribs and Spare Ribs. Both are excellent choices for this bake-then-grill method, but they offer slightly different characteristics.
- Baby Back Ribs: These are cut from the top of the rib cage, near the backbone, between the loin and shoulder. They are shorter, leaner, and more curved than spare ribs, often containing more meat around the bone. They tend to be more tender and cook a bit faster due to their smaller size, making them a popular choice for quick weeknight meals or for those who prefer a meatier bite.
- Spare Ribs: These come from the belly section of the pig, closer to the sternum. They are larger, flatter, and contain more fat and connective tissue, which translates to a richer flavor and incredibly tender results when cooked low and slow. Spare ribs often include a section called the “rib tips” which are delicious but sometimes trimmed off to create “St. Louis-style” ribs, which are rectangular and easier to cut.
For this recipe, either type will work beautifully. If you’re new to making ribs, baby back ribs might be a slightly easier starting point due to their more manageable size and inherent tenderness. However, spare ribs will reward you with a deeper, more robust pork flavor.
The Art of Membrane Removal: A Crucial Step for Tender Ribs
Once you’ve selected your ribs, the first crucial step is to prepare them for seasoning. Begin by carefully removing the ribs from their packaging and discarding any wrappers. Place the rack of ribs on a clean sheet pan. Using paper towels, pat dry any excess liquid from both the top and bottom surfaces of the ribs. This ensures that your dry rub adheres properly and helps create a better crust.
Next comes the often-overlooked but highly recommended step: removing the white membrane (or silverskin) from the bone side of the ribs. This thin, tough membrane, if left intact, becomes unpleasantly chewy and rubbery when cooked, hindering the tender texture we’re striving for and preventing your delicious dry rub from fully penetrating the meat. While some store-bought ribs may have this removed, it’s always best to check.
To remove the membrane, simply slide a butter knife or the blunt end of a spoon under the membrane at one end of the rack, carefully separating it from the bone. Once you’ve lifted a small edge, grab it firmly with a paper towel (this provides grip) and slowly pull it away from the bones. It may come off in one long, satisfying strip, or you might need to grab it in a few sections. Persistence is key, and the effort is absolutely worth it for a superior rib experience. This step significantly contributes to the “fall-off-the-bone” texture we all desire.
The Power of the Dry Rub: Infusing Flavor Deeply
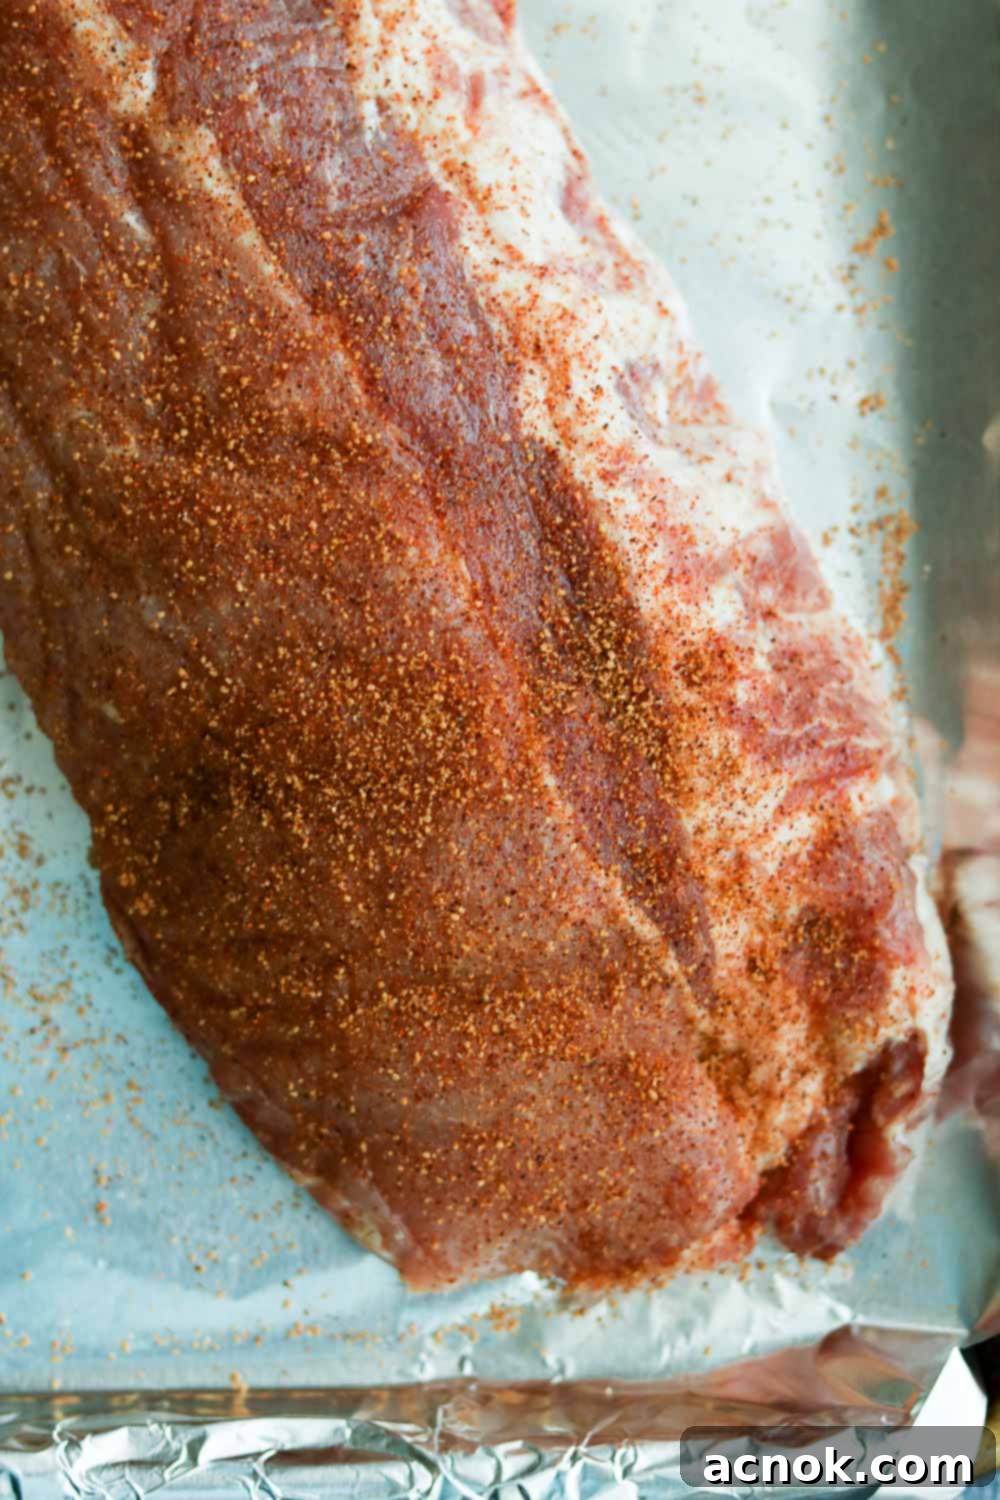
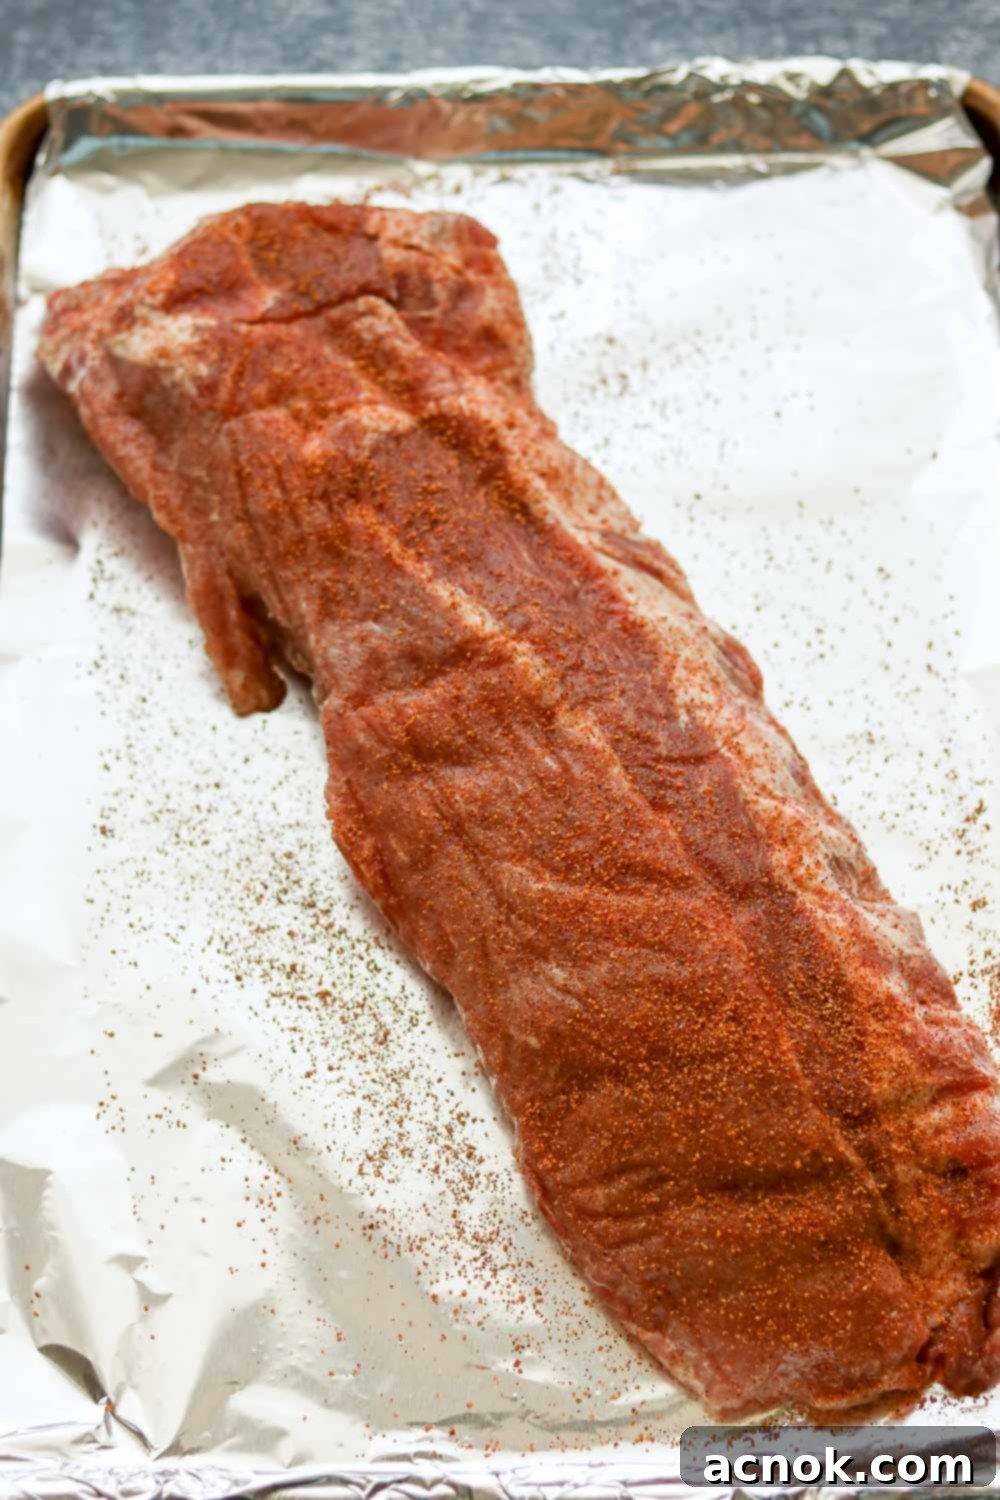
With the membrane removed and the ribs patted dry, it’s time for the star seasoning: the dry rub. This blend of spices and herbs is where much of your rib’s character and flavor will come from. Whether you use a meticulously crafted homemade recipe or a high-quality store-bought blend, don’t be shy with its application. Think of it as painting a masterpiece – every surface needs coverage!
Generously sprinkle the dry rub over all surfaces of the ribs: top, bottom, and sides. Don’t forget the edges. Gently pat the rub into the meat to ensure it adheres well. There’s no need to rub it in aggressively; a firm pat is sufficient. The goal is an even, thick coating that will form a flavorful bark during cooking.
The Essential Rest: Allowing Flavors to Mingle
Once seasoned, cover the sheet pan containing your ribs tightly with aluminum foil. This resting period, ideally for about 2 hours in the refrigerator (or even longer if you’re prepping in the morning for an evening BBQ), is crucial. It allows the salt in the rub to draw out moisture from the meat, which then reabsorbs, carrying the flavors of the spices deep into the pork. This process, known as osmosis, tenderizes the meat further and ensures a more profound flavor profile in the final product. It’s a passive but vital step that elevates your homemade ribs from good to extraordinary.
The Baking Phase: Achieving Unbeatable Tenderness for Your Ribs
The oven is your ally in the quest for truly tender ribs. This initial baking stage is where the tough connective tissues in the pork break down, transforming the ribs into a succulent, yielding masterpiece. While the ribs are resting, preheat your oven to a steady 325ºF (160ºC). This moderate temperature is key to the “low and slow” cooking method that guarantees tenderness without drying out the meat.
Prepping for the Oven
After your seasoned ribs have enjoyed their restorative rest in the refrigerator, remove them about 30 minutes before baking to allow them to come closer to room temperature. This helps ensure more even cooking. Keep them covered with foil during this time. The foil creates a self-contained steaming environment within the pan, further aiding in moisture retention and tenderness. Place the foil-covered sheet pan directly into the preheated oven.
Low and Slow: The Secret to Succulence
Bake the ribs for approximately 45 minutes at 325ºF. This relatively short baking time might surprise you, especially if you’re used to recipes calling for several hours. However, because ribs have a lower meat-to-bone ratio and are not as dense as a large roast, they cook through more efficiently. The goal here is to make them tender, not necessarily to have them falling completely off the bone at this stage. We want them to hold their structure for the grilling process.
Checking for Doneness After Baking
After 45 minutes, carefully remove the ribs from the oven and check them. You should notice some juices collected at the bottom of the pan, indicating that the ribs are releasing their delicious flavors. The meat should be significantly more pliable but still firmly attached to the bone. You don’t want them falling apart just yet, as they still have a grilling stage ahead. If you can gently twist a bone, and it gives slightly, they’re perfectly baked. If they feel too firm, you can return them to the oven for another 10-15 minutes, but be cautious not to overcook them at this stage. Remember, the grill will add more cooking time.
The Grilling Phase: Mastering That Irresistible Char and Smoky Flavor
With your ribs perfectly tender from the oven, it’s time for the grand finale: the grill. This is where the magic happens, transforming tender pork into a smoky, caramelized delight with a beautiful crust. The grilling phase adds depth of flavor, that signature BBQ char, and a slight crispness that beautifully contrasts the tender interior. Preheat your grill while the ribs are finishing their bake or resting.
Preheating Your Grill: Gas vs. Charcoal
Achieving the right grill temperature is crucial for the perfect char without burning. The method varies slightly depending on your grill type:
- Gas Grill: Preheat your gas grill to a low to medium temperature. This usually means setting burners to a medium-low flame. Allow the grill to heat up for about 10-15 minutes, ensuring the grates are hot enough to create char but not so intense that they will incinerate the delicate sugars in your rub or potential sauce.
- Charcoal Grill: If you’re using a charcoal grill, start your coals well in advance. Allow enough time for the coals to ignite thoroughly, turn ash-gray, and burn down a bit to create a medium, consistent heat. You’re looking for coals that are glowing and evenly distributed. For precise temperature gauging, Kingsford charcoal offers a super useful guide on how to arrange your charcoal for different heat zones. A good rule of thumb for medium heat is being able to hold your hand about 5 inches above the grate for 4-5 seconds before it gets too hot.
Grilling Techniques for Perfect Color and Texture
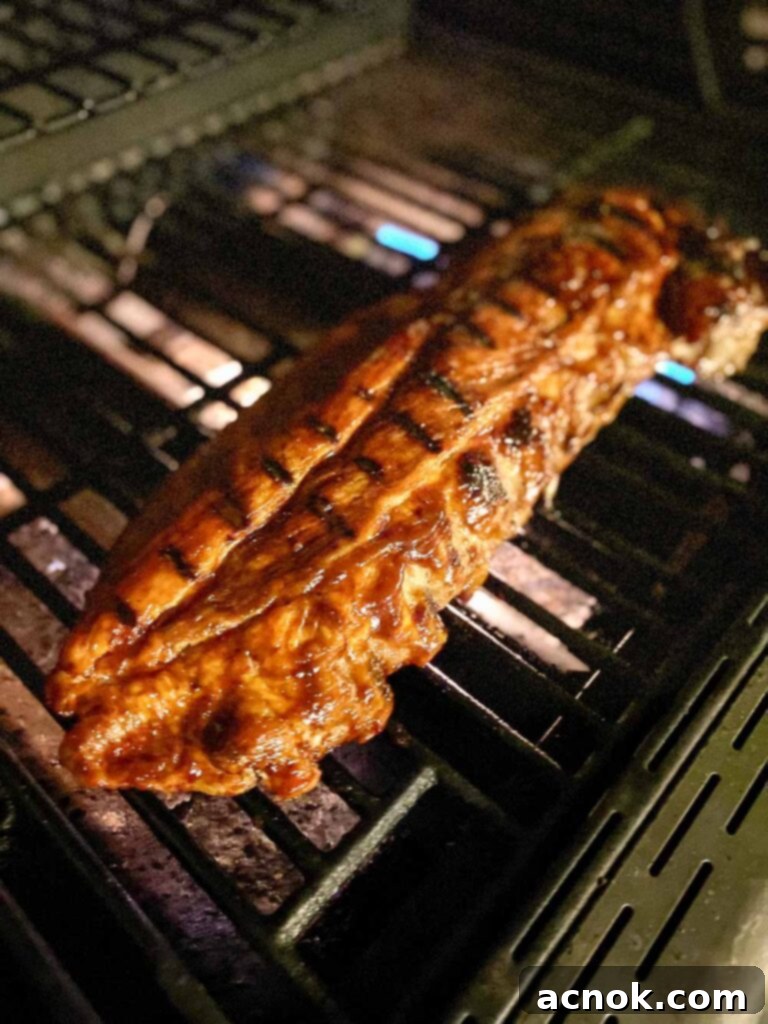
Now, you’re ready to grill! Carefully transfer the baked ribs from the sheet pan directly onto the preheated grill grates. Since the ribs are already tender, the goal here is to develop that beautiful dark brown char and smoky flavor. I find it beneficial to keep turning the ribs every few minutes. This frequent turning ensures an even distribution of heat, preventing any single side from burning while allowing all surfaces to develop that rich, dark caramelization and appealing grill marks. Continue grilling and turning until the ribs have achieved a gorgeous dark char to your liking, typically about 15-25 minutes, depending on your grill’s temperature and your desired level of crispness. Keep a close eye on them, as the sugars in the dry rub can caramelize quickly.
The Art of Saucing: When and How Much for Optimal Flavor
For those who love a saucy rib, timing is everything. I prefer not to heavily sauce my ribs during the grilling process, as many BBQ sauces contain sugars that can burn easily and create a bitter taste. Instead, a few minutes before the ribs are ready to come off the grill (typically in the last 5-10 minutes), I like to brush them lightly with my BBQ sauce of choice for the day. This allows the sauce to warm up, adhere to the meat, and lightly caramelize without charring excessively. The majority of the sauce, in my opinion, is best added as you go, allowing you to control the amount and savor the distinct flavors of the rub and the natural pork.
If you’re looking to truly wow your guests with a unique flavor profile, especially if blueberries are in season, you simply must try my Blueberry BourbonChipotleBBQ Sauce 😋. It offers a fantastic balance of sweet, smoky, and spicy notes that perfectly complement grilled pork ribs. Trust me, you won’t be disappointed!
Resting, Slicing, and Serving Your Culinary Masterpiece
The moment you’ve been waiting for is almost here! Once your ribs have achieved that perfect dark golden-brown char and are looking utterly irresistible, it’s time to remove them from the grill. But resist the urge to immediately slice into them. There’s one final, crucial step that ensures maximum juiciness and flavor.
The Importance of Resting Your Ribs
Just like with any cooked meat, resting your ribs is non-negotiable. As the ribs cook, the muscle fibers contract, pushing the delicious juices towards the center. If you cut into them immediately, these juices will simply run out onto your cutting board, leaving you with drier, less flavorful meat. By allowing the ribs to rest, you give the muscle fibers a chance to relax and reabsorb those precious juices, resulting in a significantly more tender and moist final product. Cover the grilled ribs loosely with foil and let them rest for about 10-15 minutes. This brief pause makes all the difference in achieving truly exceptional ribs.
How to Slice Ribs Like a Pro
After resting, your ribs are ready for slicing. Place the rack on a clean cutting board. Using a sharp chef’s knife, carefully slice between each bone to separate the individual ribs. If your ribs are truly fall-off-the-bone tender (which they should be with this method!), you might find some resistance from the bone, but the meat should cut through with ease. For spare ribs, you may need to cut around any remaining cartilage or sternum bones to create clean, individual portions. Aim for neat, attractive servings that are easy for your guests to handle.
Serving Suggestions: Completing Your BBQ Feast
Serve your perfectly cooked, tender, and charred ribs immediately with extra BBQ sauce on the side for dipping. This allows each person to customize their level of sauciness. Ribs pair wonderfully with classic BBQ sides. Think creamy coleslaw, tangy potato salad, sweet baked beans, cornbread, or grilled corn on the cob. A fresh green salad can also provide a refreshing counterpoint to the rich flavors of the pork.
Enjoy the fruits of your labor! There’s immense satisfaction in creating such a delicious meal from scratch. With this bake-then-grill method, you’ll consistently produce ribs that are the highlight of any gathering.
Troubleshooting & Expert Tips for the Best BBQ Ribs
Even with a foolproof method, a few extra tips and common questions can help ensure your homemade ribs are always a hit. This section aims to equip you with the knowledge to tackle any challenges and elevate your rib game even further.
Common Rib-Cooking Questions
- My ribs are tough, what went wrong? The most common culprits for tough ribs are not cooking them long enough in the baking phase or cooking them at too high a temperature. Ensure your oven is accurately calibrated and allow sufficient time for the connective tissues to break down. Also, make sure you removed the membrane!
- My ribs are dry, how can I prevent this? Overcooking, particularly during the grilling phase, can lead to dry ribs. The baking method helps prevent this by locking in moisture. On the grill, keep an eye on them, turn frequently, and avoid leaving them on direct high heat for too long. Lightly basting with apple cider vinegar or a very thin sauce during grilling can also help.
- Why didn’t my dry rub create a good bark? A good bark requires generous application of rub and enough time for the sugars and spices to caramelize. Ensure your ribs are patted dry before applying the rub, and don’t be afraid to add a thick layer. The dry rub needs moisture from the meat and heat to form that delicious crust.
- Can I make these ahead of time? Absolutely! You can bake the ribs a day in advance. After baking, let them cool completely, then wrap them tightly in foil and refrigerate. When ready to serve, bring them to room temperature, then proceed with the grilling step. This makes party planning a breeze!
Tips for the Best Results
- Calibrate Your Oven: An accurate oven temperature is crucial for the tender baking phase. If you suspect your oven runs hot or cold, invest in an inexpensive oven thermometer.
- Don’t Rush the Rest: Both the initial rest with the dry rub and the final rest after grilling are vital. Patience here pays off immensely in terms of flavor and tenderness.
- Experiment with Rubs and Sauces: While this recipe provides a solid foundation, don’t be afraid to try different store-bought dry rubs or create your own. The same goes for BBQ sauces – explore various flavor profiles from sweet and tangy to spicy and smoky.
- Use a Meat Thermometer (Optional but Recommended): While not strictly necessary for this method due to the visual cues and tenderness checks, a meat thermometer can provide extra assurance. Ribs are generally safe to eat when they reach an internal temperature of 145°F (63°C), but for fall-off-the-bone tenderness, they often reach temperatures of 195-203°F (90-95°C) as connective tissues break down.
- Clean Grill Grates: Always start with clean grill grates. This prevents sticking, ensures even cooking, and helps you achieve those desirable grill marks without old food residue interfering with the flavor.
Armed with these insights and techniques, you’re not just cooking ribs; you’re crafting an experience. Each step, from careful preparation to the final flourish on the grill, contributes to a meal that’s truly greater than the sum of its parts. Happy grilling!
