Mastering the Art of Roasting Chiles: A Simple Guide for Flavorful Peppers
Unlocking the rich, smoky flavors of roasted chiles is a culinary game-changer, transforming ordinary peppers into extraordinary ingredients. Whether you’re a seasoned chef or a home cook looking to elevate your dishes, mastering the art of chile roasting is surprisingly easy and incredibly rewarding. This comprehensive guide will walk you through everything you need to know, from selecting the right peppers to various roasting methods and essential safety tips. You’ll learn how to achieve that perfect charred skin and tender flesh, ready to enhance a myriad of recipes.
The beauty of roasted chiles lies in their versatility and the depth of flavor they bring. The roasting process not only softens the pepper’s flesh but also caramelizes its sugars, imparting a smoky sweetness that raw peppers simply can’t offer. It’s a fundamental technique used across many cuisines, particularly in Mexican, Southwestern, and Mediterranean dishes. Once you’ve experienced the delicious difference, you’ll find yourself roasting peppers for everything from salsas and sauces to stews and salads.
Why Roast Chiles? The Flavor and Texture Transformation
Roasting chiles is more than just a cooking step; it’s a flavor enhancer. When a chile is exposed to high heat, its skin chars and blisters, creating a distinctive smoky aroma and taste. This charring process also makes the tough outer skin incredibly easy to remove, revealing the tender, juicy flesh beneath. The natural sugars within the pepper caramelize, intensifying its inherent sweetness and mellowing out some of its heat, depending on the variety.
This transformation is particularly noticeable in peppers like Poblano, Anaheim, and the beloved Hatch chiles, which gain a nuanced complexity that is irreplaceable. Even bell peppers benefit immensely from roasting, becoming incredibly sweet and soft, perfect for purees, spreads, or adding to an antipasto platter. Once roasted and peeled, these peppers become incredibly versatile. They can be diced, sliced, pureed, or left whole, ready to be incorporated into your favorite recipes, adding a layer of sophisticated flavor that will impress any palate.
Essential Tools and Crucial Safety Tips for Roasting Peppers
Before you begin the roasting process, gathering the right tools and understanding crucial safety measures will ensure a smooth and safe experience. While the process itself is straightforward, working with open flames or high heat requires attention and caution.
The most important tool you’ll need is a good pair of tongs. These are indispensable for handling hot peppers, allowing you to rotate them safely and remove them from the heat without direct contact. Look for tongs with a sturdy grip and a comfortable handle. You might also want to have a small paper bag or a heat-resistant bowl with plastic wrap ready for the steaming step.
Safety first! When working with an open flame on a stovetop or a hot grill, always prioritize safety. Ensure your cooking area is clear of clutter. Two critical points to remember:
- Wear appropriate clothing: Avoid loose, dangly sleeves or anything that could accidentally catch fire or get in the way of the flame.
- Use gloves when handling spicy chiles: After roasting and especially when peeling and seeding hot chiles like jalapeños or certain Hatch varieties, the capsaicin (the compound responsible for the heat) can transfer to your skin and cause irritation. Always wear kitchen gloves to protect your hands and avoid touching your face, especially your eyes, until you’ve thoroughly washed your hands. Even after roasting, the oils can still be potent.
By keeping these simple precautions in mind, you can enjoy the roasting process without any unwelcome incidents.
Method 1: Roasting Chiles on Your Stovetop (Quick & Easy for Small Batches)
The stovetop method is by far the quickest and most convenient way to roast a few chiles for an immediate recipe. It’s perfect when you just need a couple of Poblano peppers for your favorite Mexican Salpicòn de Res or a few Anaheim chiles for a batch of homemade enchiladas. This method directly exposes the peppers to an open flame, providing rapid and even charring.
Step-by-Step Stovetop Roasting Guide:
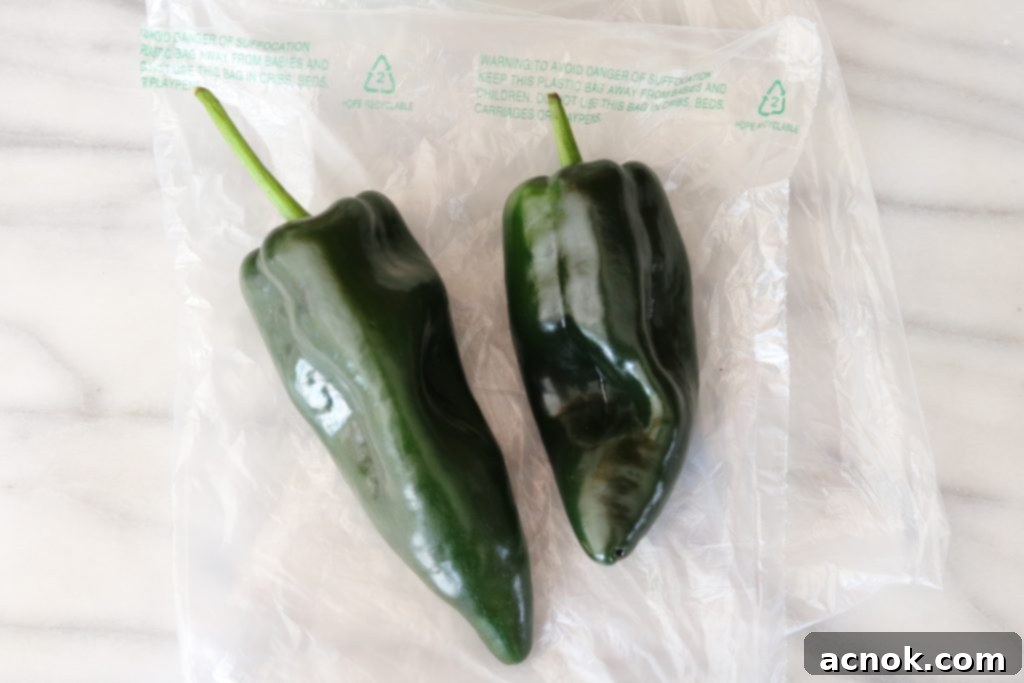
- Prepare Your Chiles: Start by washing your chiles thoroughly under cold running water to remove any dirt or debris. Pat them completely dry with a clean kitchen towel. Any moisture can hinder the charring process and cause splattering.
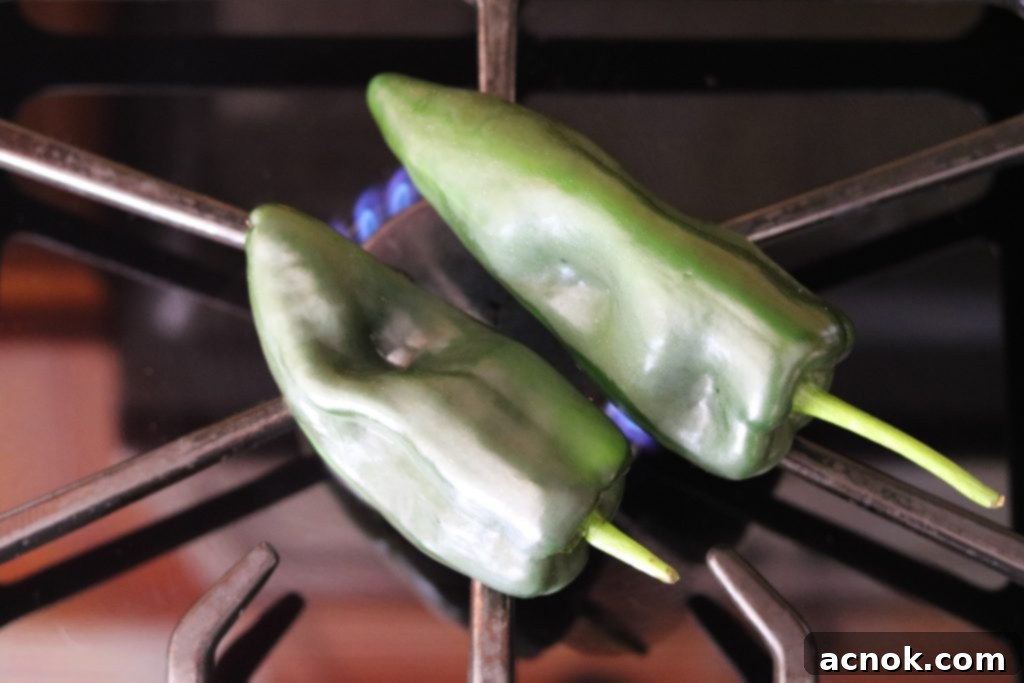
- Set Up Your Stovetop: Place a clean stove grate or a cast-iron grill pan directly over a high flame on your gas burner. If using an electric stove, a cast-iron pan set to high heat will work, but the direct flame provides superior charring.
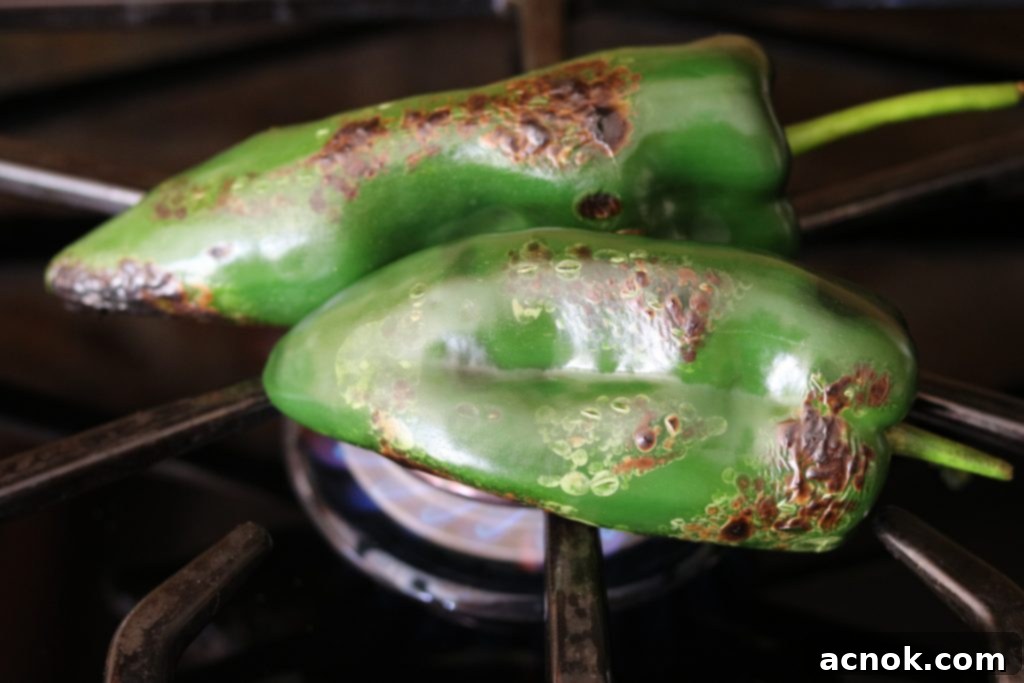
- Place Chiles on Heat: Carefully place the chiles directly onto the stovetop grate or in the hot grill pan. Ensure there’s enough space between them for even cooking.
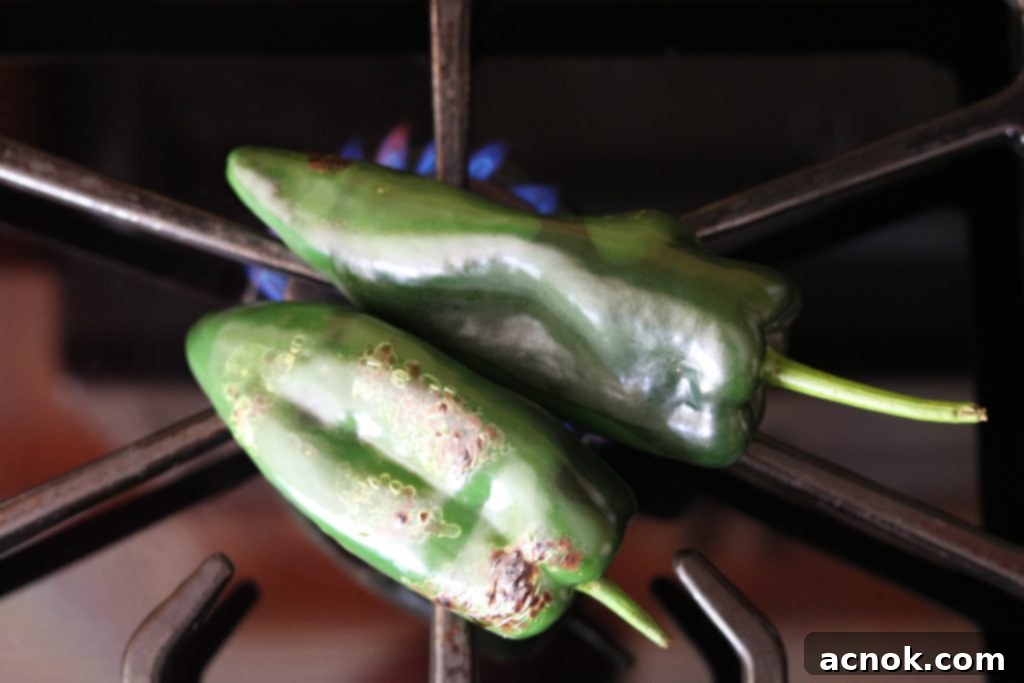
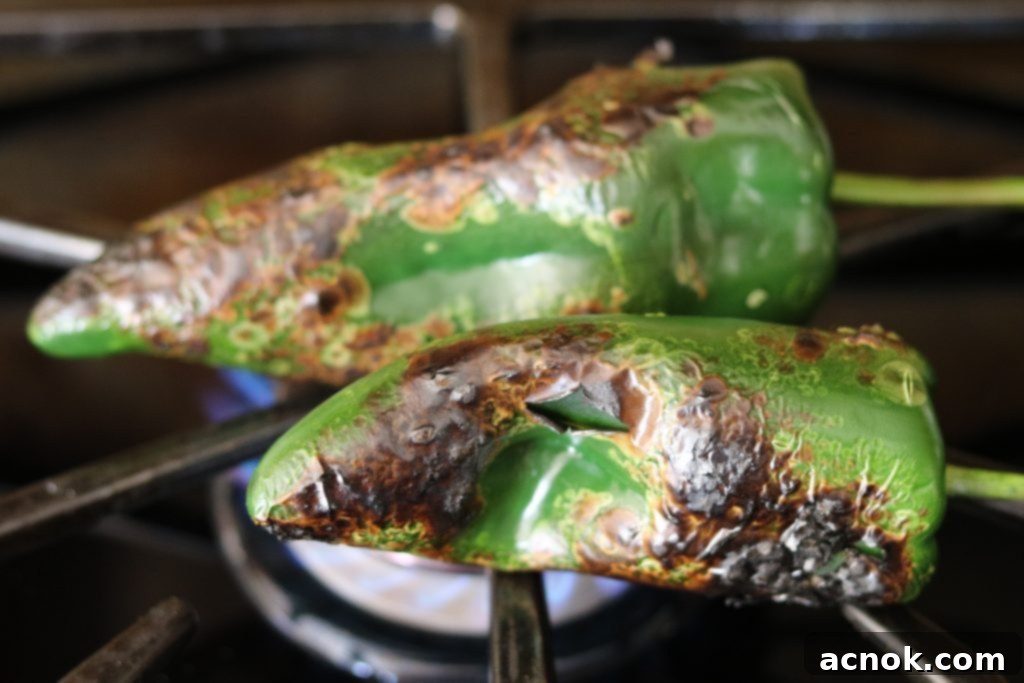
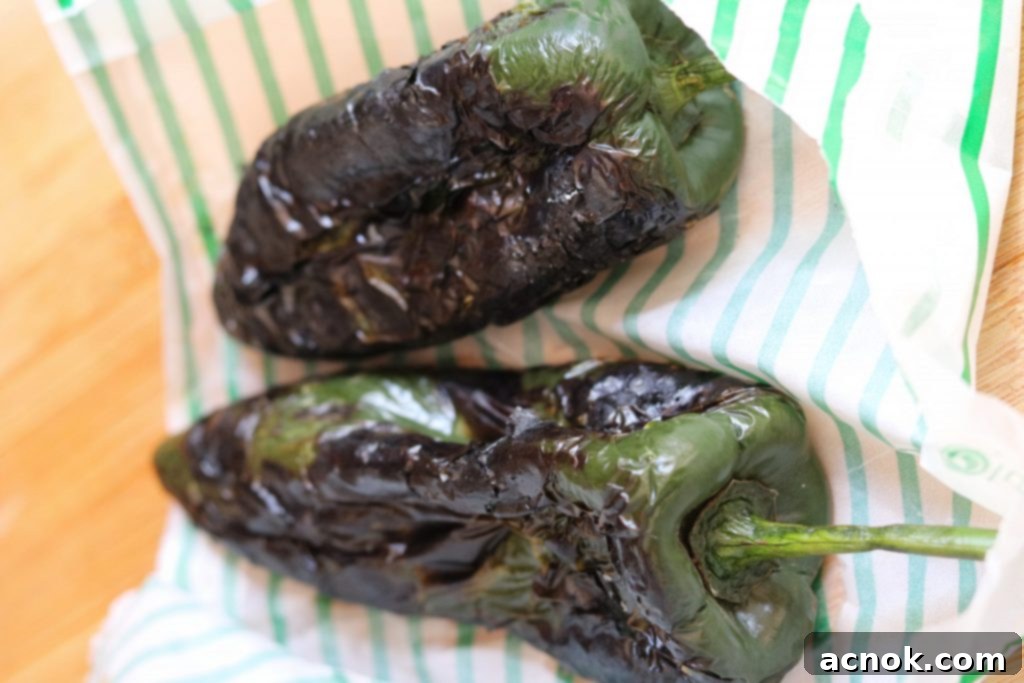
- Begin Charring and Rotating: Watch closely as the skins begin to blister, blacken, and char. Using your tongs, carefully rotate the peppers every few minutes. Your goal is to char the entire surface of the pepper evenly. Don’t be afraid of the black spots; this is exactly what you want! The skin should be completely blackened and blistered, indicating that the flesh inside is tender and smoky.
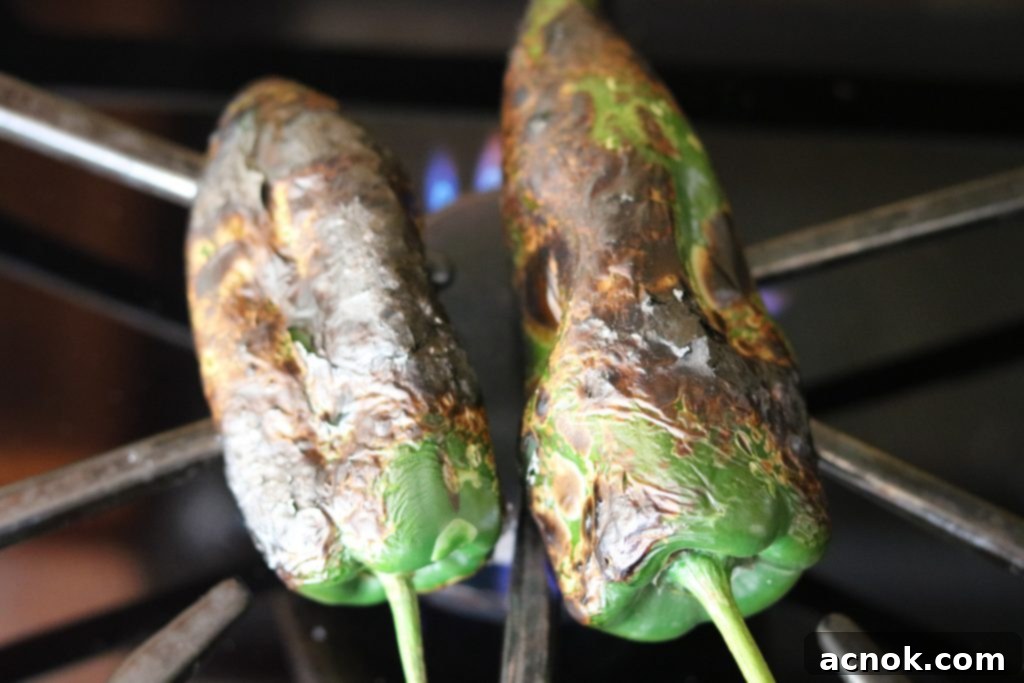
- Continue Rotation Until Fully Charred: Keep rotating the chiles until all sides are uniformly charred and blackened. This usually takes about 5-10 minutes per pepper, depending on its size and the intensity of your flame.
- Transfer for Steaming: Once fully charred, turn off the heat. Using your tongs, carefully remove the hot, blackened peppers and immediately place them into a small paper bag, a bowl covered tightly with plastic wrap, or wrap them snugly in a clean kitchen towel. This crucial step is for steaming.
The stovetop method delivers intense charring quickly, making it ideal for when you’re short on time but refuse to compromise on flavor.
Method 2: Roasting Chiles on an Outdoor Grill (Ideal for Larger Quantities)
For those times when you need to roast a larger batch of chiles – perhaps a whole harvest of Hatch chiles or several pounds of Poblanos for an upcoming feast – the outdoor grill is your best friend. This method not only accommodates more peppers at once but also keeps the smoky aroma outside, preventing your kitchen from smelling like a campfire. Plus, the high, direct heat of a grill imparts an unparalleled smoky flavor.
Step-by-Step Grill Roasting Guide:
- Prepare Your Chiles: Just as with the stovetop method, wash and thoroughly dry your chiles. You can lightly brush them with a neutral oil (like canola or grapeseed) to prevent sticking and promote even charring, though this is optional.
- Preheat Your Grill: Light your gas or charcoal grill and preheat it to high heat. For gas grills, aim for around 450-500°F (230-260°C). For charcoal grills, spread hot coals evenly to create a direct heat zone. Ensure your grill grates are clean.
- Place Chiles on Grates: Carefully place the chiles directly onto the hot grill grates. Leave some space between them so they don’t steam each other.
- Roast and Rotate: Close the grill lid (if using a gas grill) to help cook the chiles through. Allow the peppers to char for 3-5 minutes per side. Using your tongs, rotate them frequently until all sides are evenly blackened and blistered. The skin should look completely shriveled and charred.
- Remove and Steam: Once all sides are thoroughly charred, remove the chiles from the grill using tongs. Transfer them immediately to a paper bag, a bowl covered with plastic wrap, or a clean kitchen towel for steaming.
Grill roasting is particularly effective for thick-skinned peppers and provides a superior smoky depth that is hard to replicate with other methods.
Method 3: Roasting Chiles in the Oven (A Hands-Off Approach)
If you prefer a more hands-off approach or need to roast a moderate quantity of chiles without an outdoor grill or a gas stovetop, your oven is an excellent alternative. The oven method, particularly using the broiler, provides intense, even heat that beautifully chars pepper skins. It’s also a great option if you’re concerned about direct flame or prefer not to stand over the stove constantly.
Step-by-Step Oven Roasting Guide:
- Prepare Your Chiles: Wash and thoroughly dry your chiles. You can lightly toss them with a tiny bit of olive oil or neutral oil, which can help promote charring and prevent them from drying out too much.
- Preheat Oven/Broiler: Adjust an oven rack to the highest position, about 6 inches from the broiler element. Preheat your broiler to high. If you don’t have a broiler or prefer a gentler roast, you can roast them at 400-450°F (200-230°C) but it will take longer and the char might not be as pronounced.
- Arrange on Baking Sheet: Place the chiles in a single layer on a sturdy baking sheet. For easy cleanup, you can line the baking sheet with foil.
- Broil and Turn: Place the baking sheet under the hot broiler. Keep a close eye on them, as broilers can be very powerful. Allow them to char for 5-7 minutes per side. Use tongs to turn the peppers every few minutes, ensuring all sides get blackened and blistered. The skins should be completely charred and shriveled. If roasting at a lower temperature, this process will take 20-30 minutes, with turning every 10 minutes.
- Remove and Steam: Once the peppers are fully charred on all sides, remove the baking sheet from the oven. Transfer the hot chiles immediately to a paper bag, a bowl covered with plastic wrap, or a clean kitchen towel for steaming.
The oven method offers convenience and allows for roasting multiple peppers simultaneously with less direct supervision compared to the stovetop.
The Crucial Step: Steaming Your Roasted Chiles
Regardless of the roasting method you choose, the steaming step is absolutely critical. This is where the magic happens, making the charred skin incredibly easy to peel off. The trapped steam creates a moist environment that loosens the connection between the delicate flesh and the tough outer skin.
How to Steam Your Chiles Effectively:
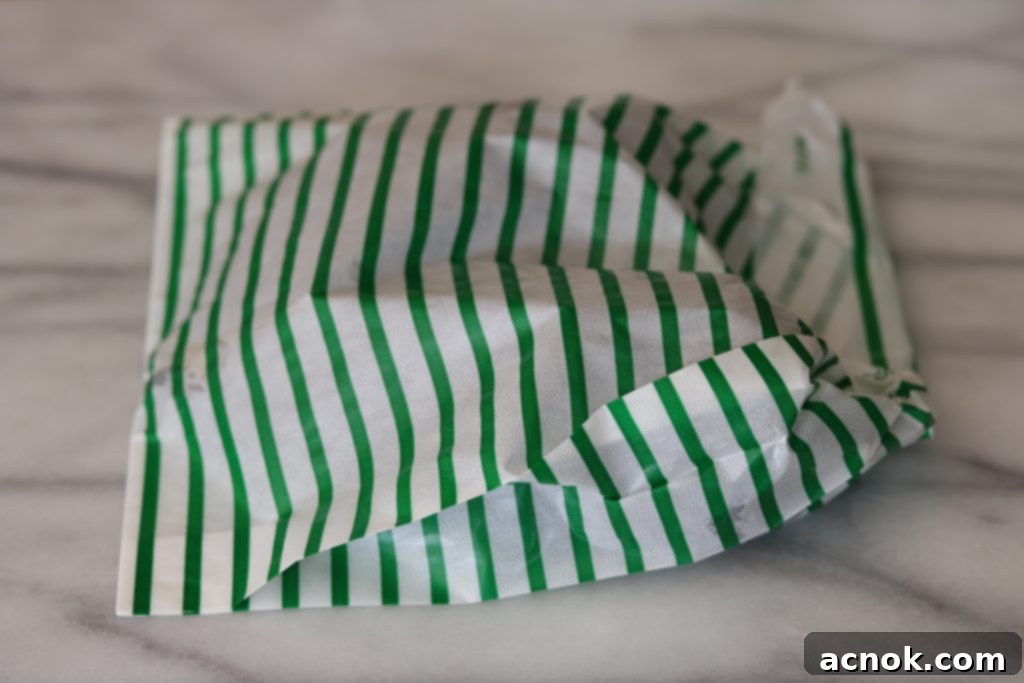
- Paper Bag Method: Place the hot, charred peppers directly into a small paper bag. Fold the top of the bag tightly to seal in the steam. This is a very common and effective method.
- Bowl with Plastic Wrap: Alternatively, you can place the chiles in a heat-proof bowl and cover it tightly with plastic wrap. The plastic wrap creates a seal, trapping the steam inside.
- Kitchen Towel Method: For a quick and easy option, wrap the hot chiles snugly in a clean kitchen towel. Ensure they are fully enclosed to maximize steam retention.
Allow the chiles to steam for at least 15-20 minutes, or even up to 30 minutes for larger, thicker-skinned peppers. You’ll notice the peppers softening further as they steam. Do not skip this step! Trying to peel un-steamed peppers is a frustrating and often unsuccessful endeavor.
-

Wash and dry peppers. -

On your stovetop, over high flame, place peppers on stove grate or grill. -

With tongs, carefully rotate peppers as they begin to char. -

Using tongs, keep rotating chiles. -

Using tongs keep rotating until they are completely charred. -

Turn heat off. Remove charred peppers with tongs and place in small paper back or kitchen towel. -

Close paper sack making sure steam stays inside the bag. -

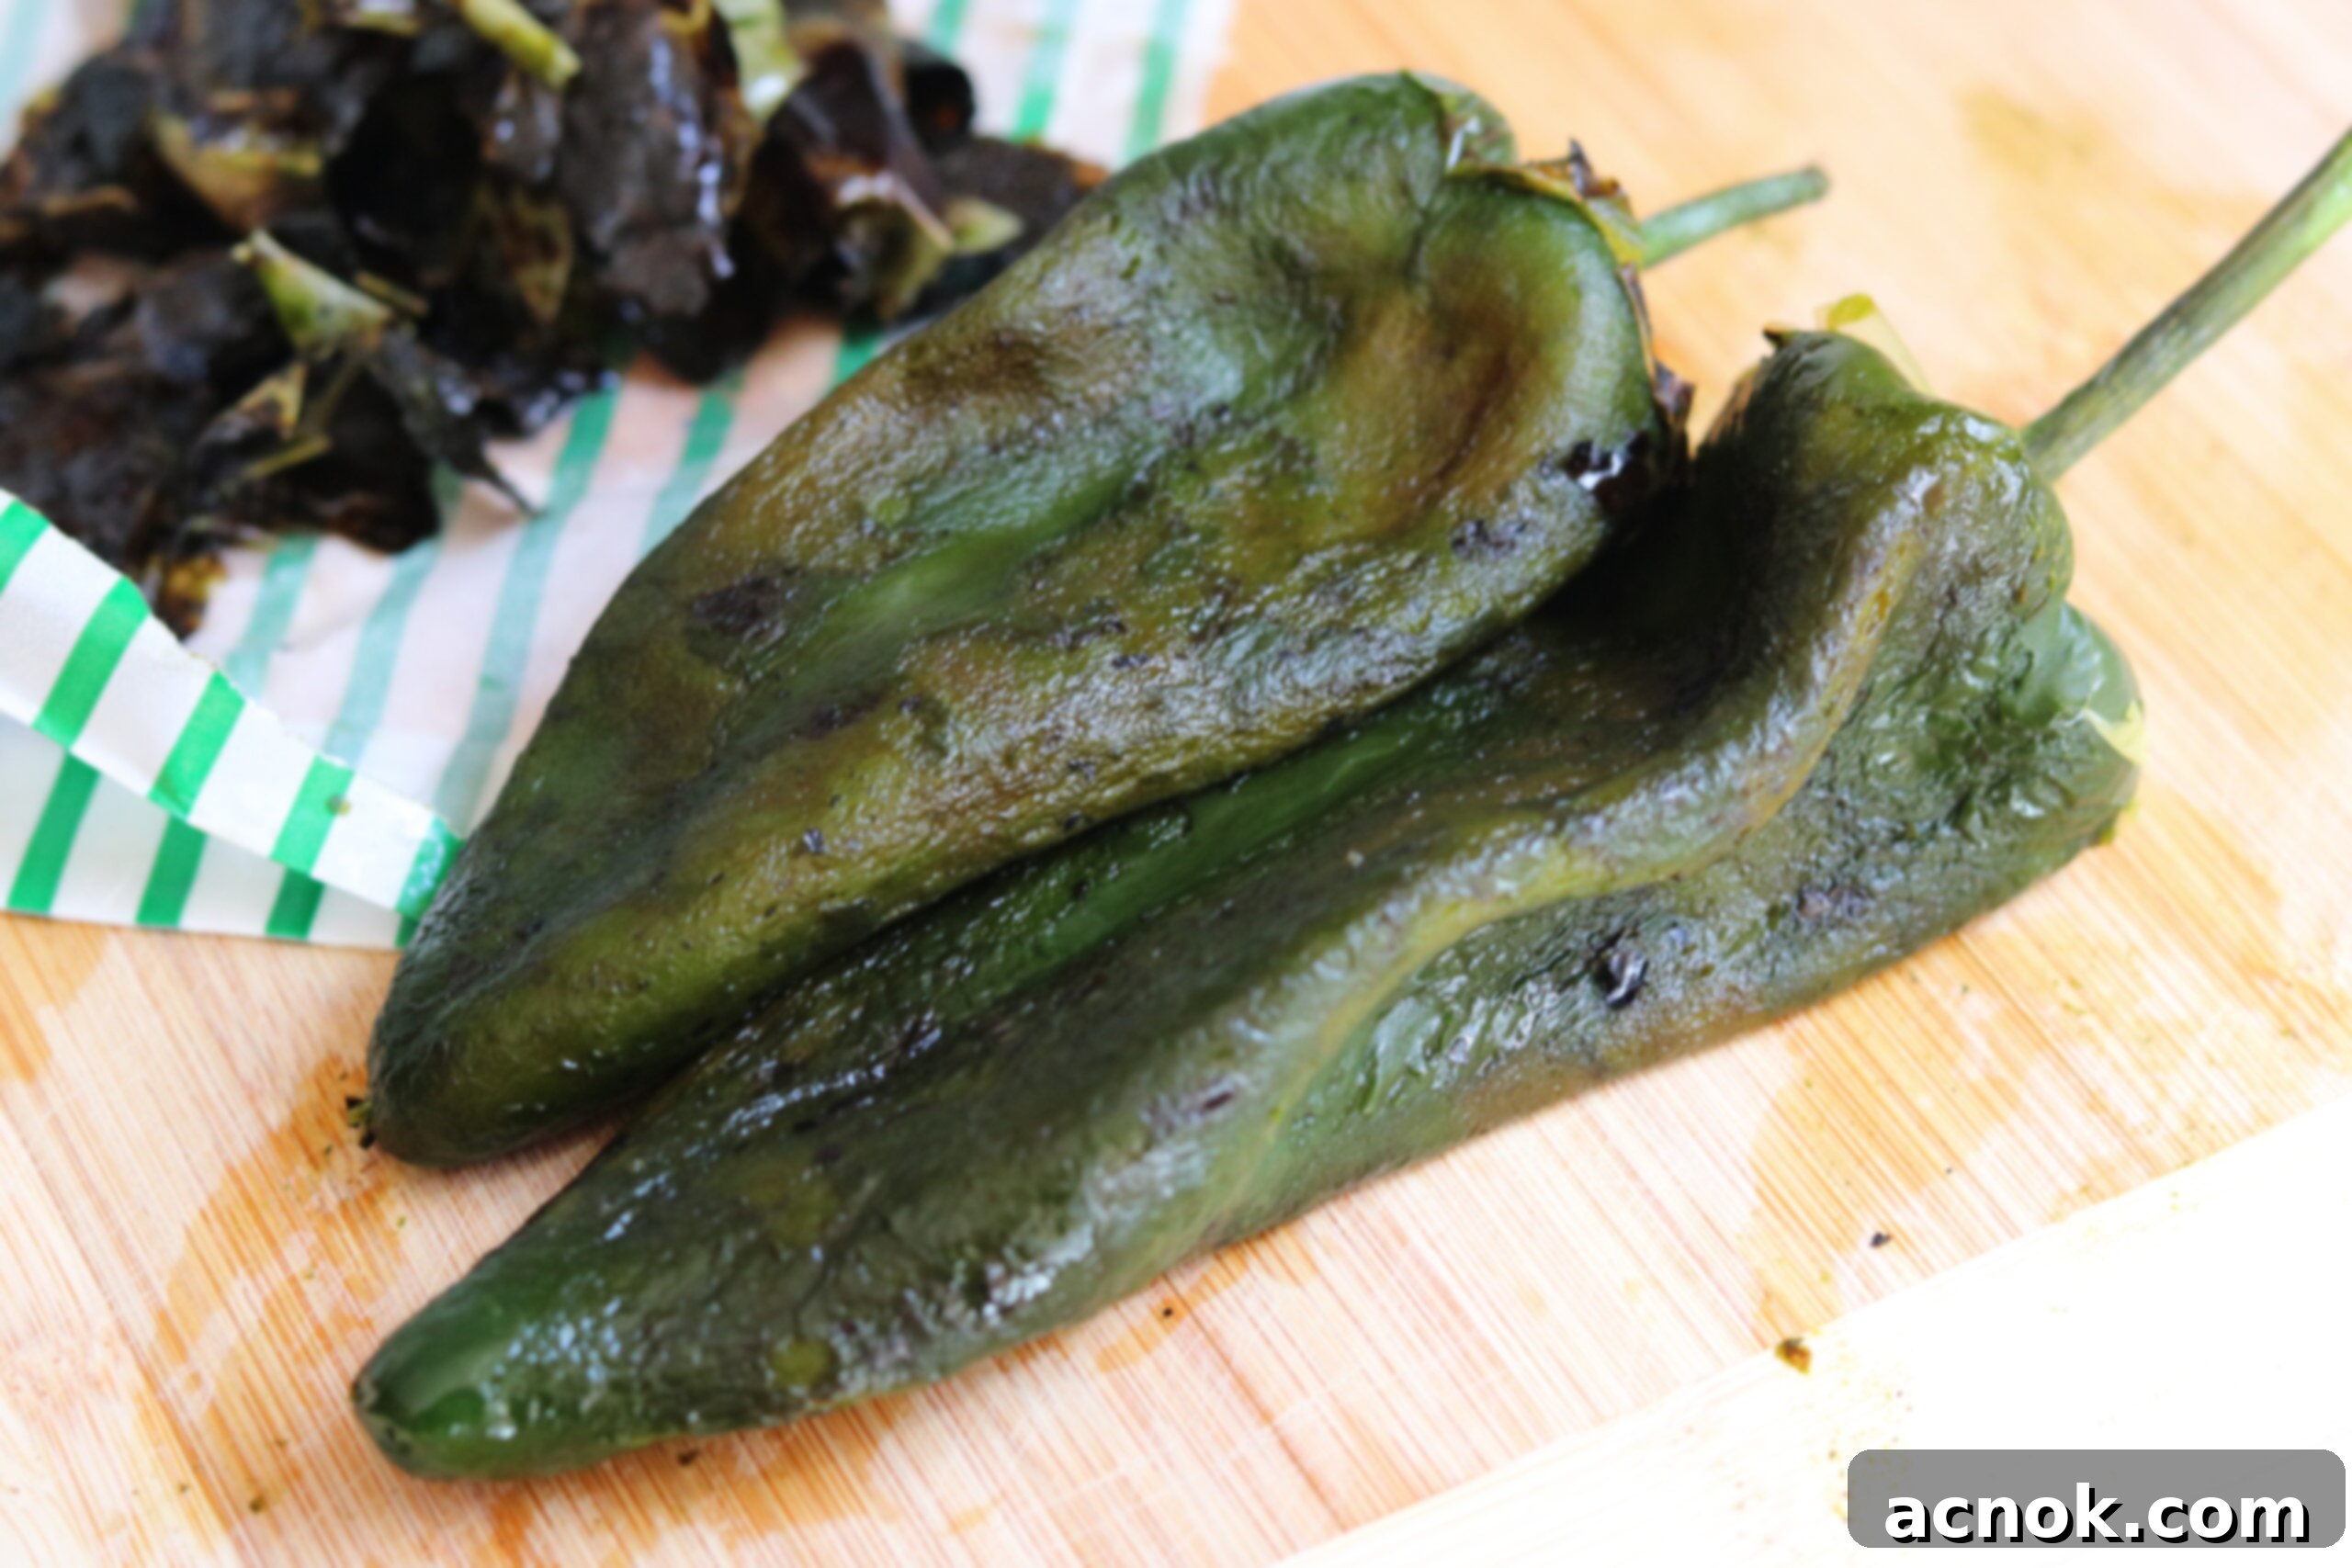
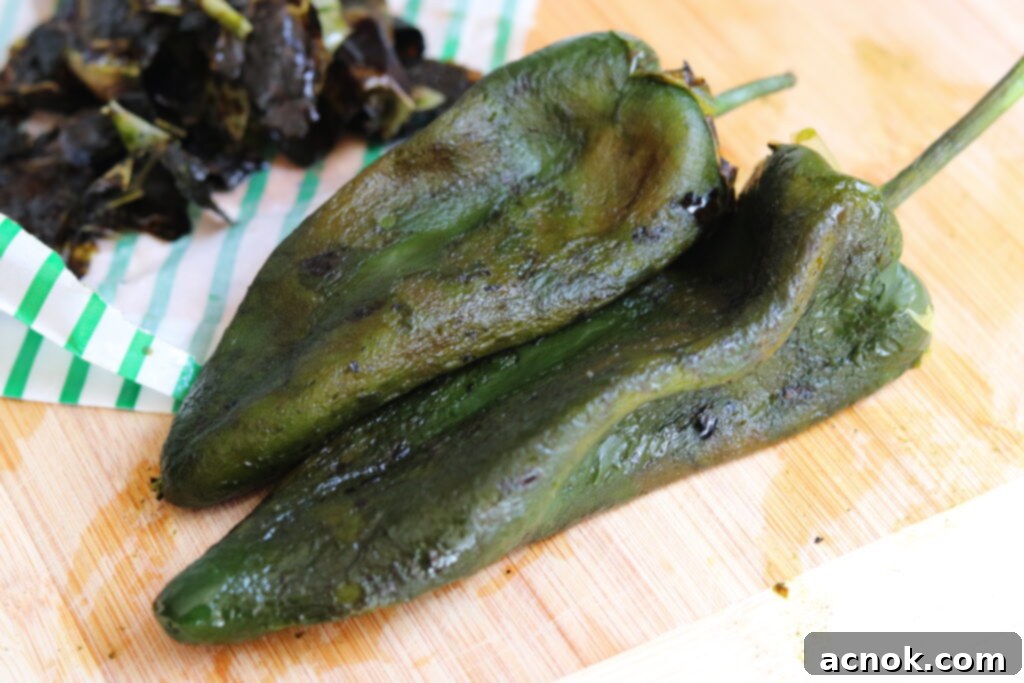
After 15 minutes or so, carefully peel the charred skin off the peppers. -

Peppers are now ready to use.
Peeling, Seeding, and Preparing Your Roasted Chiles
Once your chiles have steamed sufficiently and are cool enough to handle, it’s time for the final preparation step: peeling and seeding. This is where you reveal the tender, flavorful flesh.
How to Peel and Prepare:
- Peel the Skin: Remove the peppers from their steaming vessel. Starting from the stem end, gently rub or pull off the charred skin with your fingers. The skin should slide off easily. If some bits of skin are stubborn, you can use a small paring knife or the back of a spoon to scrape them off. Don’t worry if a few small charred bits remain; they often add to the smoky flavor. Avoid rinsing the peppers under water to remove skin, as this can wash away some of the delicious smoky oils and flavor.
- Remove Stems and Seeds: Once peeled, carefully cut around the stem end of each pepper and remove it. Make a slit down one side of the pepper to open it flat. Scrape out the seeds and any internal membranes with a spoon or your fingers. Remember to wear gloves if you are working with hot chiles!
- Final Preparation: Your roasted chiles are now ready to use! You can slice them into strips, dice them, or leave them whole, depending on your recipe.
Storage Tips:
- Refrigerator: Store peeled, seeded roasted chiles in an airtight container in the refrigerator for up to 3-5 days.
- Freezer: For longer storage, flash-freeze whole or sliced roasted chiles on a baking sheet until solid, then transfer them to freezer-safe bags or containers. They can be stored in the freezer for several months, making them perfect for meal prepping or enjoying seasonal chiles year-round.
Which Chiles Are Best for Roasting?
While almost any pepper can be roasted, certain varieties truly shine and are commonly used for this method due to their flavor, texture, and ease of peeling. Knowing which chiles to choose can elevate your dishes.
- Poblano Peppers: These dark green, mild to medium-heat peppers are a classic choice for roasting. They develop a beautiful smoky flavor and tender texture, perfect for dishes like Chiles Rellenos, stews, or a creamy rajas con crema.
- Hatch Chiles: Hailing from New Mexico, Hatch chiles are famous for their unique, earthy flavor and varying heat levels (mild to hot). Roasting is the quintessential way to prepare them, transforming them into a culinary delight for salsas, stews, and chile con queso. They are a seasonal favorite.
- Anaheim Peppers: Similar in appearance to Hatch chiles but generally milder, Anaheim peppers also roast beautifully. They become sweet and pliable, making them excellent for stuffing or adding to casseroles.
- Bell Peppers: Red, yellow, and orange bell peppers become incredibly sweet and juicy when roasted. They are fantastic in salads, sandwiches, pureed into soups, or marinated as part of an antipasto spread. Green bell peppers can also be roasted, offering a slightly more bitter and earthy note.
- Jalapeño and Serranos: For those who love a bit of heat, roasting these smaller, spicier chiles intensifies their flavor and makes them ideal for fiery salsas, hot sauces, or adding a kick to your dishes. Remember to wear gloves!
- Cubanelle Peppers: These long, sweet peppers are also great for roasting, offering a mild, sweet flavor and tender flesh that’s perfect for Mediterranean-inspired dishes.
Experimenting with different chile varieties will broaden your culinary horizons and introduce you to new flavor profiles.
Culinary Inspirations: What to Make with Roasted Chiles
Once you have a batch of beautifully roasted chiles, the possibilities are endless. Their smoky, sweet, and sometimes spicy notes can enhance almost any savory dish. Here are just a few ideas to get your culinary creativity flowing:
- Salsas and Sauces: The most obvious and delicious use! Roasted chiles are the base for many authentic Mexican salsas, from vibrant green salsas to smoky red ones. They also make fantastic additions to enchilada sauces or a rich mole.
- Chiles Rellenos: A classic Mexican dish where roasted Poblano or Anaheim chiles are stuffed with cheese (or meat), battered, and fried.
- Stews and Soups: Incorporate diced roasted chiles into hearty stews, chili, or creamy chicken and tortilla soups for an incredible depth of flavor.
- Tacos, Burritos, and Enchiladas: Add strips of roasted chiles to your favorite Mexican dishes as a topping or an ingredient in the filling.
- Eggs and Breakfast Dishes: Fold chopped roasted chiles into omelets, scrambled eggs, or breakfast burritos for a flavorful start to your day.
- Salads and Sandwiches: Slice roasted bell peppers or milder chiles and add them to green salads, pasta salads, or layer them into sandwiches and wraps for a gourmet touch.
- Dips and Spreads: Puree roasted bell peppers or Poblanos with cream cheese or goat cheese for a delicious spread, or blend them into hummus.
- Sides and Accompaniments: Serve roasted chiles simply dressed with a little olive oil, garlic, and herbs as a vibrant side dish.
- Our Featured Recipe: Don’t forget to try our delicious Mexican Salpicòn de Res, which truly highlights the incredible flavor of roasted Poblano or Hatch chiles!
The flavor of freshly roasted chiles is incomparable to canned varieties, offering a vibrant, authentic taste that elevates any dish. It’s a skill that once mastered, will become an indispensable part of your cooking repertoire.
Troubleshooting and FAQs for Roasting Chiles
Even with clear instructions, sometimes questions arise or things don’t go exactly as planned. Here are some common troubleshooting tips and answers to frequently asked questions:
- “My chile skins aren’t peeling easily!”
This is usually due to insufficient steaming time. Ensure your chiles were immediately placed in a sealed bag or covered bowl while still hot, and allowed to steam for at least 15-20 minutes. If they’re still stubborn, place them back in the steaming vessel for another 10-15 minutes.
- “Some parts of my chiles aren’t charred.”
This means you didn’t rotate them enough during the roasting process. The goal is to get as much of the skin blackened as possible. Next time, be more diligent about turning them every few minutes.
- “My chiles taste too bitter.”
A slight bitterness can occur if the charring goes too far and burns the flesh, or if the chiles weren’t fully ripe. Ensure you’re only charring the skin and that the underlying flesh remains tender, not burnt. Rinsing them quickly *after* peeling (though generally not recommended for flavor) can sometimes help reduce bitterness if it’s very strong.
- “I touched my eyes after handling hot chiles!”
Immediately wash your hands thoroughly with soap and water (and consider using dish soap which is good for oil). For eye irritation, flush with cool water. Prevention is key – always wear gloves when handling hot varieties.
- “Can I roast chiles without a gas stove or grill?”
Absolutely! The oven method (especially the broiler) is a fantastic alternative that yields great results. You can also use a cast-iron skillet on an electric stovetop, though the char might be less intense.
- “Can I freeze roasted chiles?”
Yes, and it’s highly recommended for preserving your harvest! Once peeled and seeded, you can freeze them whole, sliced, or diced in freezer-safe bags or containers for several months. They thaw beautifully and retain most of their flavor and texture.
Mastering the art of roasting chiles is a simple skill that delivers profound flavor rewards. With these techniques, you’ll be able to transform any pepper into a smoky, tender, and incredibly delicious ingredient, ready to star in countless dishes. Enjoy the process, and prepare to elevate your cooking!
Inspired by this recipe or ready to share your roasted chile creations? Make sure to mention us or tag us on Instagram. All content and photographs ©Claudia’s Table and claudiastable.com
